INTRO
This year’s SDCC was my first. In previous years, I’d find myself staring and drooling at all the cool exclusives offered at the con. This year I’d actually have a shot at scoring them first hand. The slightly annoying bit is that unlike the past few years, my “want” list was pretty light. A couple prints and two or three toys were all I was after. At the tippy top of that tiny list was publisher IDW’s Zomb from their Ashley Wood created series, Zombies vs Robots.
IDW had a presale a few weeks prior to the con. I was dead asleep when it went live, but through some randomness of chance I woke up in the middle of the night, glanced at my phone and saw the words “SDCC Zombs up for sale!” on my twitter feed. In a half-asleep blur I worked my way through their site and secured my two.
Though blind boxed, the zombs were available in two skin colors with two different colors shirts for a total of 4 different combinations. The boxes themselves were supposed to have a color coded dot on them, but the stickers rubbed off several of the boxes in transit.
The color codes are as follows:
Blue = red shirt, grey skin
Green = white shirt, grey skin
Orange = red shirt, orange skin
White = white shirt, orange skin
(thanks for laying it out dtrain!)
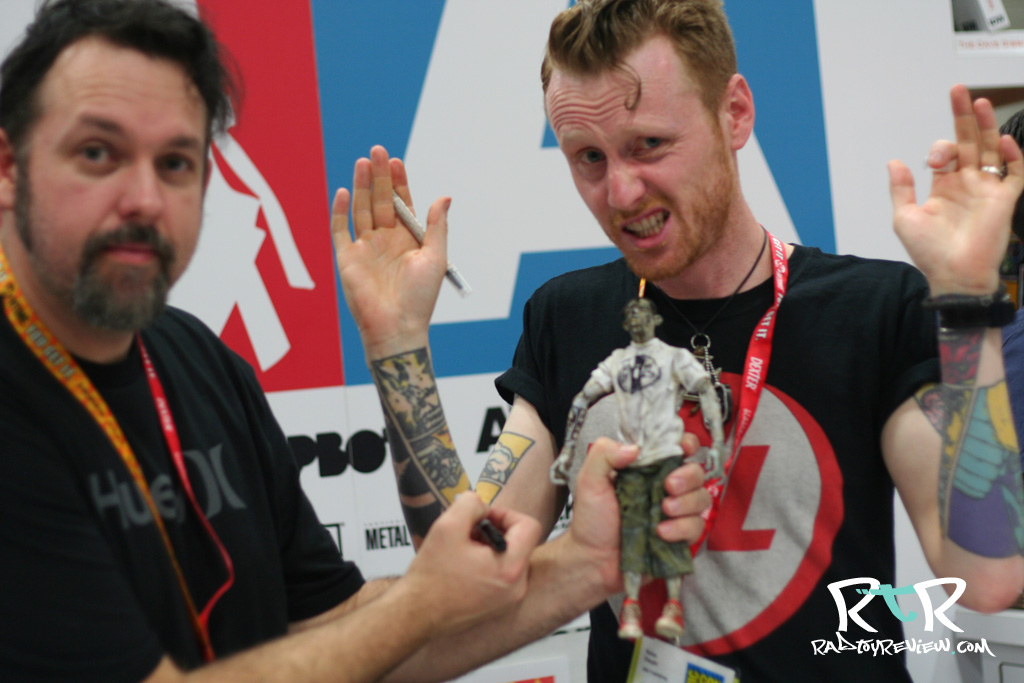
For this review, you might notice my zombs have marker doodles all over their shirts. That’s because I asked Ashley Wood to sketch on them. Rufus Dayglow was standing next to him when he started and used him as a bit of inspiration. Thus the birth of “Rufus Zomb”. On my red shirt zomb he sketched a simple, smiling girl and the words “Fun Girl” underneath.
Like most sketches you’d get from Ash, they’re pretty quick renders and a little on the sloppy side. But I love ’em. Rufus Zomb is da coolest!
PACKAGING
Sweet. That’s what I said when I saw the box art for the first time. ZvR played a huge part in getting me into Ashley Wood’s art (that and his stint on Metal Gear Solid) and the box is smothered with illustrations that call back to that fun comic series.


WHAT’S INCLUDED

3A is apparently making a play to help save the planet by doing away with the toxic plastic bubble shell. Either that or it’s a lot cheaper to wrap toys in torn up bits of cardboard. The Zombs are basically free floating amongst the strips, but the padding works well to keep them safe and snug. The Zombs come accessory/poster/extras free. Just them, you and the room.
THE BREAKDOWN
These are the first Zombs out of 3A (cough, IDW) that actually looks scary. With their pitch black eyes and craggy maw, these are some sinister creatures.

They still have similar stylized hair and the big ears that their Adventure Kartel brothers do, but they feel very different. Far more ferocious. These are the runner Zombs of your horde. Unlike the boiler Zombs who slowly lurk around the shadows, the ZvR Zombs run screaming at you from the alleyway, teeth bared for flesh. The paint app on his head and body are really nice. While the grey skinned Zomb appears grey overall, his skin is mottled with specs of blue, brown and black. In fact, it looks like blue is the base color and the main grey fleshy skin tone is painted over it. Once again, there’s no blood to speak of but the paint is broken up in such a way that it gives off a nice decaying flesh look.
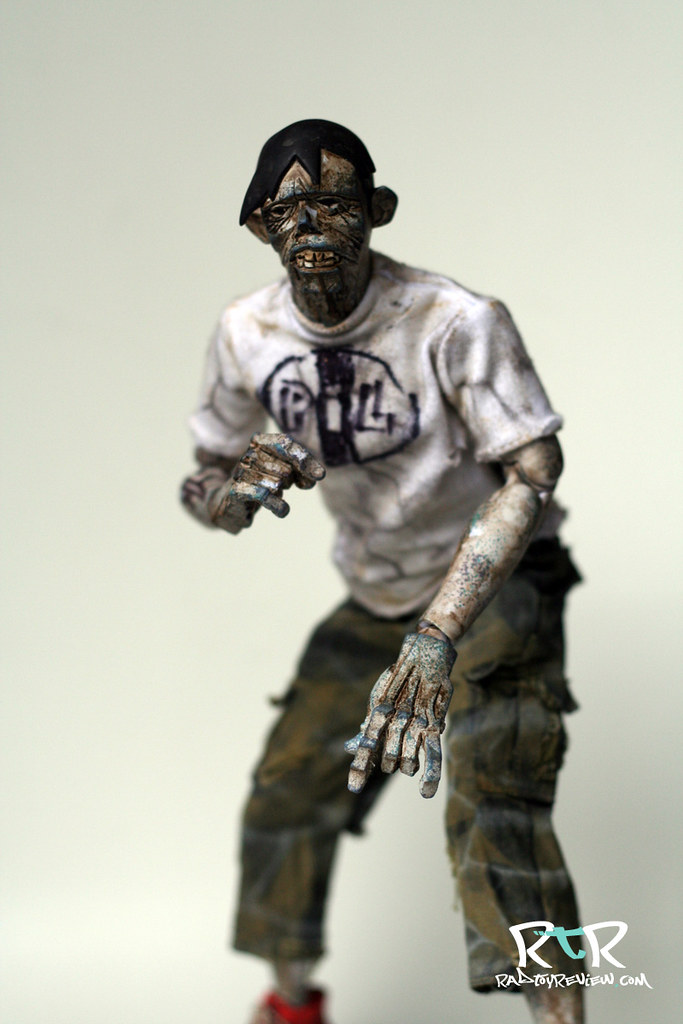
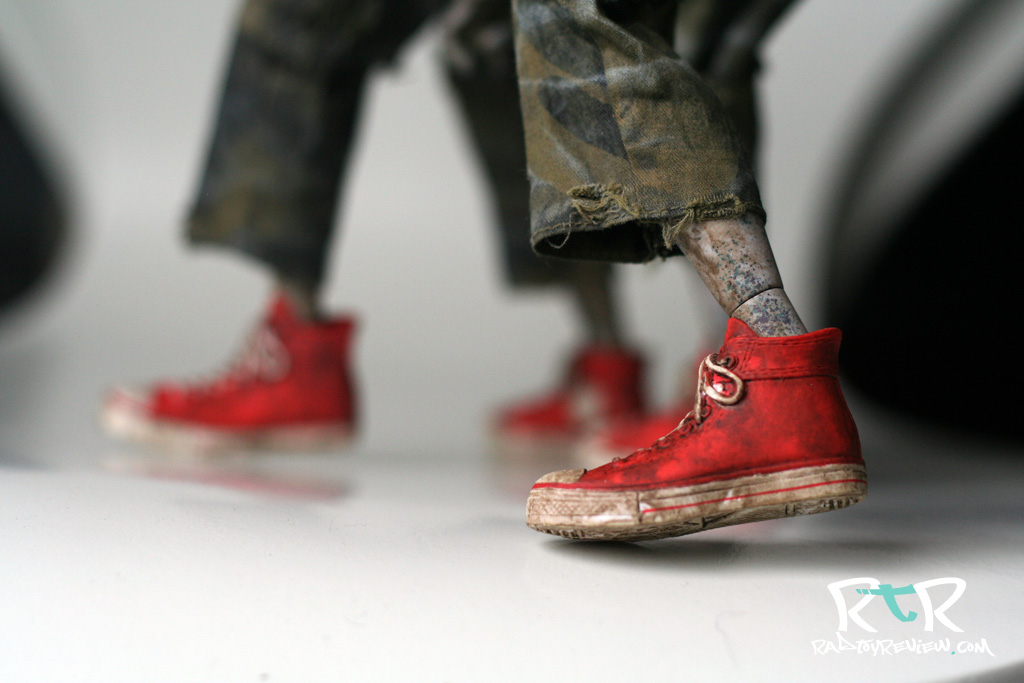
Other than the new head sculpt, most of ZvR Zomb’s getup it borrowed from elsewhere. The slim body is used for the first time on a Zomb which adds to their overall agile appearance. But as expected, it’s the same one we’ve seen on Rothchild and the RVHK TKs. The red chucks (which I really dig) are Tommy Red’s, the cargo’s probably from one TK or another. The hands are actually interesting because they are technically a new sculpt, but we saw them first on Rehel. Thing is, as of this writing, Rehel hasn’t shipped yet. So in some ways, the hands are unique to the zombs and it’s Rehel who’s reusing them.

Whichever came first, the Rehel or the Zomb doesn’t really matter I suppose. The hands sculpts are cool and I doubt these guys, or Rehel will be the last we see of them. The tattered and torn tee-shirts lack the usual front “3A” logo or Ash image. Instead we get a blank front and a brain graphic that reads “brain pie orgy” on the back. That worked out fine for me since I was able to get Ash to doodle in the available space, but I thought it looked a little unfinished before.

I didn’t realize this until posting, but apparently I didn’t get a good shot of the back of his shirt. At this point, I’m too lazy to drag my camera out, pose, light and reshoot him. Thus, I hope you can piece together the general idea between these two images.

I don’t really consider different color shirts much of a variant so I sort of wish I’d gotten on grey skin and one orange skin, just to have one of each. I say that now, but when I was looking at them at SDCC, the orange skinned Zomb was very orange. The orange read more like a “special” colorway like Shadow, Inky or Blanc than something that can naturally stand with the rest of your regular collection.

One big difference between my zombs and any other figure in my collection is the way their joints work… or should I say, sound? Even though I have Rothchild and a RVHK TK who both share the same slim body as these Zombs do, neither of them feel/sound the same.
My Zomb’s joints pop. As if I’m moving tiny gears, there’s incremental clicks at every major joint point. My buddy Scott was the first to notice this. We never got around to opening his to see if they shared the same “feature”, but I’d assume since it applies to both my Zombs that it’s not a unique trait.
I’ve yet to notice any hinderance caused by this, but it’s a little off putting, especially the first time it happened. Popping, creaking or cracking toy joints do not usually mean things are going as you planned.

Popping joints aside, I’ve had a ton of fun with these two in the short time I’ve had them. They pose and balance very well, they look super cool and there’s just enough new on them to make them feel original.

Going over these guy with a fine tooth comb I did notice one thing that seems to more or less underline the kit-bashy ness of these guys. Taking the new Rehel hand’s and stuffing onto the slim body may have seemed like an easy no fuss idea. The problem is that Rehel’s wrists are a good deal larger than those on the slim body. At some angles, it looks like our boy is wearing flesh colored gloves or zombie Hulk hands.

Without the long boiler suit or tracky jacket to cover it up, I more than once stopped to look it over. I still can’t decide if it actually bothers me or if it’s simply something I noticed looks slightly out of whack. It’s not a deal breaker by any means. A fun toy is fun toy.

FINAL WORD
Zombs are fun. I didn’t “get” the Aventure Kartel line of 3A toys until I got my first Zomb. The classic 3A boiler is among my favorite figure in my collection. The head sculpt on him is probably the best we can expect to see from 3A. The other iterations of the Zomb head designs have been good, but they haven’t been able to hold a candle to boiler’s.

This is the first time a Zomb has come out that I haven’t felt compelled to compare him to the previous Zombs. There’s no need to see how he stacks because he feels so different than the others. While they’re still laced with some 3A charm and maybe the slightest tinge of classic zomb goofiness, the large majority of what you get with a ZvR Zomb is far more scarier and evil looking than what we’ve seen before.

The ZvR are some of the more versatile 3A (cough, IDW) figures yet. They can mesh with just about anyones collection. They can sit with your AK Zomb horde and represent the faster/vicious/runner Zombs that Tommy and his crew fear running in to. You could throw them up on your Popbot shelf and give your TKs something to chop at. They also work well with the bots in your WWR collection. It can’t really be Zombies vs Robots without robots, right?

I really love the ZvR Zombs. They look great, they’re fun to play with and my pair happen to be doodled on by Ash himself. Admittedly, that may have caused some bias.
A part of me enjoys the exclusive/limited drops, particularly when I score. I’ve been on both sides of the boot so I know how it feels to miss out. I feel super fortunate that I happen to wake up in the middle of the night and lock down my preorders. So many did not and missed completely. As much as I love exclusive toys and “winning” cool limited things, I do hope we see another version of this guy down the road for general release. It’d be a shame to relegate his coolness to the paltry few who via happenstance, got lucky.
Pros:
- The new head sculpt is really cool/evil/vicious/bitey looking
- Really like the Zomb/Rehel hands
- The grey skin has a lot of nice paint texture on it
- The only SDCC 2012 exclusive I was really excited about and I managed to score it.
Cons:
- Clicky joints. Slightly terrifying.
- A little on the kit-bashed side of things
- Orange skin is a bit too orange.
- As an exclusive and an awesome one at that, it’d be a shame if the general 3A Zomb collecting population didn’t have a stab at owning at least a variant of him
Help us improve this site by letting us know what you think! Follow us on Facebook and Twitter to stay updated on all the latest reviews, previews and toy news!
/
/
/
/
/
/
/
/