THE WORKSHOP – Custom 1/6 Sword by Paul Benson

We’re back with another workshop by the might Paul Benson!  Paul brings his technique in creating custom swords for all your 1/6 army.

Enjoy!

– Knives

How to make a 1/6 sword

What you will need:

You will need a sheet of 2 mm and 1 mm styrene sheet, masking tape, scalpel, sharp scissors, nail file, sand paper (various grades) and/or nail files, cyanoacrylate (commonly sold as Super Glue or Krazy Glue), Dremel with tool kit (optional), matt black paint and metallic paint (preferably as spray paints), acrylic paints of various colours (depending on the colour of the handle tape [see below]).

I am writing this up, in the hope it might be useful to folks. I am no expert on swords so please excuse any little inaccuracies that are due to my lack of ‘sword knowledge’ or being unable to scale details down to 1/6 scale.

Nothing new under the sun here, but as a little set of techniques that could be used to make a whole variety of things e.g. knives, axes, tools etc. Wrote them up as a set of stages to follow through.

STAGE 1
As a starting point find a suitable picture online, using an image search. I chose to make a Japanese Katana. From the found image find out the actual size 1:1, which you can get from the website who are using the picture.

Copy and paste the picture and then crop and resize to 1/6 scale using Photoshop or another photo editing programme. If you don’t have Photoshop or something similar, you can do this by trial and error, printing out and then measuring the length of printed sword and then resizing.

STAGE 2
Print the sword picture onto card and cut out to use as a template.

STAGE 3
Draw around the template onto 2 mm thick styrene sheet. Cut out the sword outline with sharp scissors or a fine modellers saw. After cutting out the sword blank it may need to be flattened slightly as the cutting process can distort the plastic. This can easily be remedied by immersing the sword in boiling water or use a hair dryer and hold flat whilst it cools.

STAGE 4
To create the cutting edge for the sword blade use any or a combination of scalpel, nail file, Dremel and various grades of sandpaper. Start off by removing the square edges. A scalpel can be used at to shave off the plastic to make the cutting edge. Final corrections can be done with coarse and then finer grade sandpaper. Depending which figure you are making the sword for you may need to thicken the sword handle. That is certainly the case for example for ThreeA Tomorrow Kings and Queens. This can be done very easily by adding further strips of plastic card glued to either side of the handle.

STAGE 5
The guard can be made by drawing a small suitably sized oval onto 1 mm styrene sheet, cut out with scissors. A slot then needs to be carefully cut out with a scalpel the same width and thickness as the blade next to the handle. Slide this onto the sword and glue in place with super glue. The blade collar is just masking tape cut into a 4 mm strip and wound round the blade. Once on the sword to keep the tape in place and to harden it, ‘paint’ it with super glue. Some super glue containers come with a brush in, very handy.

STAGE 6
The handle was also wrapped around with a 4 mm masking tape strip gradually wound down the length of handle. Japanese swords, of course have a tape wound round the handle in a particular way. I have done the winding in the simplest way possible! To get the 4 mm strip, if you have one of those green soft artist cutting boards, the tape can be run along a line on the board. Mark off 4 mm along the tape and use a ruler and sharp scalpel to cut a strip around 40 cm long. When done, again it was painted over with super glue.

To paint the sword it was first sprayed with matt black using Humbrol acrylic aerosol paint (enamel paint would be fine). As the sword was light it was held in place on a piece of waste board whilst being sprayed with a small blob of Blue Tack. When one side was dry, the sword was turned over and the other side sprayed. The blade was sprayed with Humbrol acrylic polished steel metalcote. After the paint had dried and been allowed to harden for a few hours it was rubbed with a soft cloth to give the ‘polished steel’ finish. The sword can of course be sprayed with another suitable metallic paint. The handle was lightly dry brushed with a dark brown, mid brown and then a light brown. What colour you use for the tape is of course up you. The guard was dry brushed with silver on it edge.

Being the ninny that I am, I forgot to photograph this sword before I sent it off to someone! The pictures below are of several swords I have made. The sheath shown was made from styrene tube carefully and evenly squashed with pliers to make an oval cross section. The tube was cushioned with a cloth to stop the pliers marking the styrene. I drew round the ends of the tube onto 1 mm styrene sheet and cut out the ovals with sharp scissors. With one of the ovals a rectangular slot was cut out with a sharp scalpel slightly larger than width and thickness of the sword blade collar.

So that’s it! Again, this can be applied to a wide arrange of melee weapons. Trial and error is part of the fun! Thank you for reading and see you next time!

We hope you enjoyed the latest Workshop. Big thanks once again to Paul for sharing his techniques with us. 
 We’d love to hear from you and check out what kind of customs you’re working on! Send us a shot of your latest custom work with a brief description to radtoyreview@gmail.com. 

Hit us up on Facebook or Twitter pages to stay updated whenever we post new Workshops and epic toy reviews!

Until next time!


*Review* 3A Real Steel Ambush

INTRO

When I was a kid, you could probably list my significant interests on a single line of paper. Super heroes, ninjas, robots, monsters, comic books and movies with Arnold Schwarzenegger, Harrison Ford or Michael J. Fox in them. Like a lot of kids my age, ridiculous or not, I loved action-packed entertainment.

If it had a robot or some promise of karate, I wanted to know all about it. I was obsessed with the stuff. Lucky for me, the 80’s pretty much banked on those concepts. It wasn’t about the quality, it was about the quantity of how many in-your-face explosions and muscle bound heroes they could shove in front of you. Watching those same movies now, mature me can certainly see how my tastes failed me in my youth. Most of these “films” are tragically terrible. I think this realization is what has had me avoiding the vast majority of “action-packed” movies as an adult. Nowadays, I find that I can’t comfortably roll with the cheesy cinema.

A good example of cheesy cinema was last year’s robot fighting movie, Real Steel. It was big and flashy, with some cool, realistically rendered robots (thanks to Dreamwork’s CGI chops) punching each other over and over again in the face. End scene. The storyline seemed as though it was essentially ripped from Stallone’s 80’s flick, “Over the Top”. Some movie exec took that thin prose and married it with Rock’m, Sock’m Robots. My skepticism was pretty high so it was passed over while in the theater only to be picked up months later when it became available on DVD. I didn’t expect it to be very good and big surprise, it wasn’t.

But what I also didn’t expect was that I actually liked it. For the first time in years, I embraced the cheese and enjoyed it. Something about the film tapped into that 80’s nostalgia that used to push my buttons when I was a kid. Maybe it had something to do with how disappointing all the Transformer films have been. Here were these giant, cool looking robots beating the crap out of each other. As a youth, that would have been all I needed to dive head first into bugging my parents to buy me as many of the related action figures as the family’s “spoiled only child” budget would allowed. The story and acting was completely secondary.. nay, THIRD-ary. It wasn’t Shakespeare, it wasn’t art, it was just cool to see big robots beating the heck out of each other.

image copyright Dreamworks Studio

So, what am I getting at?

3A, one of the top high-end action figure toy manufacturers in the world, signed a fat deal with Dreamworks to make high-end figures based off the Real Steel franchise. When I first heard about it, I thought it’d be quite the conundrum for collectors. On one hand, it’s robots and 3A is ah-maze-ing at making robots. Probably the best out there. On the other hand, it’s a robot from a movie that wasn’t very good to begin with and isn’t really that popular with anyone who is old enough to afford 3A robots.

With all of 3A’s other toy lines tying up my play money, it was pretty easy for me to pass when the first figure, Ambush, was up for pre-order. While I thought the film was fun and the pictures 3A used to show him off looked intriguing with all of his intricate-looking, gear-supported articulation, it wasn’t quite enough to rally my interest and loosen my purse strings.

A few weeks back I got a surprising email from 3A that they wanted to send me Ambush to review. This was a definite first and something I was very excited about. Still, I was a little hesitant because I didn’t feel that jazzed about a Real Steel robot. I tried to keep an open mind and wait for him to show up. I had no doubt that the figure would be at the very least… neat. The thing I wanted to see most was if Ambush was cool enough for me to be able to ignore the franchise and simply be interested in a cool robot for the sake of a cool robot, much like the ten year old me would have done back in the day.

Well sir, the delivery man has arrived and it’s time to answer that question.

PACKAGING

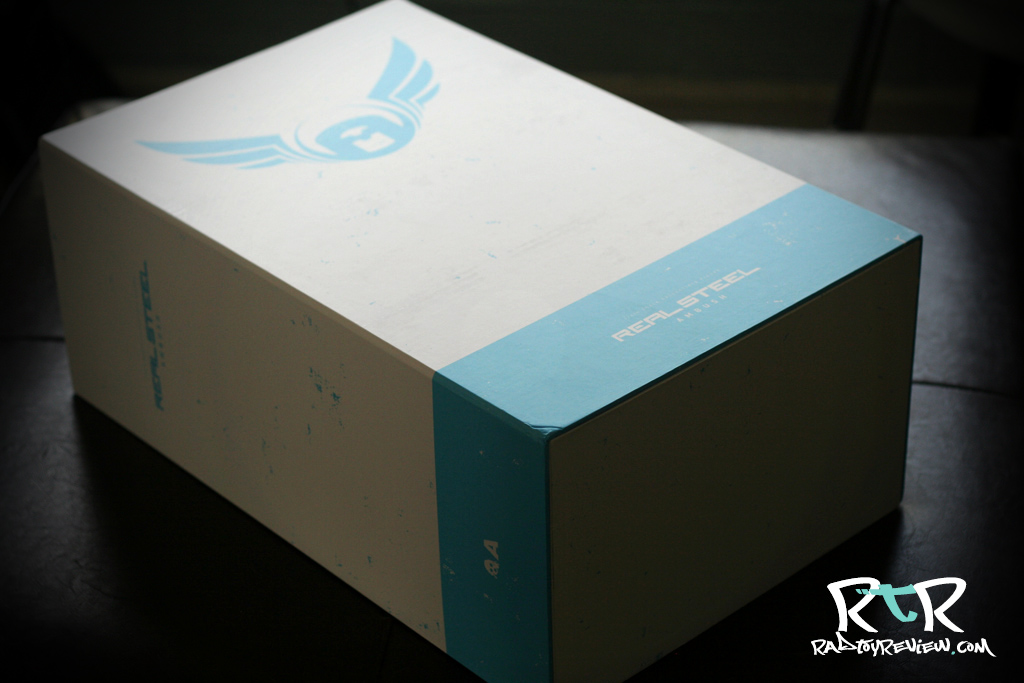
The outside of the box is pretty minimalistic. A logo here and there with some of Ambush’s stats on the inside flap. My favorite stat being, “Cost – Won him in a bet”. Said flap has a magnet that keeps the lid secure. Upon opening it, I found that Ambush received one of the best packaging jobs from 3A yet. There’s several layers of molded dense foam between you and your robot, each piece carefully placed to protect all the delicate bits. If you have a Blind Cowboy/Ghost Horse set, you’ll have a good idea of what to expect here.

WHAT’S INCLUDED

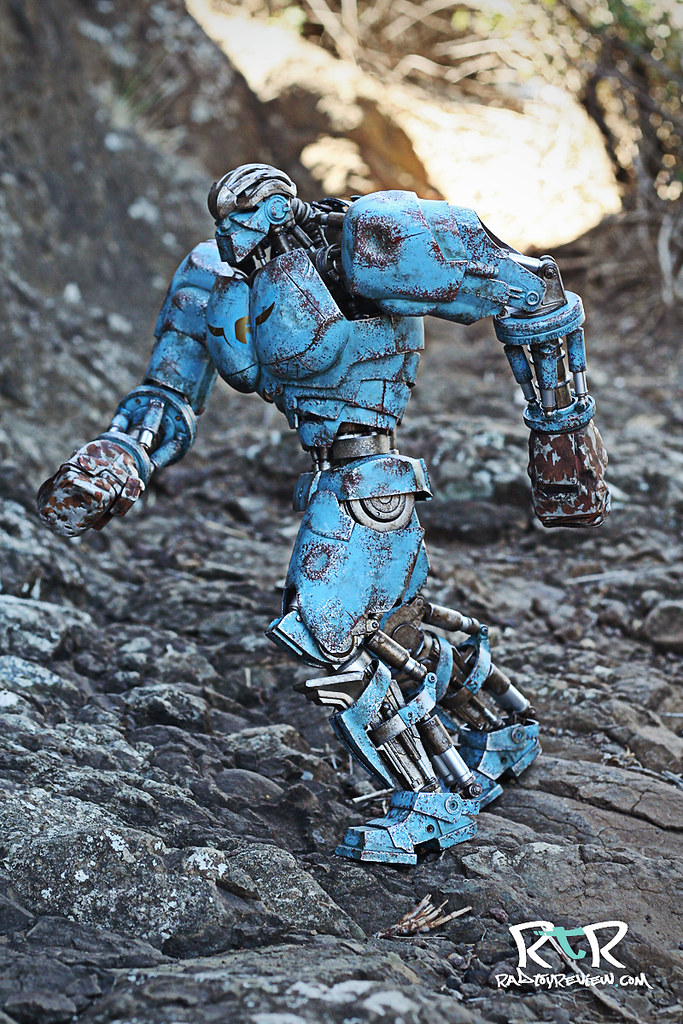
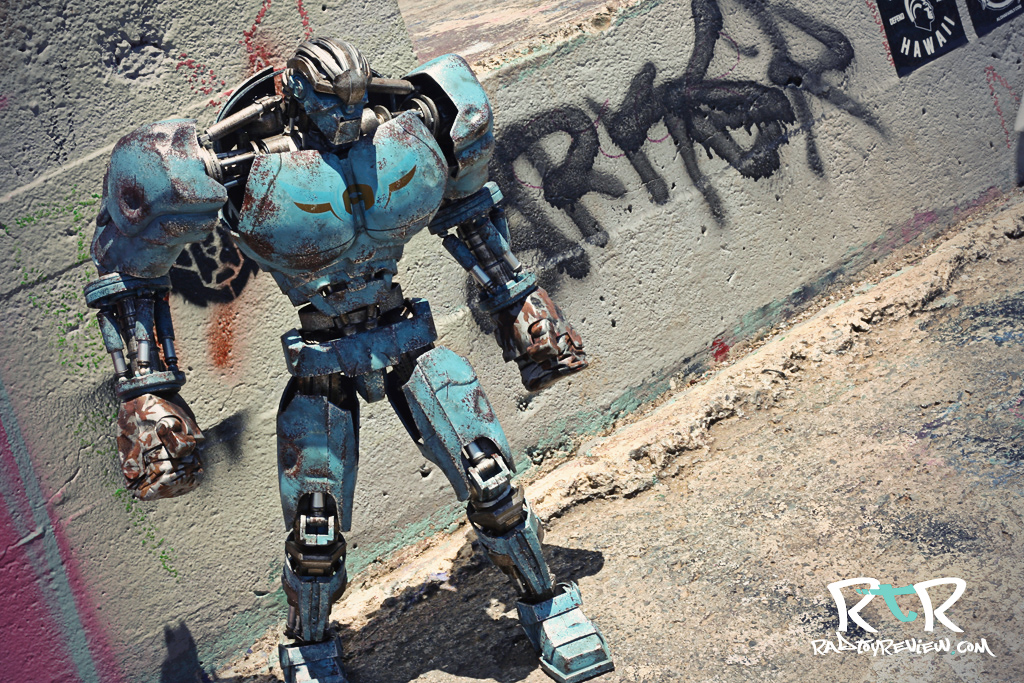
For starters, there’s that hard to ignore, giant blue robot, Ambush..

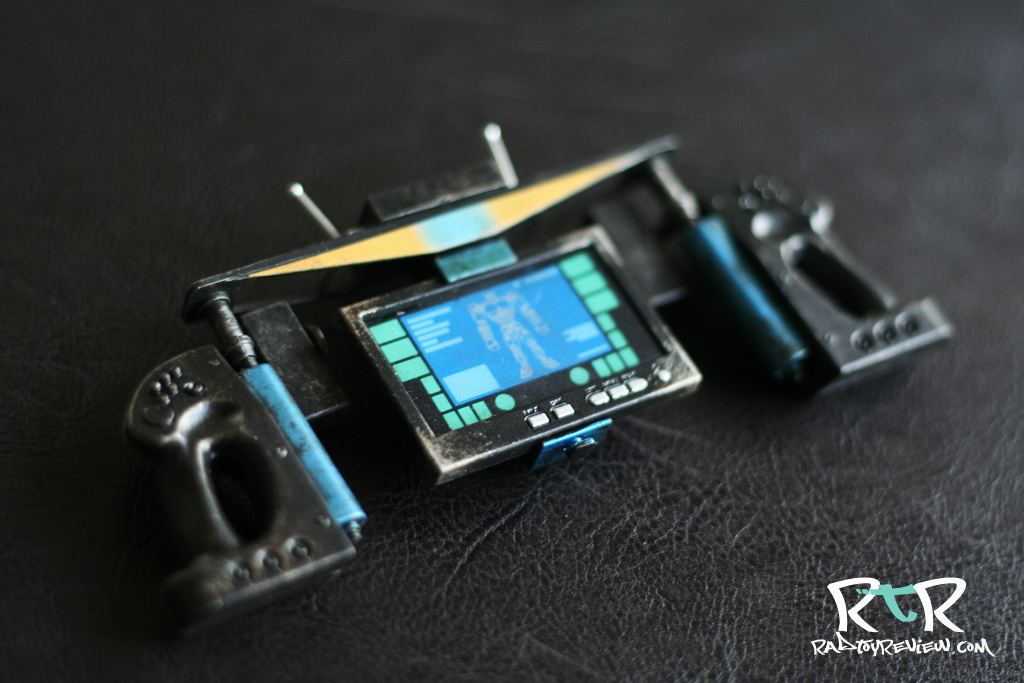
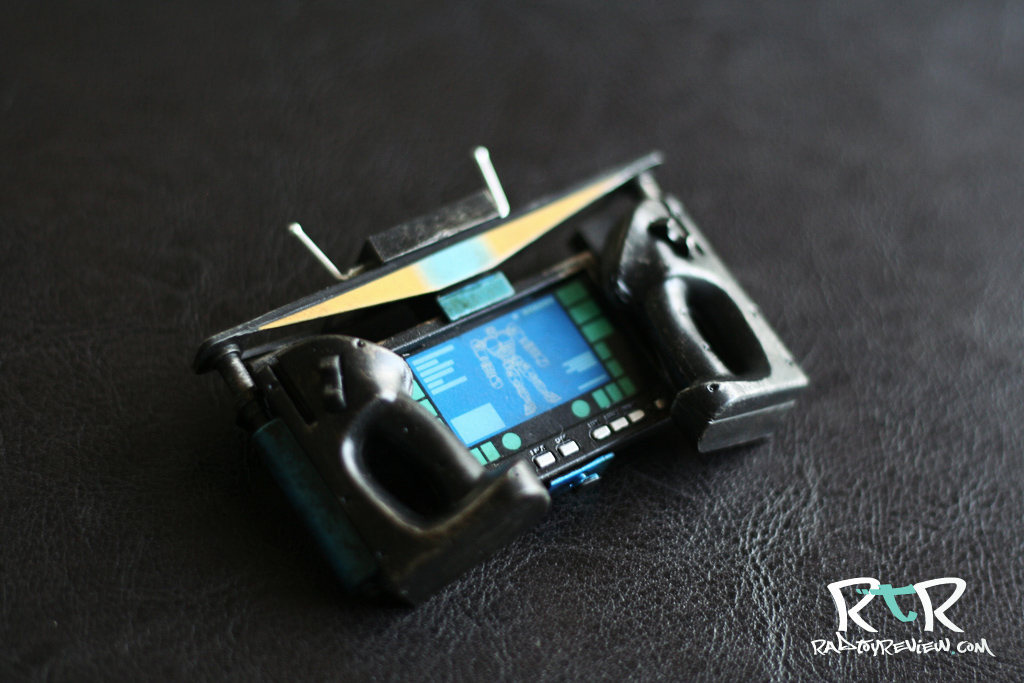
If you ordered yours from Bambaland, you’ll also receive the exclusive little robo-remote. Don’t lose too much sleep if your order doesn’t include one because, while it’s a nice looking accessory, without anyone to hold it, I’ll most likely keep it in the box instead of having it on display.

Bummer alert, batteries for Ambush’s eye lights are not included. However, a small slip of paper on the inside flap describes how to install them once you rustle some up.

THE BREAKDOWN

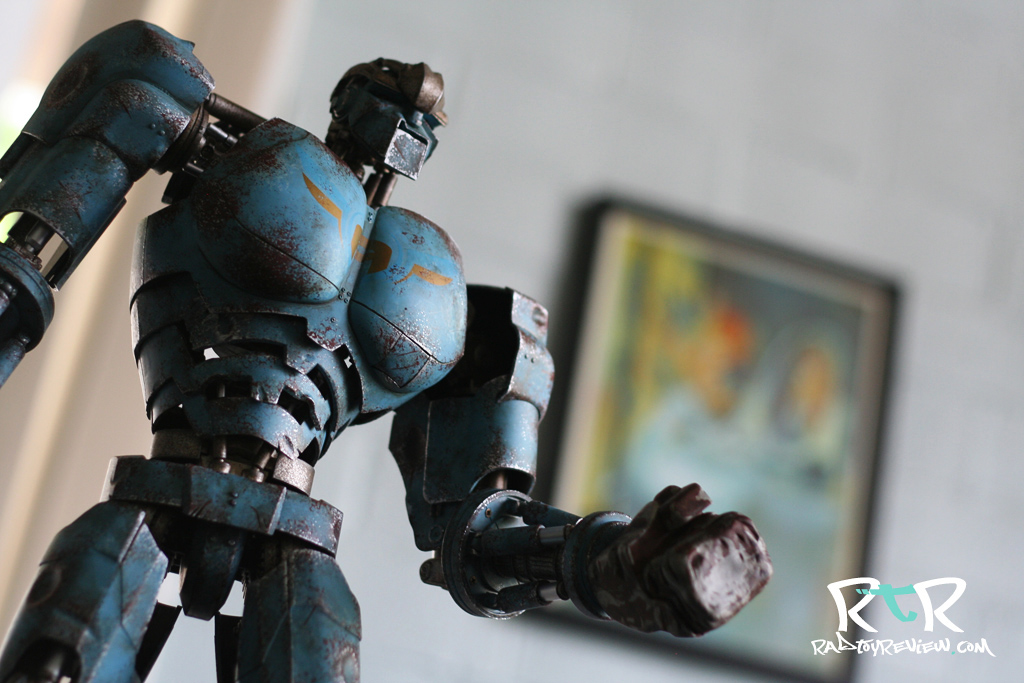
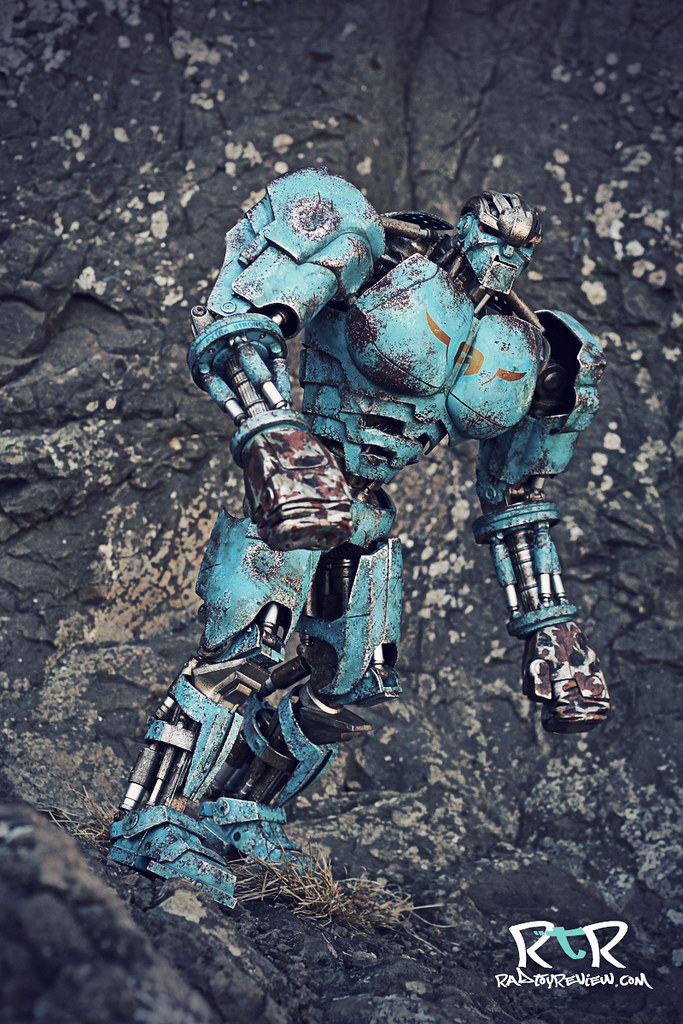
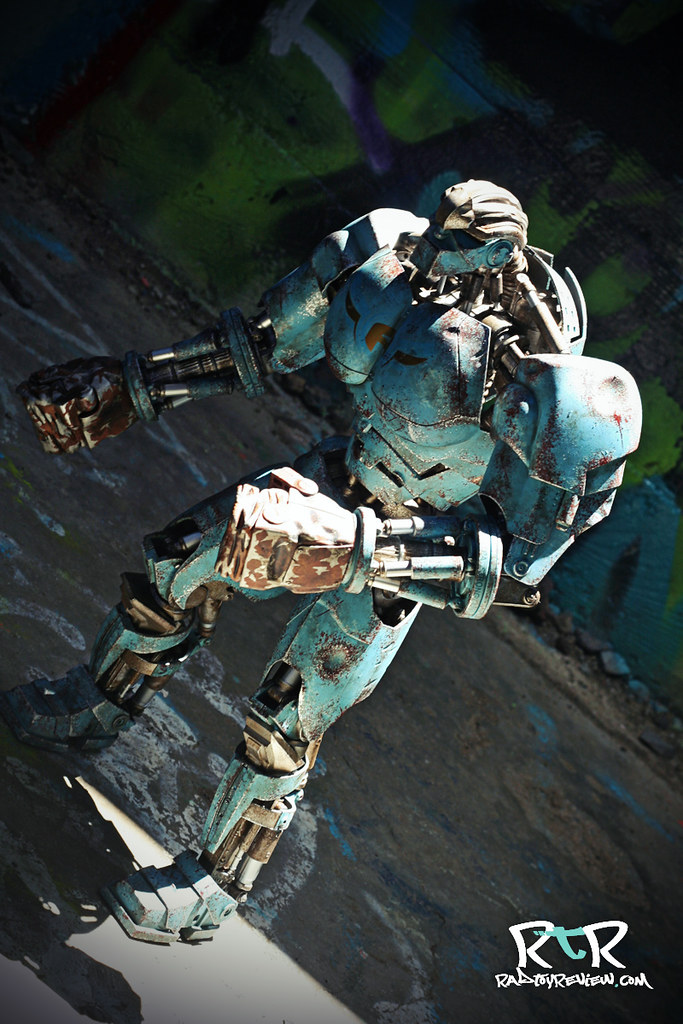
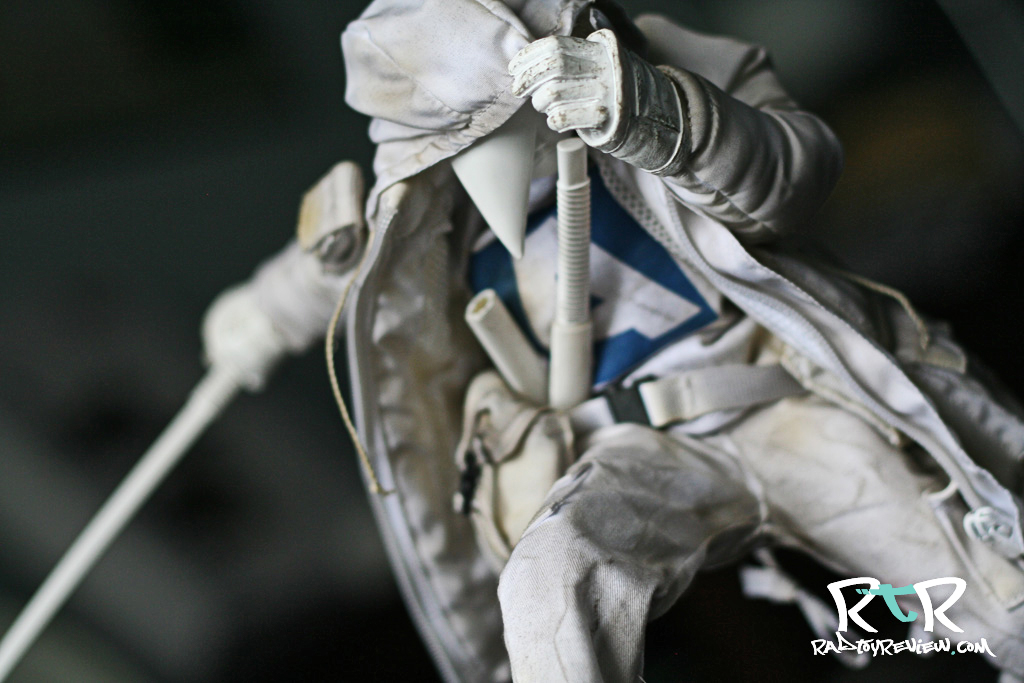
My first impression, Ambush is one nice looking robot. There are so many gears and tubes running all over this guy, it’s a bit of a marvel that 3A pulled this off so elegantly. He looks, needless to say, very accurate to the film.  If he’s not made up of 100% all new parts, he’s at least scoring in the high 90’s. Scanning him over, I can’t seem to find anything that 3A reused from their previous robots. I’m not seeing a Bertie, Bramble or Dropcloth anywhere amongst the detailed assets.

The overall build of Ambush is a mix of solid plastic and some slightly flexible shell-like pieces. On his back especially, there are strips of decorative parts that seem a little delicate, though they do have some give to them that keeps them from feeling overly brittle. Thankfully, they’re not really in areas where you’re likely to put much pressure when posing him.

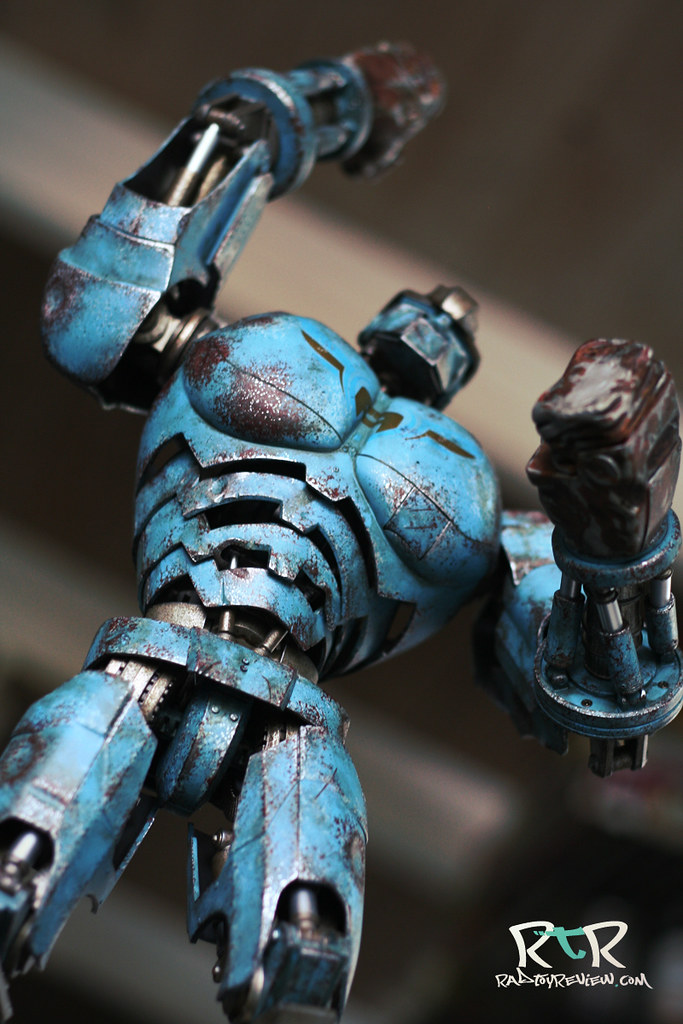
There’s definitely a lot going on with various layers of highly detailed robo-parts overlapping other highly detailed robo-parts. Everything blends together cohesively and believably. One thing that really impressed me was that there are no visible ball-joints like those found on 3A’s own robot designs. Everything is structured to and succeeds in looking like a believable 1:whatever scale of the actual robot, if he were an actual robot.

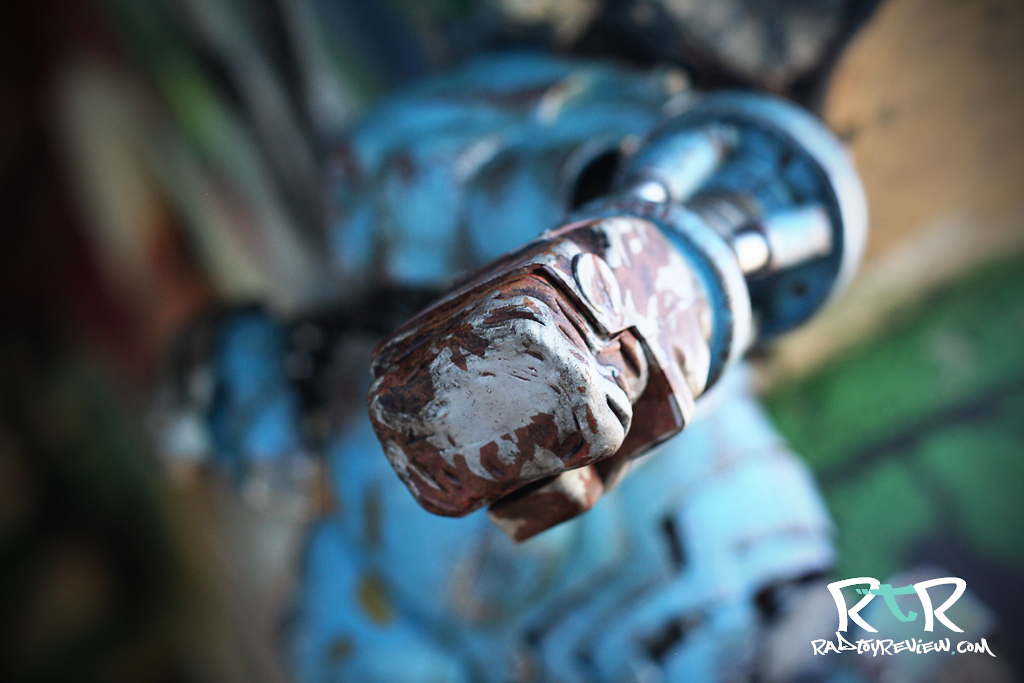
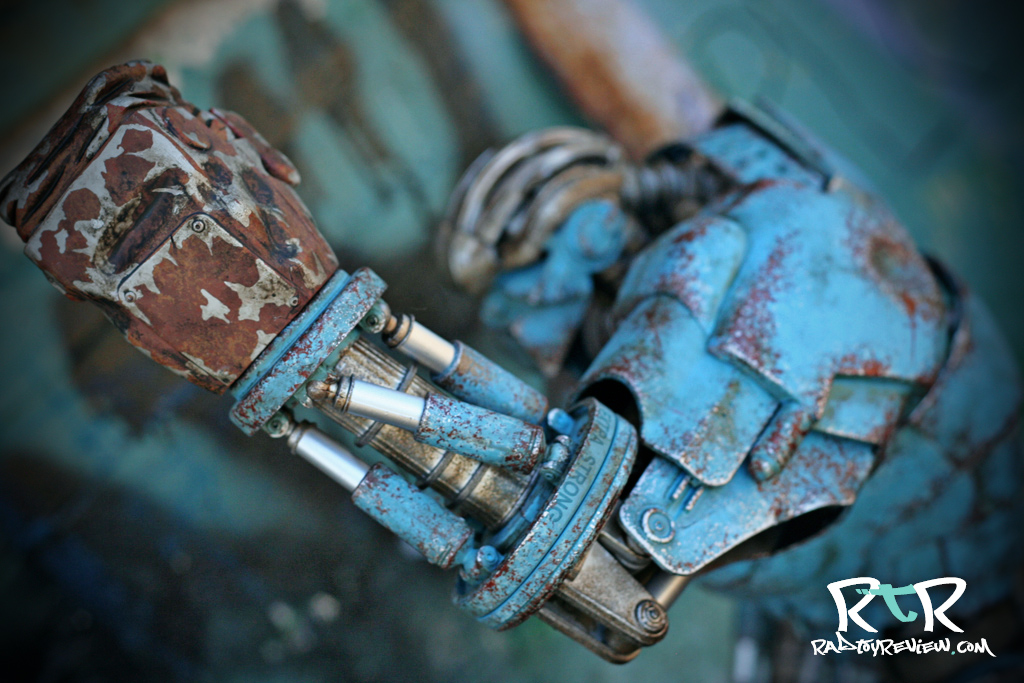
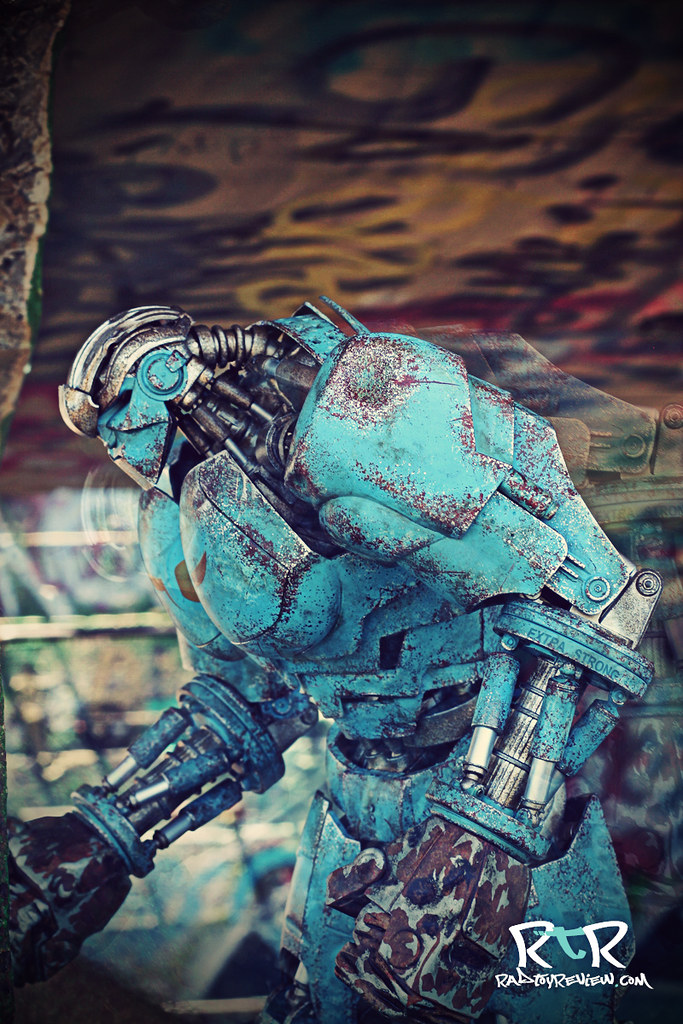
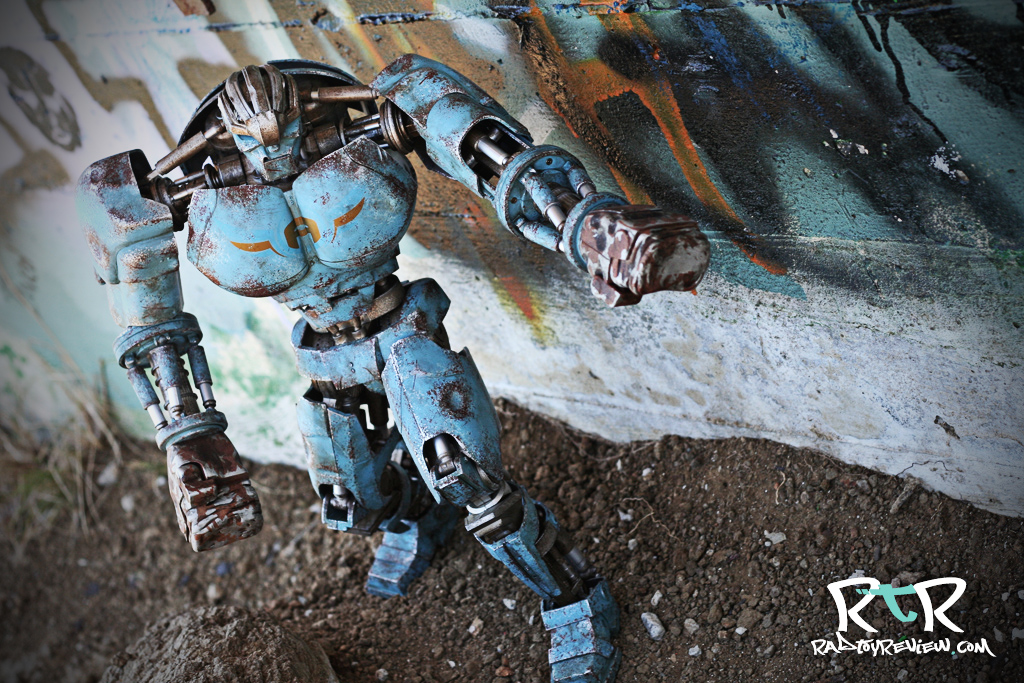
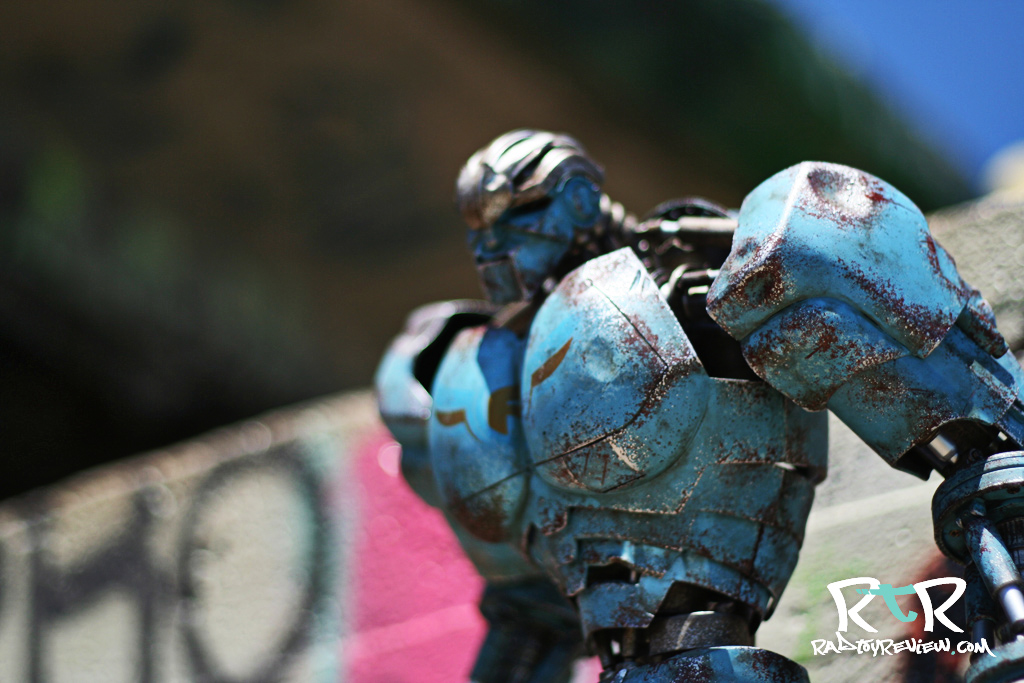
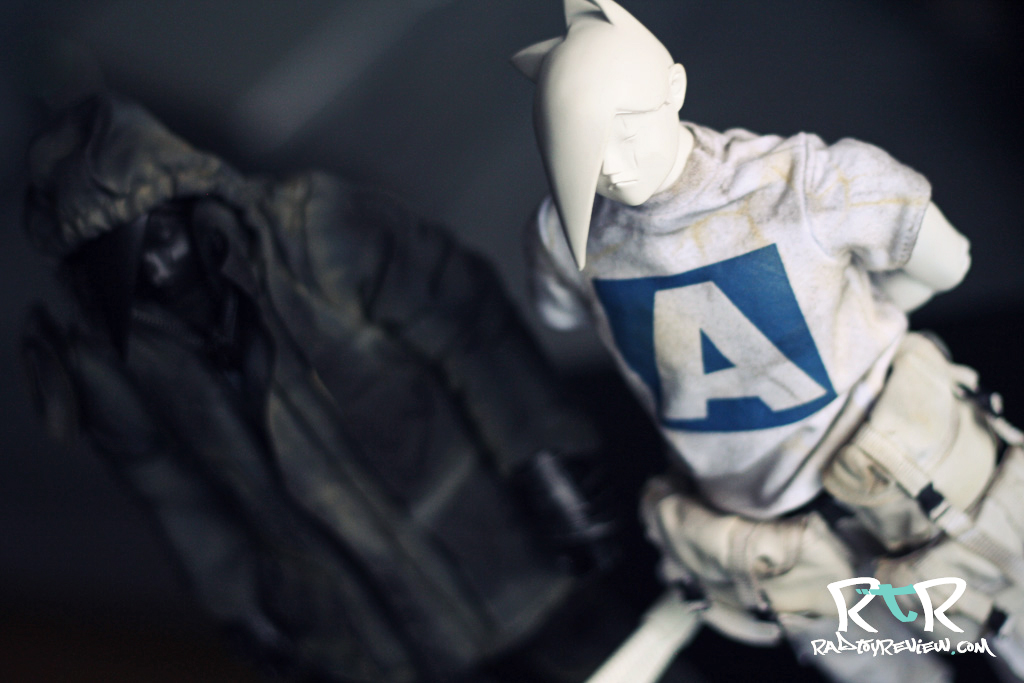
Ambush is covered in the Triple Ds, dings, dents and damage. There’s the kind of stuff you’d expect from 3A in terms of scratches and overall molded-in weathering which are, of course, apparent. But what’s impressive is all the dented areas that look legitimately torn up. Beyond his signature dented “snarled” lip, there are various edges of the sculpt that are crinkled and sport believable battle damage appropriate for the not-so-successful fighting robot that Ambush is supposed to be. The asymmetry of the damage also adds significantly to his realism. Take all that and combine it with the paint work and it’s pretty difficult to tell if what you’re looking at is plastic or an actual metal robot.

Speaking of paint work…

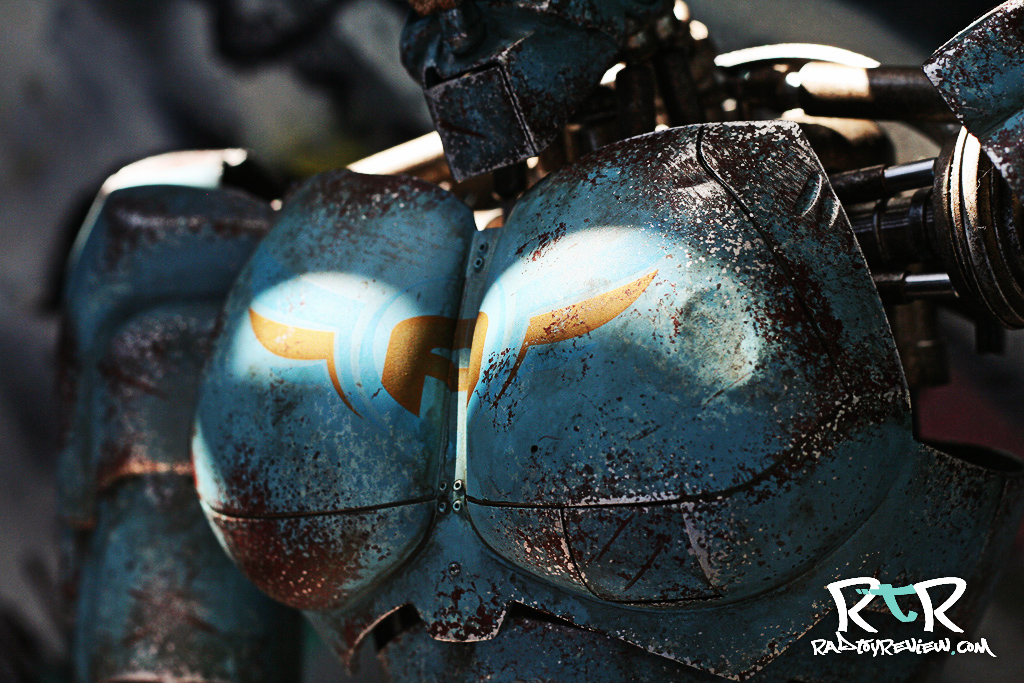
The paint application on Ambush is next to none. It’s hands down one of, if not the, best paint work I’ve seen on a 3A robot. I’m not exaggerating. You can tell a lot of time and care went into the detailing. Rust looks good and crusty while stripped away bits of paint show shiny steel underneath. The only parts that do not share the same impressive application are the tiny pistons that support Ambush’s articulation. This was probably a good call to ensure that as stuff moved around, it didn’t become funked up over time. I do wish that 3A went with actual metal rods here instead of the clean plastic ones as I think it’d look better overall, but what’s here works well.

So he’s a marvel to look at but how does he dance?

Well, from a technical standpoint, he’s amazing. For example, when you twist his wrists, 4 little pistons rotate, expanding and contracting with the motion. Similar gears are at work at almost every articulation point and it just looks fantastic. The thing about Ambush is that it isn’t just how he moves, it’s how his various parts work together and how they look when he moves. He’s a plastic machine of independently moving parts working together. It’s a joy to see.

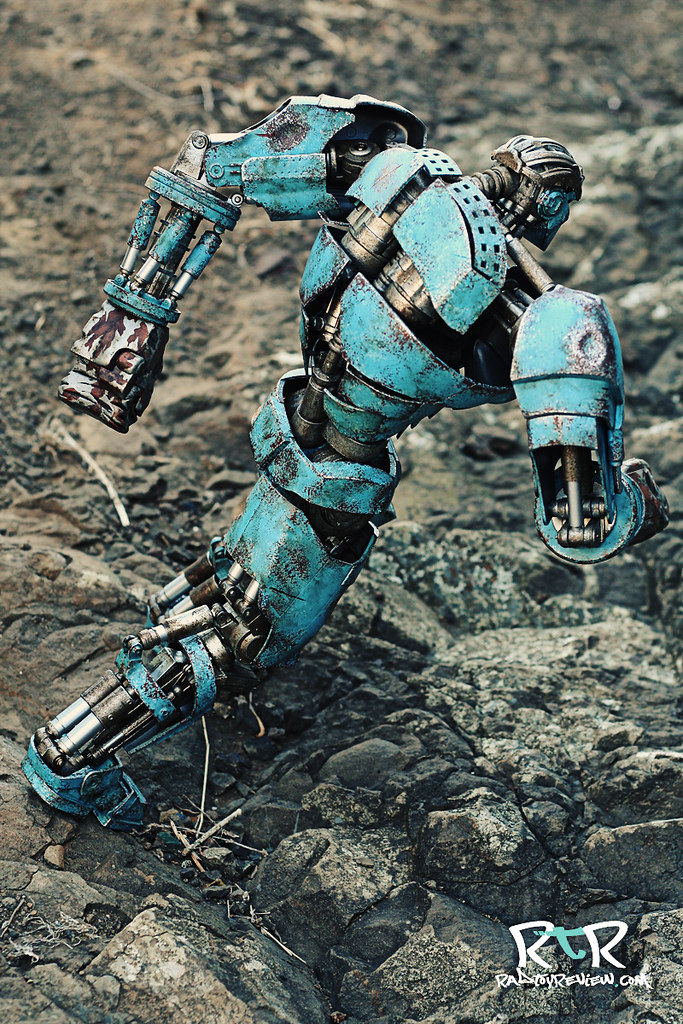
The Good: Ambush has a really solid range of motion in his shoulders, elbows and wrists. I didn’t figure it out until near the end of our shoot that his wrists not only turn, but bend up and down. You can get most of the rock’m sock’m poses you’d want to out of him. He can get a fairly wide stance to help balance his upper body heft. His legs, particularly his knees, ankles and the balls of his feet, work really well to keep him from toppling over, as well as give you a few nice pose options. Some smaller articulated garnishes include his mouth and wee thumbs.

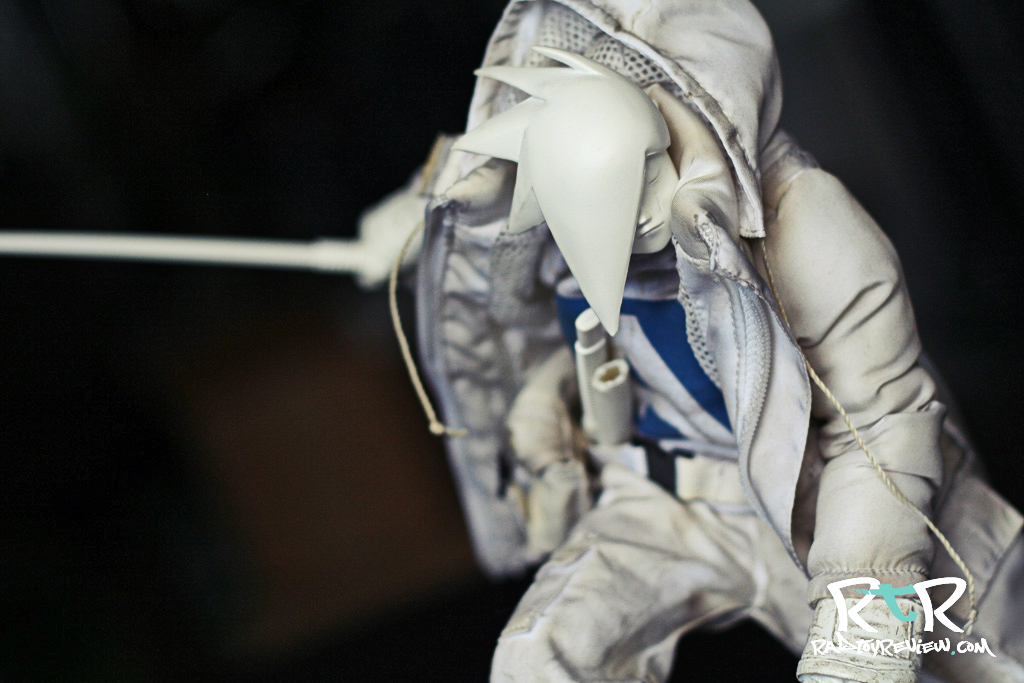
The Bad: The neck joint doesn’t hold a turn. It simply springs back to facing forward when you let go of it. You can move his head up and down as well as cock his head side to side where it stays as it should, but an unmanned left to right position isn’t possible. Despite the fancy neck pistons, I can’t figure out why 3A designed it that way since it appears so similar to the wrist joint in function.

The waist articulation feels a little more limited than I expected it to be. There’s a few sliding parts that overlap each other that gives a nice visual effect when he bends and twists, but I think they might hinder his movement some as well. It’s probably a trade-off. I just wish the extremes of his possible articulation were a little more.. extreme.

Lastly, the hip joints for Ambush are the tightest I’ve experienced from 3A. I held my breath every time I set him up for a shot. I’m not sure if the inherent tightness of the joint was purposeful or not, but thankfully, it looks like 3A used a heavier duty post to support the extra strain. No snapping sounds yet.

The Ugly: I have one last small issue with Ambush. In a way, it’s actually more of a compliment and a testament to how good this guy looks.

Thanks to how well 3A crafted all the excellent, intricate gears and details on Ambush’s body, it can be a little difficult to tell exactly what SHOULD and SHOULD NOT move. His knees, for example, look like they should be double jointed. Trust me, they are not. Due to the stiff joints 3A toys sometimes experience when you first get them, you tend to have to apply a good deal of pressure to knock them free. There are definitely areas on Ambush you might be tempted to apply some pressure to, going off appearances alone, when you most certainly shouldn’t. This, of course, could lead to needlessly breaking parts off your shiny new (and pricey) toy.

My suggestion would be for 3A to include in future releases of their more intricate figures, a small printed sheet that illustrates the various articulation points on the toy. This isn’t out of the question as I’ve seen several other toy manufacturers do that exact thing, so hopefully 3A will consider it.

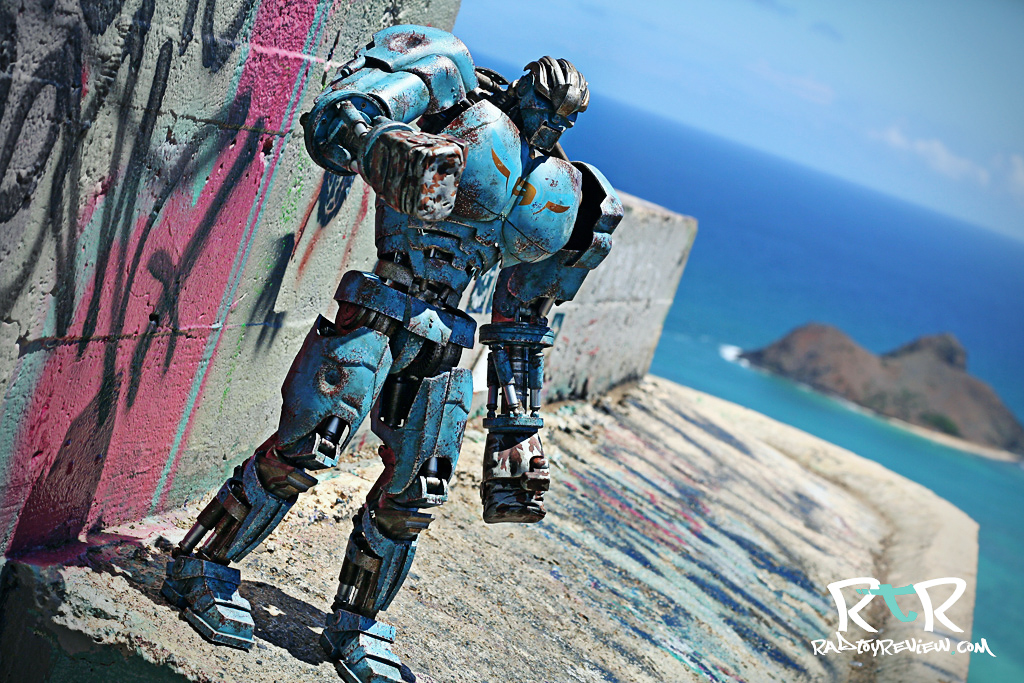
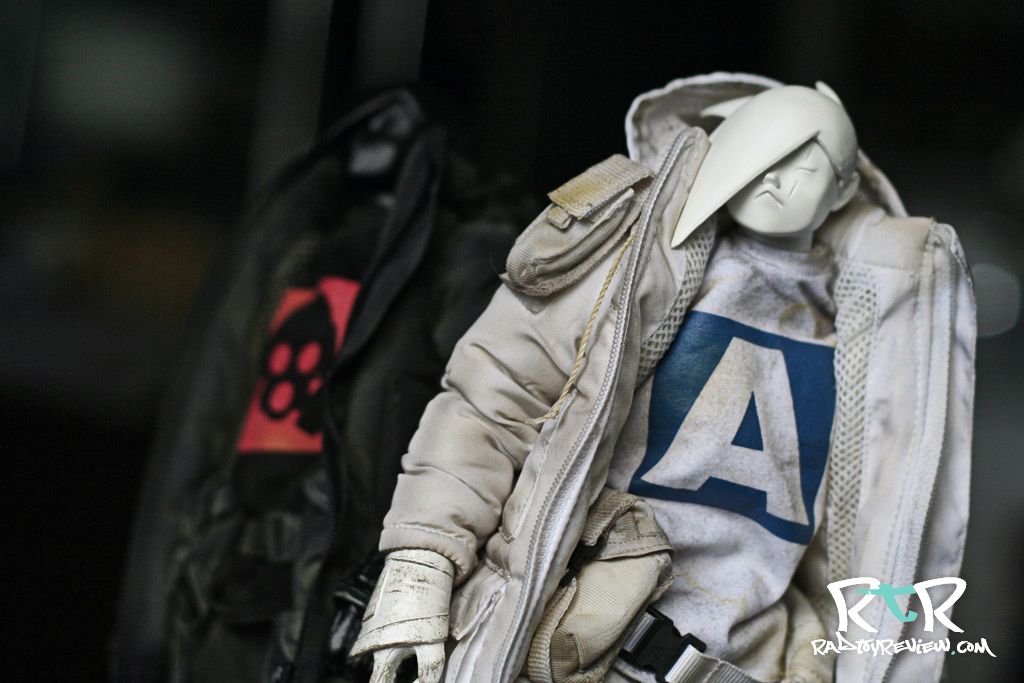
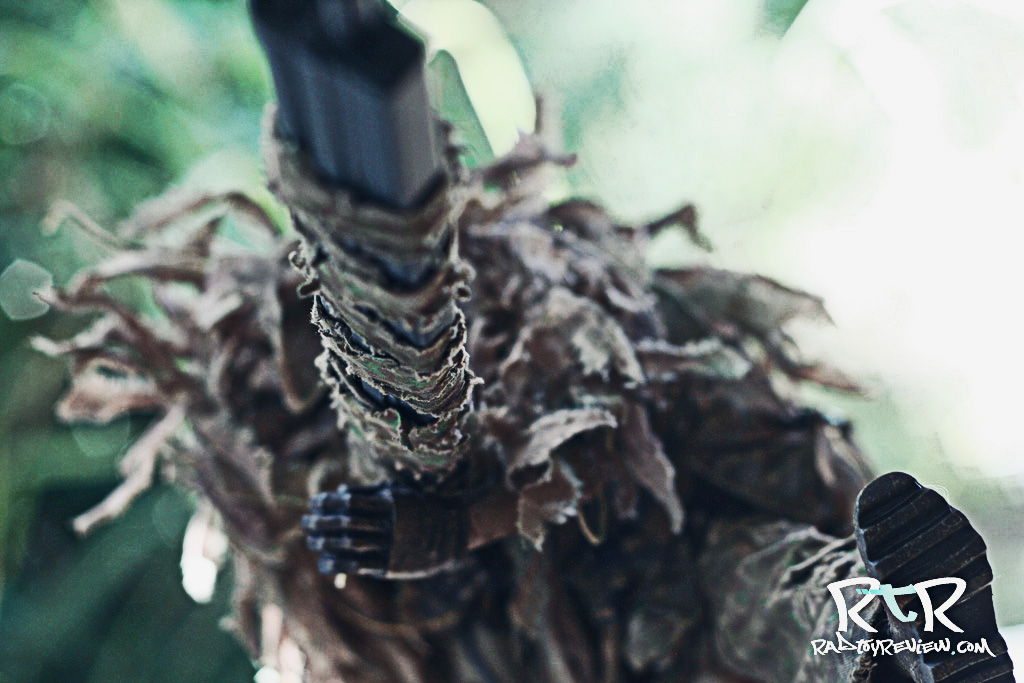
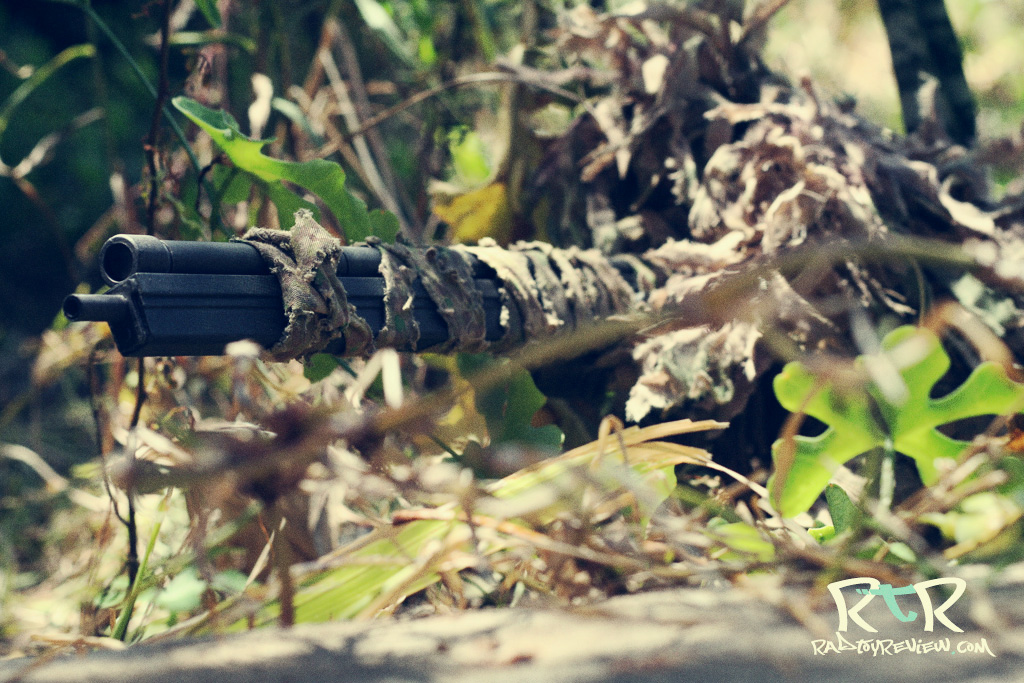
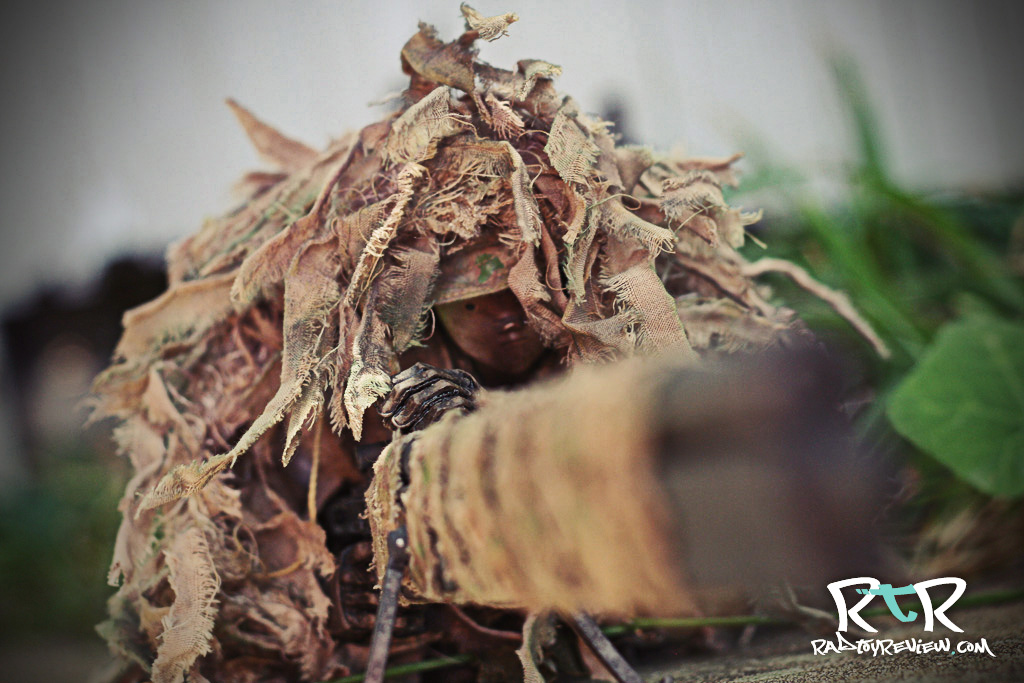
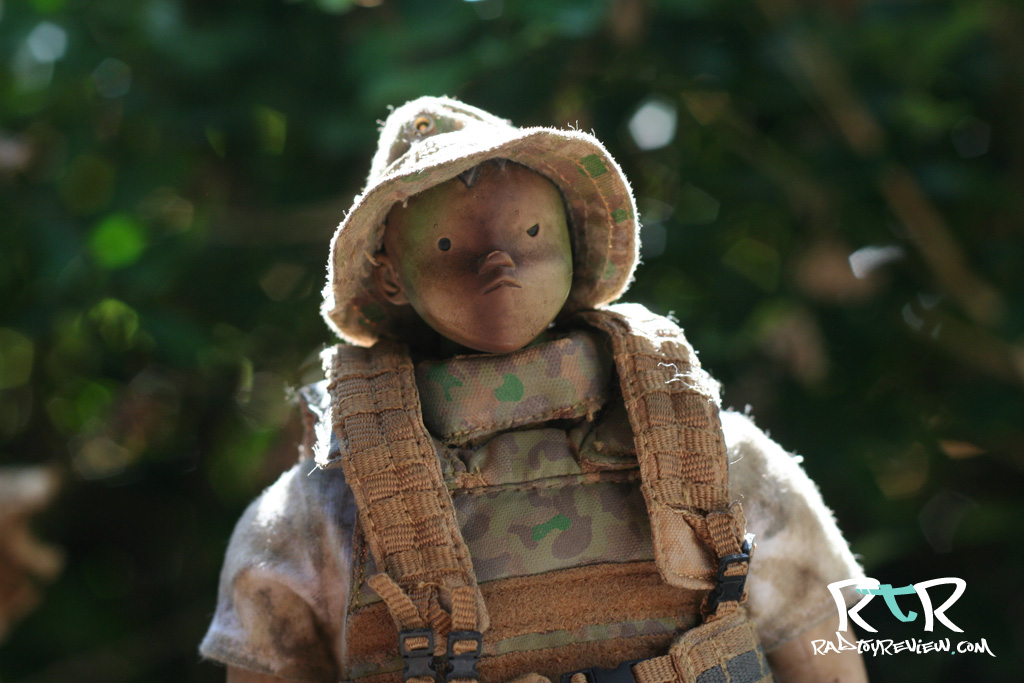
For Ambush’s photo shoot we wanted to do something special. So my ever supportive wife suggested that we hike up to the “pill boxes” (two lookout posts leftover from WWII) that overlook the beautiful Hawaiian beach of Lanikai and the two offshore islands, the Mokes. I was a little nervous stuffing the big guy into my tiny backpack, but he made the journey just fine.  It’s always fun doing location photo shoots and that morning was no exception. With so many details on him, photographing Ambush was  a real treat. I do wish I had figured out before we set out for the shoot that there were no batteries pre-installed. There were a few points during the day where I know some menacing looking eye-lights would have been super cool.

THE FINAL WORD

Ambush isn’t going to change your mind about the movie Real Steel, but 3A may change your mind about Ambush.

They knocked it out of the park. He’s definitely one of those toys that you can see where the money went. From paint, to construction, to articulation, he’s really top notch. It’s a true achievement in terms of articulated robotic action figures. So much so, it’s what you’ll want to see in every 3A bot. Admittedly, I’ll probably find myself at least marginally disappointed by future 3A bot releases if they don’t have the same obvious attention to detail Ambush does. I understand corners have to be cut occasionally.. but now that I’ve seen what’s possible, it’s going to be very hard to go backwards.

So the big question is, should you buy 3A’s Real Steel Ambush? Well, to answer that, we have to clear up a few things first.

  1. Do you like toy robots? 
  2. Do you like the movie Real Steel?
  3. Regardless of how you feel about the movie Real Steel, do you think the robots themselves look really cool?

If you answered all 3 of the questions with “yes”.. then you probably already have Ambush on the way or you’re in the process of clicking the “buy button” somewhere.

If you answered question 1  as “no”.. then I’m really not sure why you’re reading this article and you are dismissed!

If you answered questions 1 and 2 as “yes”.. then don’t hesitate another second to shell out for Ambush.

If you answered 2 as “no” then see question 3.

If you answered 1 and 3 “yes”, then once again, I’d urge you to confidently hunt one down. I’m telling you, you’ll be very happy with your decision.

My gushing over the quality and attention to detail withstanding, you’ve probably already decide whether or not Ambush deserves a place on your shelf. I’m not here to try and change your mind about that. What I do hope I’ve managed to do is to shed some light on just how well 3A put this guy together. I want to put to rest any fears you may have had about whether or not they can deliver on the goods. Personally, thanks to this experience, I’m really looking forward to Atom being released. He’s easily my favorite from the film, and the prototype 3A teased at HK Venture already looks sick.

If you hated the film, and hated the robot designs, then there’s probably nothing for you here other than some amazingly shot photos (wink, wink, nudge, nudge). On the other hand, despite your feelings about the franchise itself, if you think Ambush is a really cool looking robot, then I know you’ll find a lot to enjoy by having him in your collection.

He’s positively one of the finest pieces 3A has put out to date…

that is, until Metal Gear Rex finally ships. 🙂

PROS:

  • An incredibly executed, impressively detailed giant robot
  • Just an astonishing amount of attention went into the sculpt, paint and the design of the joint articulation
  • Very accurate to the source material
  • One of the best looking/conceived products 3A has put out yet.

CONS:

  • The neck articulation doesn’t allow for left to right positions
  • Due to the high level of details that abound throughout the character, it’s a little tricky figuring out what moves and what doesn’t
  • The hip joints were/are incredibly tight and difficult to move, but this could be an isolated case
  • It’s a little thing, but it’d been nice if 3A included the wee batteries already installed so we could immediately experience the eye lights

.

..

A big thanks to Kim and Cody for getting this guy out to us! It was a pleasure. ~ knives

.

.

.

.

.

.

.

.

.

.

*Review* 3A Shadow and Light Tomorrow King Oya Two Pack

INTRO

I just spent a good 15 minutes perusing the internet for a quote that said something poignant about overcoming an obstacle or taking up a difficult challenge head on. “No guts, no glory”, that sort of thing. I was searching for something to set the tone and portray a sense of how I felt about winning the Shadow and Light set. A one liner, a “zinger”, a single phrase that could fulfill the entire needs of a proper article introduction. Instead, everything I came across had been tirelessly plastered as off-the-cuff Facebook status updates or otherwise publicized to death, thus sucking all the marrow of meaning from the words contained within. After reading dozens of these once-were-so-inspiring/my-how-cynical-I-must-be-to-feel-otherwise quotes, I decided to scrap the idea and instead go a more traditional route by giving a possibly over wrought rundown of the events leading to me winning this coveted set.

When Ashley Wood/3A announced the animation contest for the Shadow and Light set I almost didn’t enter it. The thing about 3D.. anything, is that it takes a lot of time to do. Exspecially if you’re doing it all from the ground up. I’ve been working as a character artist and animator for years, but my free time to devote to such an undertaking like this wasn’t (still isn’t) at all what I felt it needed to be. Given the one month deadline, my first thought was that I wouldn’t have the time to devote to it in order to pull off something I’d be really happy with..

My saving grace was that the day following the announcement, I had an idea that seemed a lot like a genuinely good and unique one. Something that I felt would go the opposite direction of the competition and hopefully set my work apart from the rest of the crowd. It was simple, cute and most importantly, something I knew I could get together in the given time-frame.

I’ve never been one to ignore inspiration.

I kissed and hugged my supportive wife goodbye, knowing well that in order to get everything together I wouldn’t be seeing her much over the remainder of the month. Every ounce of free time available to me was dedicated to the project. I set to work on modeling, texturing, rigging, animating, rendering, picking music, creating sound and the final post effects for the project. From the day the concept hit, right up to the last (original) day of the contest, I raced/worked.

Ash decided on the last day of the contest to extend it another 2 weeks. While a good thing for some, it definitely took a bit of the wind out of my sails. I was tired and felt all the momentum I’d experienced up to that point completely lapse. I’d pushed myself and put in some seriously long hours to complete the piece in the given time. Now with this extension in play, I simply had no more time or frankly, energy to put into it. I’d put off actual paying work, time with family and personal hygiene (joking!) for far too long. As a steady stream of some very strong animation submissions started to come in, I knew competition was going to be stiff. The best I could do at that point was to cross not only my fingers, but also all my toes and simply wait it out.

Well, you know the end of this story.

I won…

along with 4 others. A surprising, but awesome gesture by Ash to spread the Shadow and Light love, if only by a little.

If you’re curious, you can click the image above to check out my animation.

I spoke to Ash at SDCC about the set and he not only shared how excited he was about how awesome the set turned out, but also how humbling it was for him that anyone would take their time to contribute artwork/animation based off his creations. He was really proud of that and rightly so.

Skip ahead several long months later and my set has finally arrived.

Before I jump to the review I want to give full marks to all that took the time to enter the race and heartfelt fist bumps to those who also won a set. A big thank you to 3A! Thank you Mr Wood! I love these guys and feel honored to be included amongst the winners circle!

PACKAGING

I’m the proud owner of a one of a kind Shadow and Light TK set.

“But wait! There were other winners!”, I hear you exclaim!

It’s one of a kind because it has my name written neatly across the box in black sharpie. I have no idea who at the hatchery did the honors. I’m also unaware if it bothered the other recipients to have their set “defaced” by such cruel permanent markings. But me, I’m for it. It makes it feel personal.

One small difference between this set and previous 3A toys is that it was not shrink-wrapped. Just boxed, labeled and sent. Score one for the environment..

As you can see, the box sports some cropped photography of the pair on one side and a cool stencil style 3A logo (plus me given name) on the other.

WHAT’S INCLUDED

Two TKs. One black, one white. The dynamic duo come with two of their own color coordinated long swords.

Natch.

THE BREAKDOWN

I don’t feel I can really “review” this set in the truest sense of the word simply because one does not “review” or “judge” a reward/gift. If Grandma gave me brown socks for Christmas this year.. again, I’d smile, kiss her on the cheek and thank her. They’d most-like be thrown in the bin with the rest of the collection, never to be worn or seen again, but Memaw would be none the wiser.

That’s how it should be.

Of course you could argue that it’s not like I didn’t do anything for these guys. I did put in a ton of hours and toiled over the particulars. I’d certainly paid in time for the set many times over. But I don’t look at it that way. I look at it as a gift.

Simply put, it’s not polite to gripe about the gifts you receive. Not to say I have any gripes. Just if I did.. in this case, I wouldn’t tell you.

My reaction of the set right away was a sort of quiet “stun”. I’m not sure if it was the months of anticipation bubbling forth or what, but when I opened them up, I just starred at them for several minutes before even touching or removing them from their plastic packaging. I’ve never been very interested in the negro or blanco color schemes 3A puts out, however sitting in front of me as a set I can comfortably say they look amazing.

Light and Shadow are basically the same character top to the bottom as 3A’s 7bones member, Kyoku. The only real difference being the obvious color, or lack thereof. Shade, to be precise.

The head sculpt all 3 figures share are actually from last year’s Slicer Tomorrow Kings, Baka and Kyuuketsuki. Scar and all. It may not be my favorite TK head sculpt, but it’s dynamic and fun to pose.

One thing that really stands out to me is how squeaky clean the TK’s themselves are. Not a speck of dirt on their “skin”. Their clothes on the other hand, have a light dusting of weathering throughout. At SDCC this year, Ashley Wood told me that the set would have been done earlier, but he felt that the clothing needed a “touch of weathering to feel finished”. I’m sure some would argue that they’d look better sparkling clean top to bottom but for me, I really like the contrast.

It’s like they take showers, but can’t wash their clothes. Poor guys.

The Oya jackets are the usual high quality, impressively sewn articles. They look fantastic on and offer a wide array of dramatic pose possibilities. While I love the jackets, I’m considering setting these guys up jacketless as I have so many Oyas already littering my shelf.

We’ll see. I’ll let balance/aesthetics ultimately decide.

I really like that the teeshirt decals work best when you place the pair next to each other to form 3A’s logo. It’s a simple thing, but well thought out and melds these two together.

As I posed them for the various shots, I came to realize that despite their simple color scheme, these figures have plenty of character.

My take on them comes from a clichéd or otherwise well worn part of my imagination which seemed to dictate every pose I put them in.

Shadow is quiet and brooding. When he strikes it’s exact and efficient, not showy. He stays in the background and tries to go unnoticed. Light on the other hand seems as though he’d be much more animated, quick to act and stylistic in his motions. He stands in the front, brash and ready to lunge into action.

They are Yin/Yang and completely inseparable. Like their names, you can’t have one without the other.

THE FINAL WORD

That’s about all I have to say about this lovely set. A more in depth review of the particulars of this type (TK Oyabun) of figure will come in the form of my upcoming Kyoku review, but for now understand that I have some new favorites in my collection.

I will say that shooting the pair together had it’s own challenges thanks to my camera’s apeture trying to favor one figure or the other. I had many shots that I felt were going to turn out awesome that, once loaded on the computer were completely blurry and unusable. Regardless, I hope you’ve enjoyed the few I’ve put together here. Eventually, I’ll post even more on our Flickr and Facebook pages.

I’d want to encourage anyone who’s even remotely interested to get involved in the next contest 3A comes along with. I had a ton of fun in creating my animated short, despite it’s challenges. If you’re passionate about different things like drawing, design, photography, animation, toys, etc.. and they somehow correlate and come together in the form of a world wide contest, why wouldn’t you?

I’ve heard some who claim that these type of contests are a grand waste of time, or a matter of all us collectors jumping through hoops simply so 3A can gain some sort of free marketing. A bit of “dance monkey, dance”, “lick dog, lick” or whatever animal to mind controlled robot comparison is in fashion now. My thing is, if you enjoy doing it, it makes you happy and there’s an opportunity to get rewarded for your efforts, why should it matter to anyone else?

You know what? Screw those guys and their negativity. They certainly don’t have a Shadow and Light set..

nor should they.

PROS:

  • An amazingly lovely set that’s a true treasure in my collection

CONS:

  • None

.

.

.

.

.

.

.

.

.

.

.

.

.

*Review* 3A WWR Punter Bot Sniper

INTRO

“I have too many Grunts.”

That was my first thought as I unpacked my minty fresh, right off the boat, Bot Sniper. I have EMGY, Jungler, Stealth, DIY and now Punter.

“Why do I keep buying Grunts?”

That was the first thing I asked myself as I unpacked my minty fresh etc, etc…

It’s also a question I already know the answer to. I keep buying Grunts because they are awesome and incredibly difficult to pass up. Historically, all of them have been loaded to the gills (or ghillies? Whamp whaaa..) with gear. You buy just one of them and you have dozens of various load outs and looks you can set up. I think that’s what I like about them so much. Despite their same-ness, they’re all about variety. You can have 4 of the same exact Grunt and have each one look completely different. Gas-mask on/off, helmet on/off, vest on/off, jacket on/off.. you get the idea.

Of all the Grunts, The Punter promised to be the MOST exciting (for me) to date. The words “bot sniper” sent electric pulses from my brain deep into the nerves of my index finger, causing it to twitch over the “buy now” button. I steadied my hand, took a deep breath and as I slowly exhaled, clicked the button.

The wait is over and he’s here. I’ve had several days to play around with him and take some photos. He’s chilling on my shelf right now, displayed in a relaxed pose on the ledge. He’s part of my ever expanding collection, which as I look it over I find myself saying,

“I have too many Grunts.”

PACKAGING

3A continues their fine tradition of plopping some killer Ashley Wood art on the frontside of their boxes. Most of the time, the front of their boxes sport some A. Wood art  while the rest has some minimalistic design business to fill space. In this case, it seems like they went just a little further with it by adding a fun “bot killing point system” embellishment to the side.

One of my favorite 3A posters from SDCC 2012 also happens to be the graphic for the back of the box. DC target practice!

WHAT’S INCLUDED

Punter seems to come with a good deal less “stuff” than the previous Grunts. No jacket, no shield, no helmet, no backpack(s), no multitudes of guns.. all in all, a little less equipped. Lean and mean. The trade offs in gear include his ghillie suit, boonie hat, pistol and that little sniper rifle you may have to squint to notice at the bottom of the pic.

THE BREAKDOWN

I was super excited to get this guy. In just about any online FPS video game I play, 9 out of 10 I go with a sniper. I think I have an affinity for the sneaky, unseen kill shot. To me, it’s way more fun to find some cozy little nook in a tree or bush somewhere with a clear eye-line than to rush in head first into the fray. Ninjas, snipers and thieves for whatever reason, just resonate with me. So of course that would carry over into the types of toys I collect.

So I unpacked Mr. Punter J. Esquire and immediately attempted to load him up with his bot killing rifle. I was hoping I could kit him out with it in some sort of standing/firing pose like one might when hunting fowl.

Wrong. The dang thing is far to big, heavy and awkward for our proud sniper to hold like that. Were the wrist joints, and all associated joints which run up the length of his arm to his shoulder water tight, you might be able to manage it. As is, this gun was meant for prone shooting or at the very least, propped on the bits and pieces of fallen bots.

I know, I know.. it’s a giant bot stopping sniper rifle meant for static, one shot kills, not a run and gun M16. Still, I can’t help but  wanting the option.

So other than lugging an unwieldy bot killer, what makes Punter so different from the other Grunts? Well sir, not a lot. I’d have loved it if 3A had taken the initiative (and the extra time/expense) of sculpting an all new head for Punter. Giving him a grizzled beard those spec. ops guys always sport or something. But no, Punter has the same odd Charlie Brown-ish one eyed squinting mug as all the others.

It’s not the end of the world, he’s got camo painted on and the boonie hat adds some character to him. Wood said he was intentionally designed to be somewhat generic. “Meat for the Machines” and all that. So it’s a fairly neutral sculpt that you could do quite a bit with if so inclined.

Anyway, if he’s doing his sniping job right, you’ll never have the chance to see his face anyway.

Since I’ve had him, I’ve kept his boonie hat on. Like the 3AA baseball cap, it’s a little small for his noggin. It’s as if 3A thinks hats are meant to be worn “floating” on your scalp, with a gust of wind becoming your greatest concern. With some effort you can squeeze it down on his head to where it doesn’t look so ill-fitted. I think it’s rather dashing. All he needs is some cigarettes or a toothpick.

While Punter didn’t come with a coat or backpack, among other things, he does have an extra vest over the standard issue Grunt vest. I can’t tell if it’s meant to serve any other official purpose but aesthetic, but it adds some nice depth to his gear and looks good. Plus I found another use for it I’ll go over later.

The ghillie suit is a little confusing at first. When laid out it looks a little like an ugly bear skin rug with pieces that extend further than the rest but none that are really even. I’m still not 100% confident I’m using it right myself. There are little ties inside that you can use to secure it to Punter in various spots, though I’ve found simply draping it on him seemed to work just fine for me. I don’t know how accurate it is to real life ghillie suits, having never had one myself. It reminds me a little of a tangled lions mane as though he was about to put on a home-made production of the Wizard of OZ. I like lions, so it’s cool.

Setting Punter up in some appropriately textured shrubbery, suit on and high powered rifle at the ready, he really does almost vanish from sight. The tip of his gun extends beyond the camouflage wrap, sure to give off his position to the most keen eyed of targets but in most cases I’d say the camo is effective.

I have to say, the sniper rifle is a bit of a hassle to deal with. It’s long and bulky. The gun grip is big and just fits in Punters right hand. There’s no place for him to grip the gun naturally with his left hand for added support. The extending legs are a really cool touch, but basically, if you want your sniper to look like he’s sniping you have to wrestle him down into a prone sniping position. There’s no short cuts. Once he’s set up like that, barring available shelf space, you’ll probably leave him that way.

I like to move my figures around from time to time. Sometimes this just means simple adjustments that take a few seconds to pull off, sometimes it incorporates other characters and a half hour. I like the flexibility. Because of that, I’ll probably pose Punter in such a way that doesn’t require him to hold his gun. That in itself has it’s own challenge as there is no built in and defined ways for him to actually carry it. No strap, top handle, nothing. You have to get a little creative.

Having Punter hold it under arm like a briefcase only worked temporarily, eventually the wieght of the weapon and the relative looseness of his wrists caused him to drop it. Checking out his back pouches for some sort of loop or strap that I could somehow fasten it to, I realized that the extra “over-vest” was sitting pretty loose on him.

Bingo.

If the over-vest is loose enough, you can feed the barrel of the gun through the shoulder loops on his back. To me it looks pretty official, like it was meant to be carried that way. Near nested tree’s be damned.

I’m not saying it’s the best solution or that it’d be practical in real world circumstances, but for now it works as decent hands free option.

What it really comes down to is that I wish 3A had made the gun so that it breaks down in some way; becomes more portable. Punter himself is essentially a stream lined Grunt. Lean and mean. He should be able to get in and get out of a situation. A sniper needs to be able to move with his gear though. As is, Punter would have to ditch the canon if discovered and run off with his bare essentials.

That being said, I sort of like the bare essentials.

Punter comes with a the same trusty side arm his cousins did. I’m not complaining, I like the gun and the fact that it actually fits properly in his hand. The new hip holster it fits in is a pretty nice touch as well.

THE FINAL WORD

I realize I didn’t have a whole lot to say about Punter. For this particular review, I tried to let the pictures do the majority of the talking. The reason is, he’s a Grunt. If you have one, I’ve covered the differences and you know what else to expect out of him. If you don’t have one well, you should remedy that. They’re great figures! Tons of gear, a good deal of configuration options. All and all, a good time and worth the price of admission.

Overall, I’m a little conflicted. Honestly, I wasn’t completely blown away (pun) by Punter (double pun? Does that negate the first?). He’s a Grunt so he’s definitely cool by association. I like his hat, snug as it is. The ghillie suit is a really nice accessory that gives him a unique look thats fun to play with and display. But the main call sign of this particular figure is overshadowed by it’s ridiculous size. In a sense, Punter’s rifle reminds me of the rocket bullet that came with the TK Heavies. It looked cool and at first, I did all I could to pose him with it. After awhile I just got annoyed with the fact it had no real natural place on the TK and it went back in the box. Despite being a good deal more useful than the Heavy’s bullet, I could totally see myself doing that with Punter’s canon just to get it out of the way. Of coures, without the sniper rifle, what kind of sniper would he be? He’s back to being just a Grunt.

The good news is that Punter is still available at several online retailers and sitting at his original MSP. Even on “the bay” you can pick off a few decent prices. If I didn’t already have so many Grunts in my collection, I’d be thrilled with this guy.

As it stands, he’s a solid addition to my army but not one I’m sure was absolutely necessary.


PROS:

  • A different “type” of Grunt for your army
  • Ghillie suit makes the character. Very fun to mess around with
  • Boonie hat looks great on him
  • Gun is an impressive piece of hardware and looks awesome when set up right
  • Nice box art

CONS:

  • His rifle is so huge and unwieldy that it severely limits what you can do with it
  • Same Charlie Brown head sculpt as all the other meat for the machines
  • Take away his rifle and ghillie suit and he’s basically a stripped down version of the Grunt you already have.

.

.

.

.

.

.

.

.

.

.

.

.

.