INTRO
This may be the shortest review in RtR history. I won’t even call it a review, it’s more of a “Hey kid, quick peaking in my window!”
I love Valve. Not to sound like the guy who says “I love lamp”, Valve is a game company that makes awesome games. Half Life, Portal, Counterstrike, Left 4 Dead, Team Fortress, etc etc.. Games that I’ve been playing since I was a wee boy. They make magic in a box and I’m a long, long time fan.
When 3A announced their partnership with Valve software, I literally did a back flip over a donkey. Hunting down a donkey in Hawaii is more difficult than it may seem, but the occasion called for and justified it completely.
I imagined how awesome 3A’s version of D.O.G, The Combine or Zombies would be. As cool as Adventure Kartel was, I thought Team Fortress figures would be even cooler. An image of a 1/6 scale Freeman sitting on my desk with his bloody crowbar and “buddy” headcrab came to mind almost instantly.
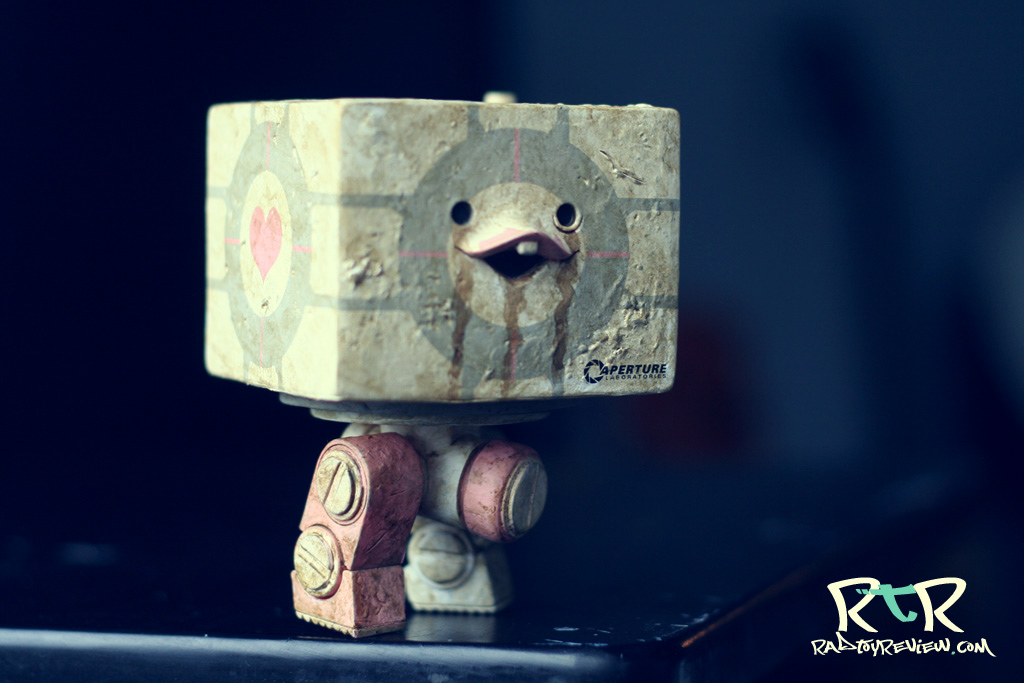
Whelp! Instead of any of that awesome sauce, 3A’s first offering to us was this guy. A toothy, smiley 1/6 WWR (Portal?) companion square. Basically 3A’s iconic Square with the decals of a companion cube.
Cute.
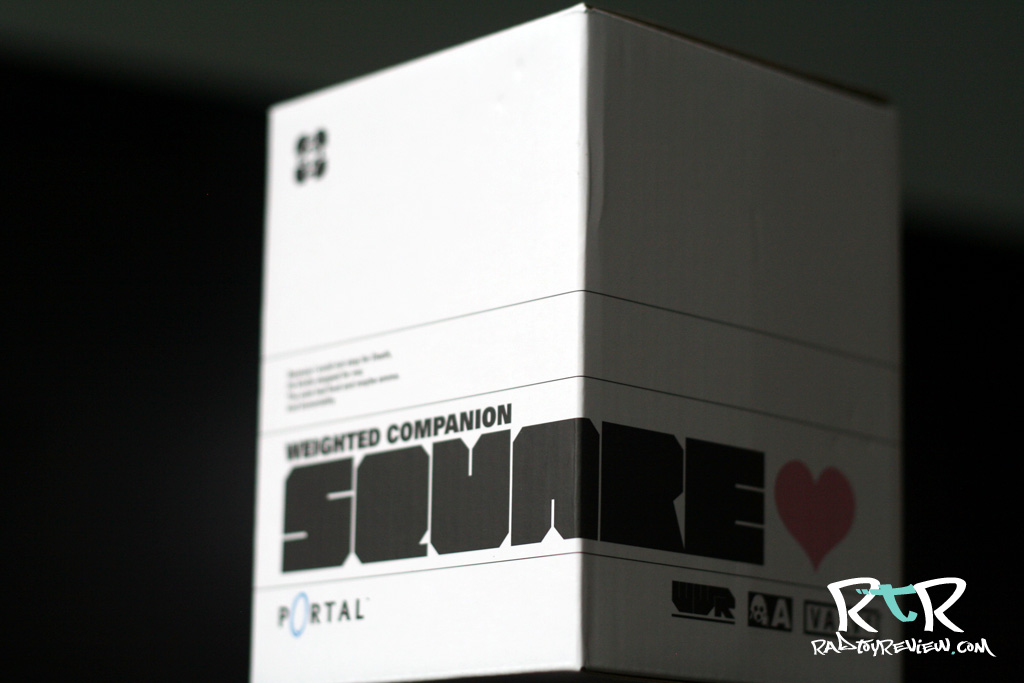
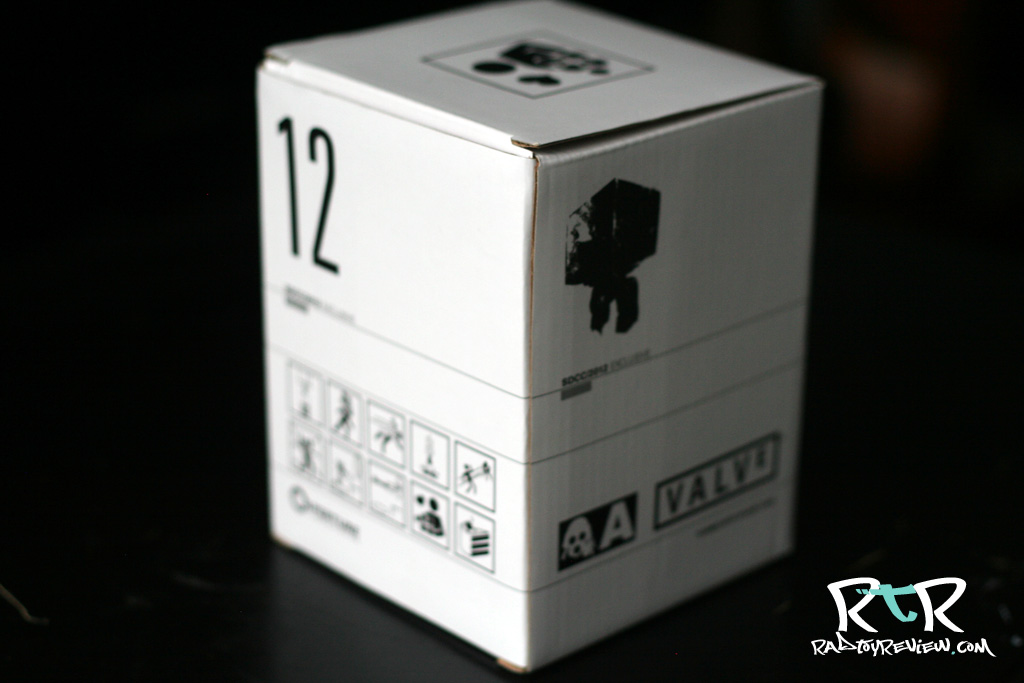
PACKAGING
A clean white box is the initial home of your companion square. Some nice decal/design work that seamlessly integrates a bit of 3A and Valve’s unique charm


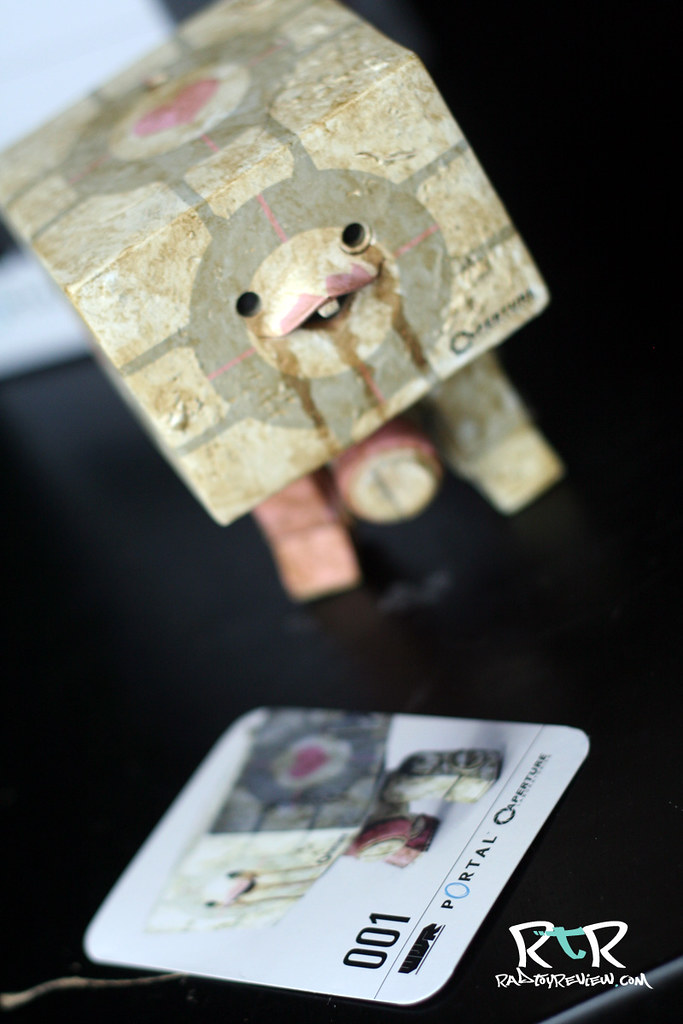
WHAT’S INCLUDED

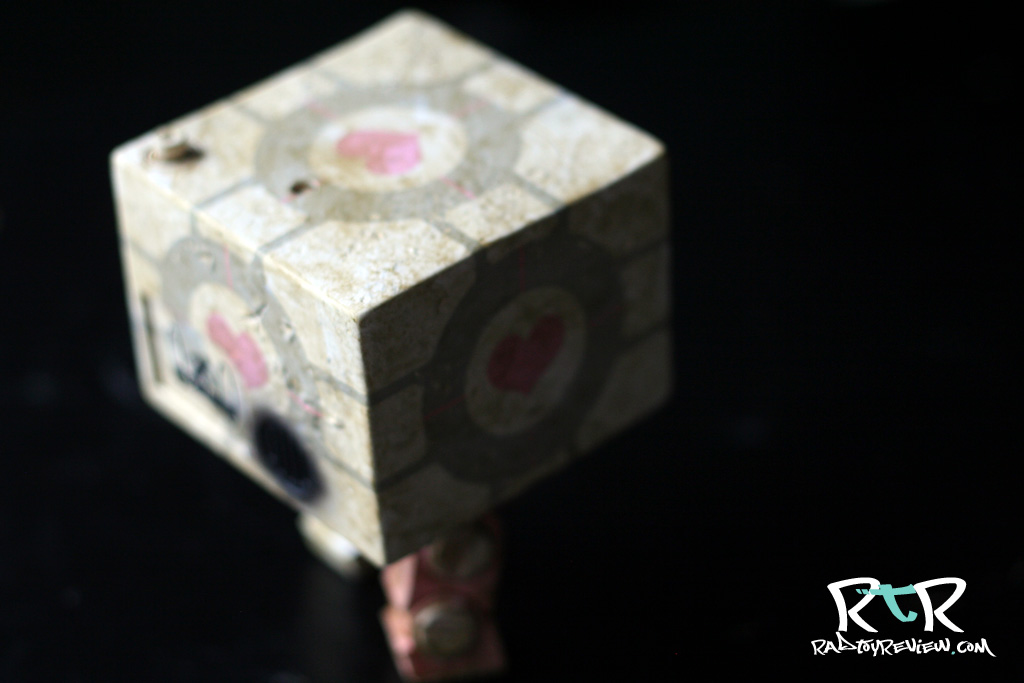
There’s the little guy! Daaawww… Other than the cutest little square I’ve ever seen.. Yes he IS! Other than bucky here, you also get a card that has codes and what not on the back that supposedly does something awesome somewhere Valve-y.
I admit, I have no clue what it does. I’ll need to load up PORTAL and look into it further.
THE BREAKDOWN

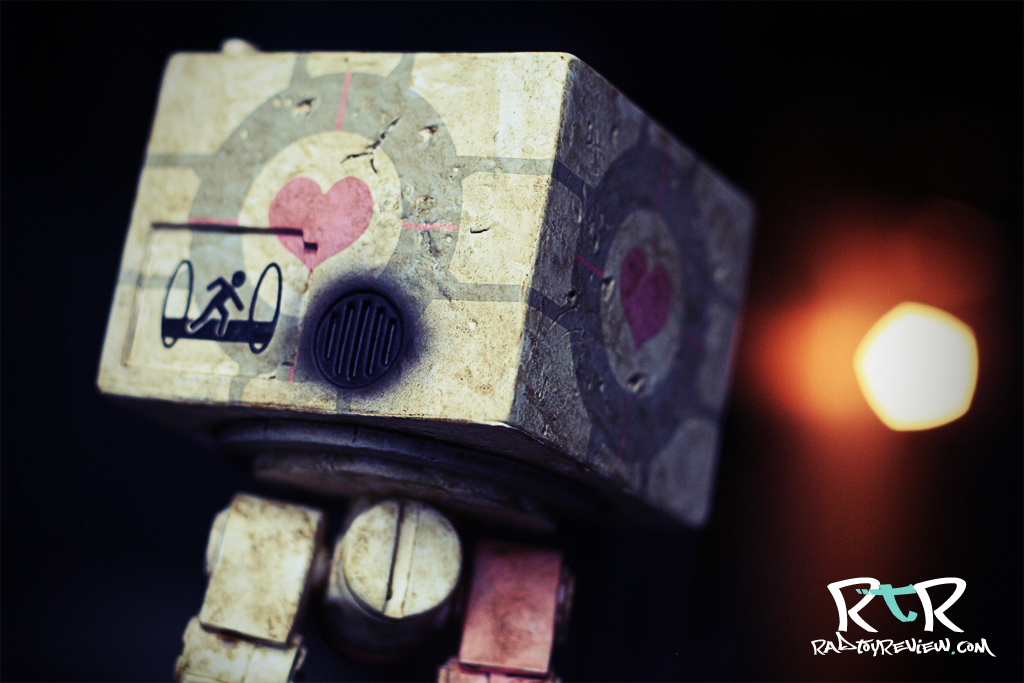
I’ve always preferred the classic stub legged, two eyed squares to the newer long legged, mono eyed ones. I had a.. we’ll call it.. impassioned discussion with a friend about why one is better than the other.. he standing on the opposite side of the fence than me on the subject. His argument was that the stub legs never made any sense in WWR. How are these little guy suppose to be scouts, move quickly, slip behind enemy lines etc? Plus he hated their goofy, cutesy face.
He said, “The longer legs on the MK2’s made a lot more sense for recon. Plus, the monocle eye is far more menacing and creepy.. even with that buck tooth grin.

And there it is. This is a robot with buck teeth. I’ll repeat that, a ROBOT with freak’n buck teeth. Long legs or not, it’s not SUPPOSE to make sense. Why are you trying to make it do something it’s not suppose to do? THAT doesn’t make sense.
To me, aesthetically, these MK1 style squares are cute and perfect just as they are. They’re iconic to 3A and will remain that way long after we’ve all forgotten how ugly and stupid the MK2’s were. Argument won, simply because this is my site. Suck it Garrett! 😉

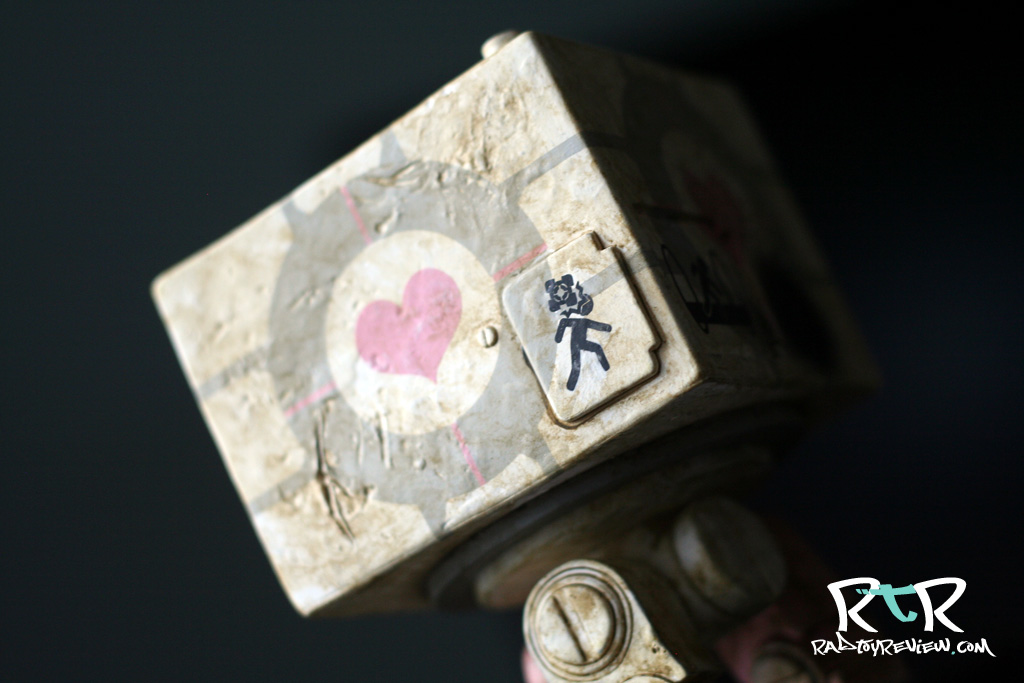
Honestly, there’s not a ton else to say about this guy. The paint and weathering is of your standard grade A, ThreeA quality and the companion cube likeness is immediately recognizable. The heart shaped decals look like and are where you’d expect them. As an afore mentioned fan of all things Portal, it’s fun to see all the little references such as the “Aperture Science” logo and falling cube warning.
Basically what it’s going to come down to is if you like the MK1 squares or not. Also, are you man (or woman) enough to deal with pink hearts on your toys? If the answer is “yes” than you’ll love this guy.

I’ve gotten a few reports from people saying that theirs has a different decal on the back plate than mine. I wonder how many variants there are…
FINAL WORD
I know a lot of people were moaning that this was a stupid SDCC publicity stunt and not at all something the fans wanted. Where’s our Gordan Freeman? Where’s our D.O.G? Where’s our Left 4 Dead Zombies? Why isn’t the grooves of the companion cube sculpted into the square instead of just painted on? The list of not-long-for-this-world horse beating goes on..
Look, this was the first thing out of the gate. To me, it’s a handshake. A glimpse meant two give us a good idea that these two companies are joining up and are planning some cool stuff down the line. We’ve seen glimpses already of the incredibly intricate Portal bots on display at 3A’s Reventure. The other SDCC exclusive was from Team Fortress, the Heavy’s “Sandvich”. I think that alone shows we can expect some really unique things to come from this partnership.
And I, for one, am really looking forward to what’s next!

Pros:
- MK1 Squares are the best Squares
- The Valve/3A partnership exists!
- Buckteeth robots are indeed cute
- The paint/weathering is done very well. Not a quick or sloppy app. in sight!
Cons:
- SDCC exclusive makes it more difficult for fans to get
- If you don’t like bucktoothed robots, this guy won’t do anything to change your mind.
Help us improve this site by letting us know what you think! Follow us on Facebook and Twitter to stay updated on all the latest reviews, previews and toy news!
/
/
/
/
/
/
/
/