

It’s that time again people! The end of 2012 brings with it the dawn of 2013, which gives us good cause to levy the hammer and proclaim our picks for the top 10 toys of the year! It was a little tricky compiling this list. For one, I’m slightly touched by a fever.. one in which cowbell has no power and only various heavy doses of sudafed seems to keep somewhat tamped down. For another, I realized going over my shelf that each toy in the list has it’s own set of qualities that seem to outshine some yet are overshadowed by others. While one toy may be incredibly fun to play with, another may look impossibly realistic thanks to an astounding sculpt and/or paint job. What merits equate “Toy of the Year”?
As with any review, 99% of it is opinion. In this case, the opinion happens to be mine. I hope you’ll find some common air here and there but even if you don’t, I’d love to hear from you and get your thoughts. Let us know what your top 5, 10, or heck, 100 toy list is this year!
To qualify, the toys need to have been shipped/delivered within 2012, though not necessarily released (sold).
Without further ado, the top 10!
10. 3A x Bandai Zaku Gundam Inspirational Model
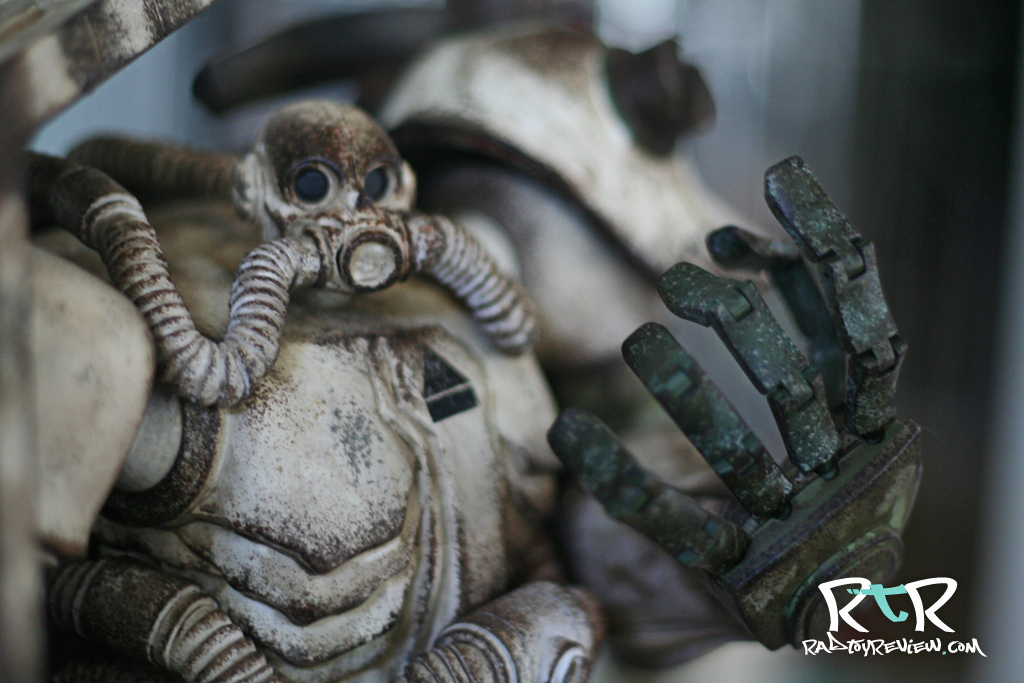
I’ll say it now to get it out of the way, I’m a big fan of what Ashley Wood has done so far with 3A’s Gundam license.
The purest may disagree with me. Ashley Wood’s Gundam Zaku creation polarized fans of both 3A and Gundam when it was released earlier this year. Many fans called foul after seeing that Wood unceremoniously got rid of the mono eye that’s been so inherent to the Zaku character. Others saw it as simply a hybrid of sorts, between 3A/Ash’s own gas mask-sporting Noms and Bandai’s iconic evil robot. While I could understand the disappointment some fans may have felt seeing the design stray so far off track from what was expected, I was more than blown away by just how dynamic the figure came out. As a friend of mine said, “Zaku looks like more of a giant space marine than a Gundam robot.” So it’s called Zaku, but it doesn’t really look like Zaku? Strangely, I have zero problem with that. I truly hope it’s not the last we see from the partnership.
You can read our full review of Zaku here.
9. Play Arts Kai Metal Gear Solid: Solid Snake
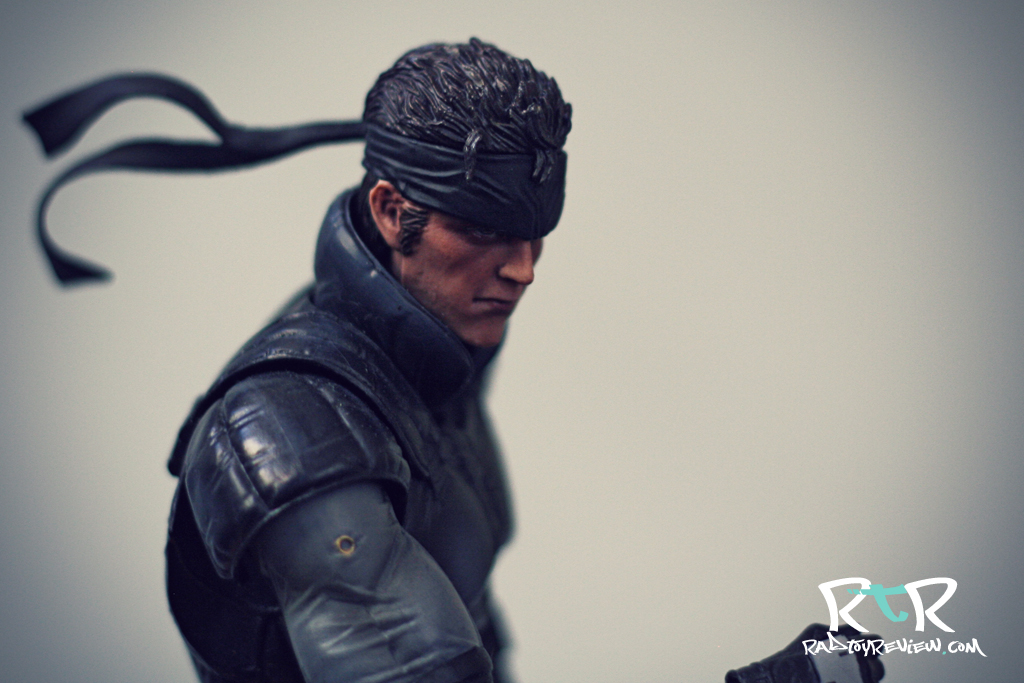
As the only non-3A toy on the list this year, Ol’ Snake is the odd man out. Still, the joy of seeing Square Enix Play Arts Kai releasing such a great quality version of one of my favorite characters in video game history soundly earns him the spot. I can’t WAIT for more classic Metal Gear Solid figures to roll out from this line.
Read our review of Solid Snake here.
8. 3A Action Portable (AP) Zombs
We never did get around to writing a review for these little buggers, but that doesn’t mean we didn’t get around to playing with them to our heart’s content. The action portable Zomb infestation was easily one of the most exciting events for 3A fans this year. With several blind boxed (carded) options to be hunted down, the BST action reached a fever pitch. Ultimately, the excitement died dramatically once they actually started to land on doorsteps. Fairly heavy saturation of certain variants caused their perceived trade/sell value to plummet and many can still be had for a song. Which is awesome, because these brain chompers are awesome!
So ready your vocal chords! The enjoyment of these little guys definitely continues and if you’ve yet to grab any yourself, they shouldn’t be too difficult to track down.
7. 3A HK ReVenture Old Guard Tomorrow King

I hesitated putting this guy on the list since they were relatively difficult to get a hold of. You either had to be one of the lucky souls to actually attend 3A’s ReVenture event in Hong Kong or be lucky at the draw to snag the few “left overs” dripped to Bambaland a few weeks afterwards.
The reason he’s here is because he is a classic Tomorrow King, through and through, the design of which is so near perfect, it’s difficult to explain what makes it so. Somehow, Ashley Wood and 3A have hit the nail squarely on the head with TKs, and fans claw at their screens and jazzercise in unison each time a new one comes along.
While the red shirt variant wasn’t on the top of my list among the four available, I still count my lucky stars to have scored him. He’s earned a spot both front and center on my shelf, as well as right here in the top ten.
Read our Old Guard TK review here.
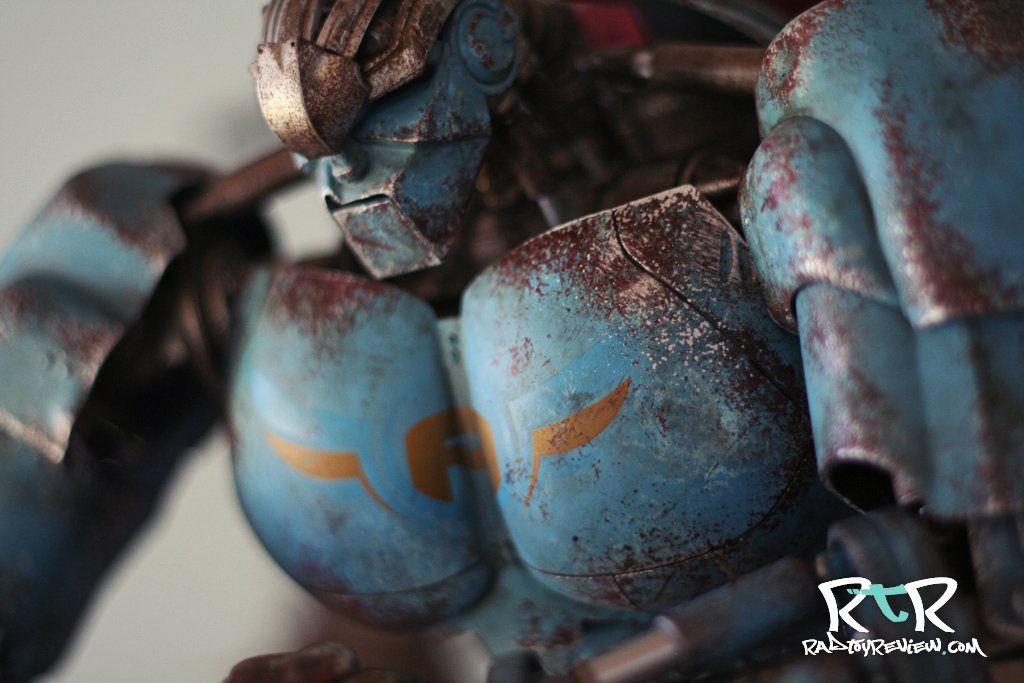
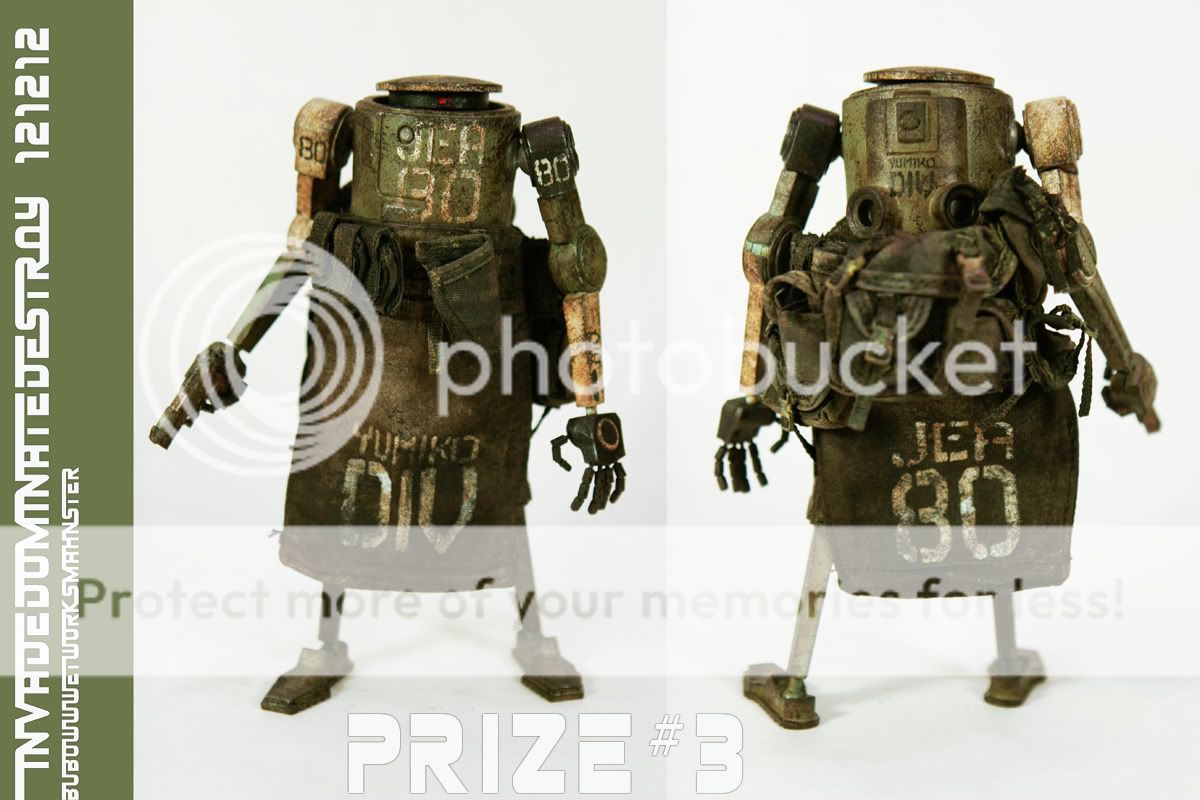
6. 3A WWRp/WWR Caesars
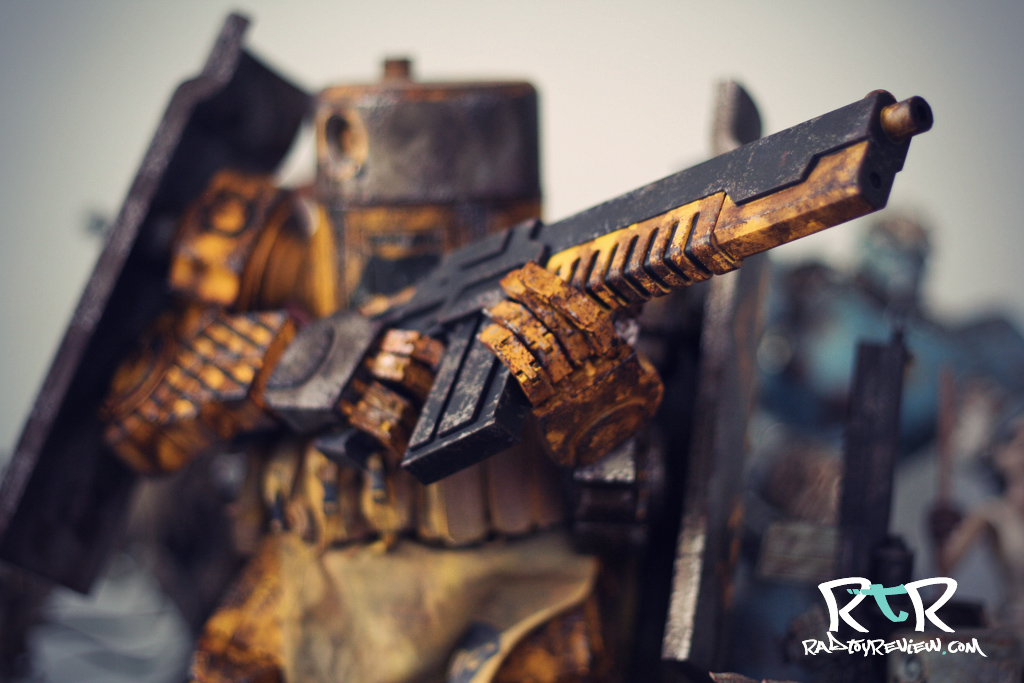
Yeah, I combined Caesars in both scales for my number six spot. The massive and mighty 1/6 WWR Caesar is astonishing to see on display. Since I went with an EMGY colorway, mine is set up with my other EMGY figures and he looks amazing. From the paint details to the articulation, everything is spot on. That being said, I don’t ever remove him from display or even try to repose him. He’s a little too cumbersome and tucked back behind other things to easily manipulate. Instead, he sits there to be admired in all his glory from a safe distance.

On the other hand, the 1/12th WWRp Caesars are the perfect size to pose and play with. While we still haven’t gotten an official review together for them, I’ll go ahead and spill the beans that these guys may be 3A’s perfect 1/12th robot toy. I can’t compare apples to apples as I chose the JEA and RIP colorways for my WWRp opposed to EMGY in WWR, but I can say that I’ve interacted with them a lot more. They look and feel more like toys and so I end up treating them as such.
So at one scale, 3A’s Caesars are astonishingly BA to look at, on another, incredibly fun to play with. In my eyes, it’s a tie. A win – win, whichever way you go.
Read our full WWR EMGY Caesar review here.
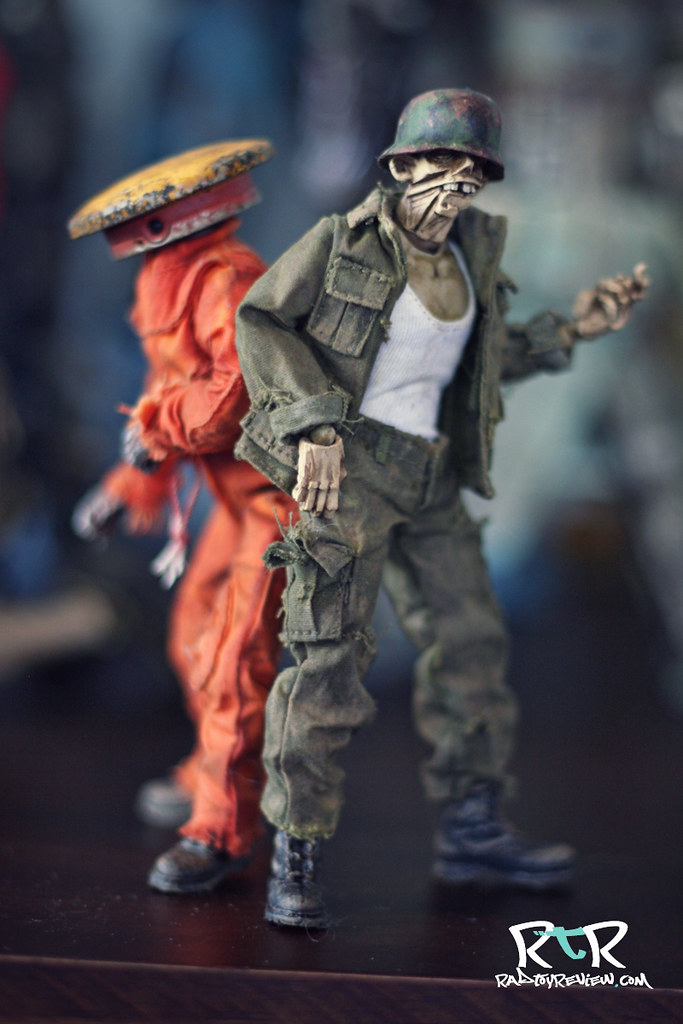
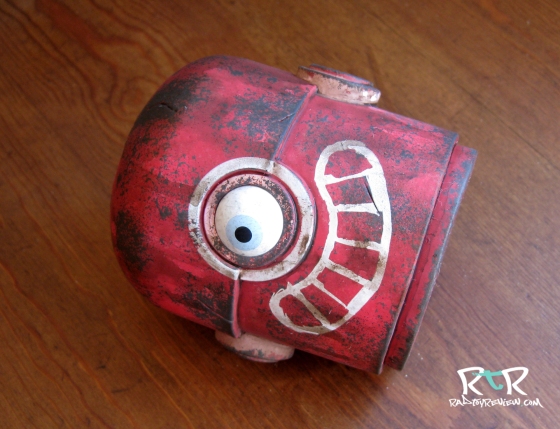
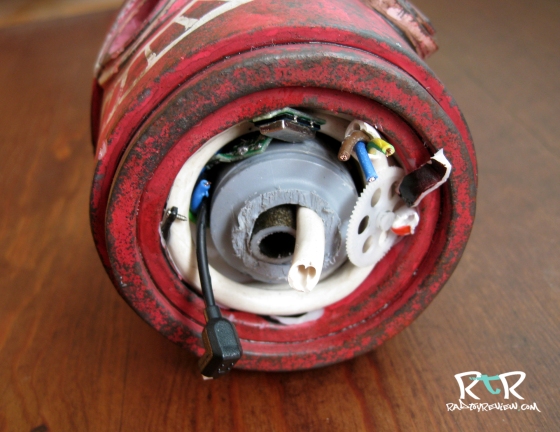
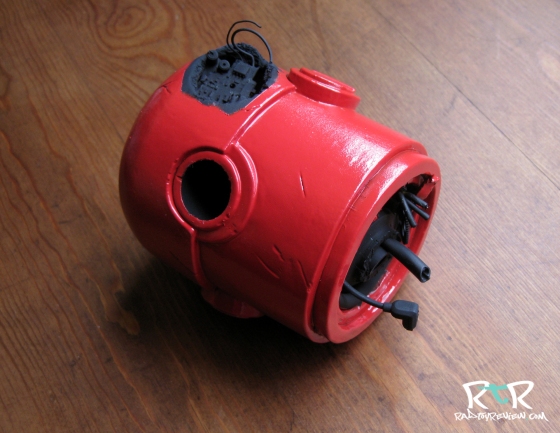
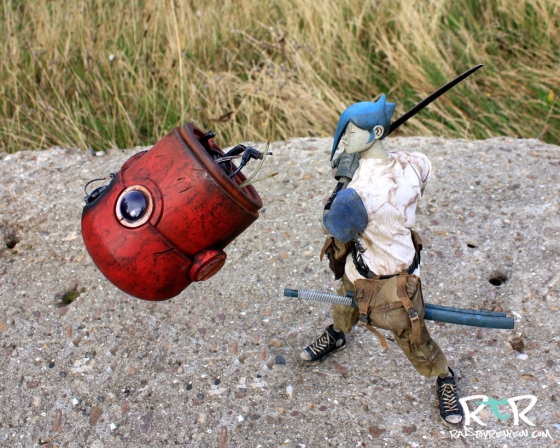
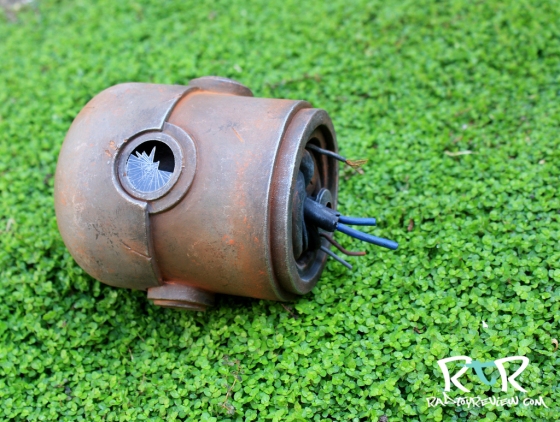
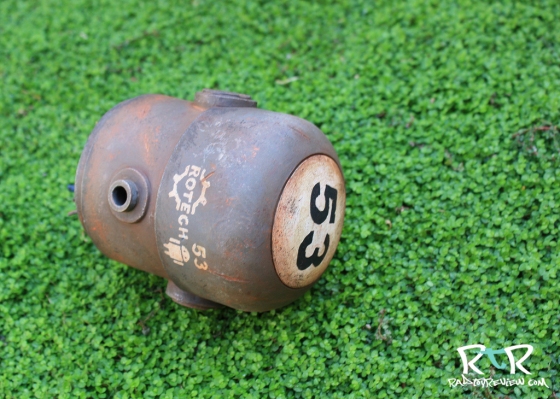
5. 3A Jungle Vet

We’re only at the halfway point of this top ten list, yet we also happen to be at the toy that I had the most fun with this year, Jungle Vet. Of the many “sold blind” new Adventure Kartel figures, he was among the most anticipated. I admit, I assumed he wouldn’t warrant such bated breath. Boy was I wrong.
Despite his kit-bashed appearance, the combination of articulated fingers and mono-eye contributed to making Jungle Vet one of the most fun and often posed toys in my collection. The photoshoot for our review lasted all day, and it was one of the few times that it didn’t feel that way.
You may be tempted to shoe-horn in here a member of the Finger Gang or even King Thumb himself as they share many of the same traits as Jungle Vet, but I think JV’s Ankou head with it’s rotating eyeball give him the edge. That and he was first!
JV is a goofy, and most importantly, FUN addition to anyone’s collection.
Read our full review of JV here.
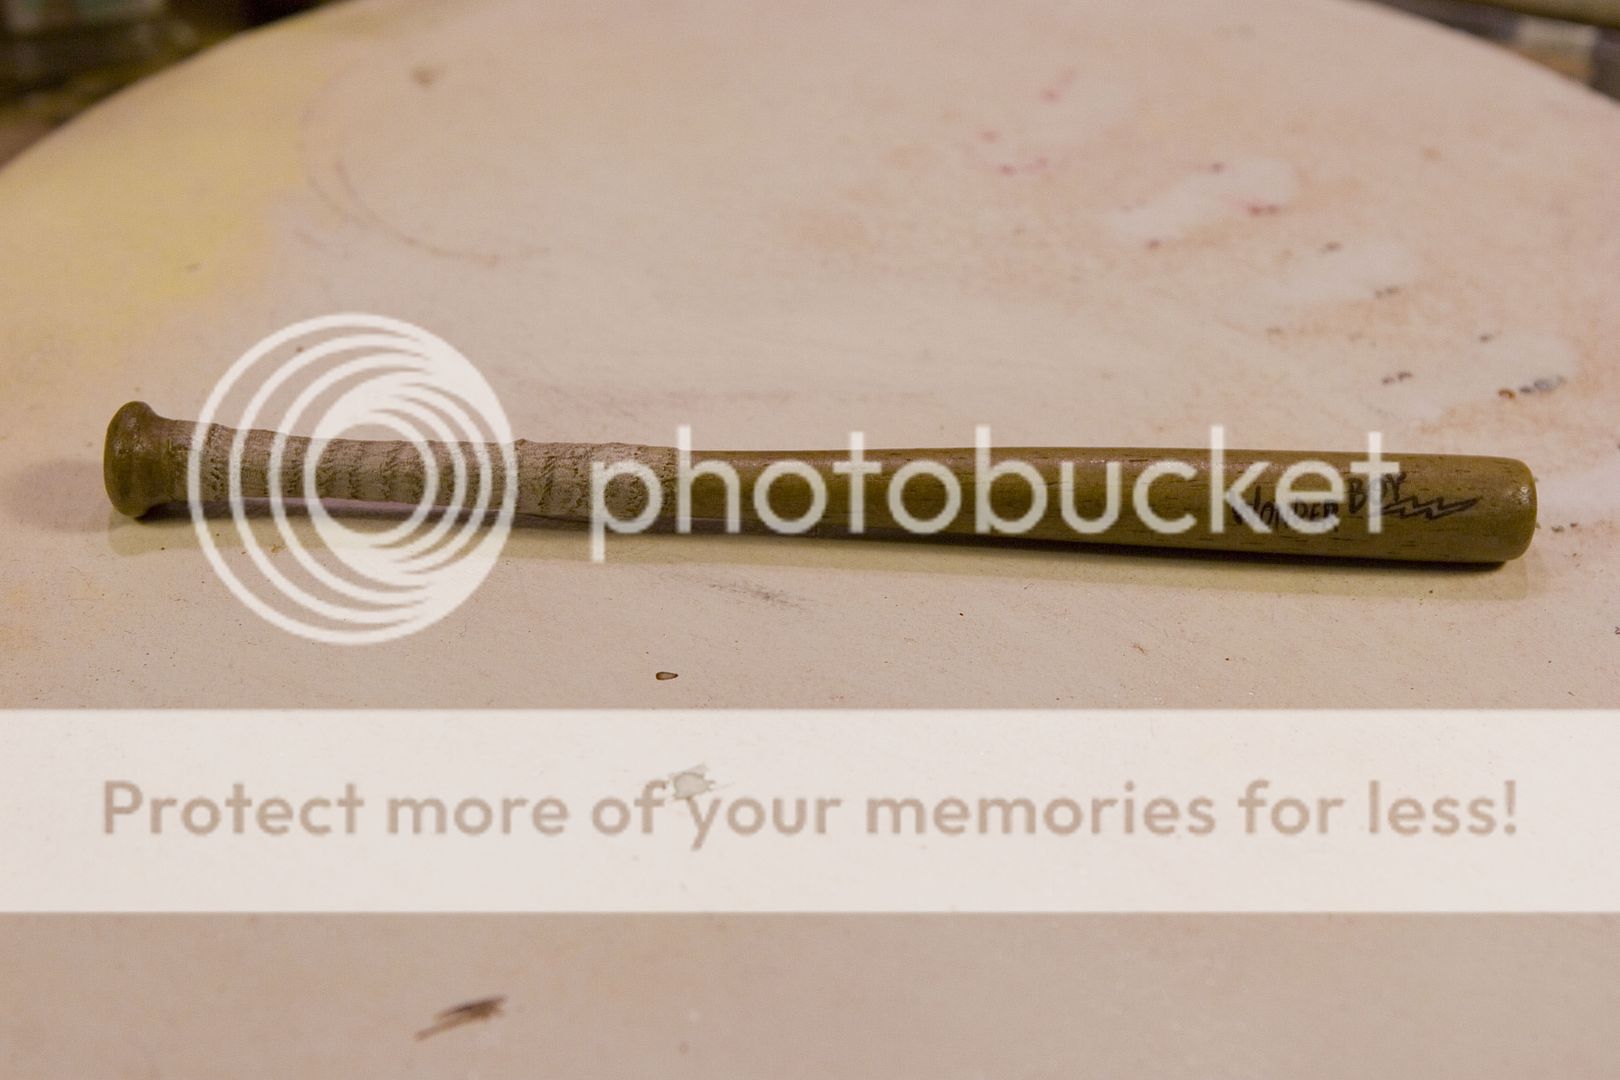
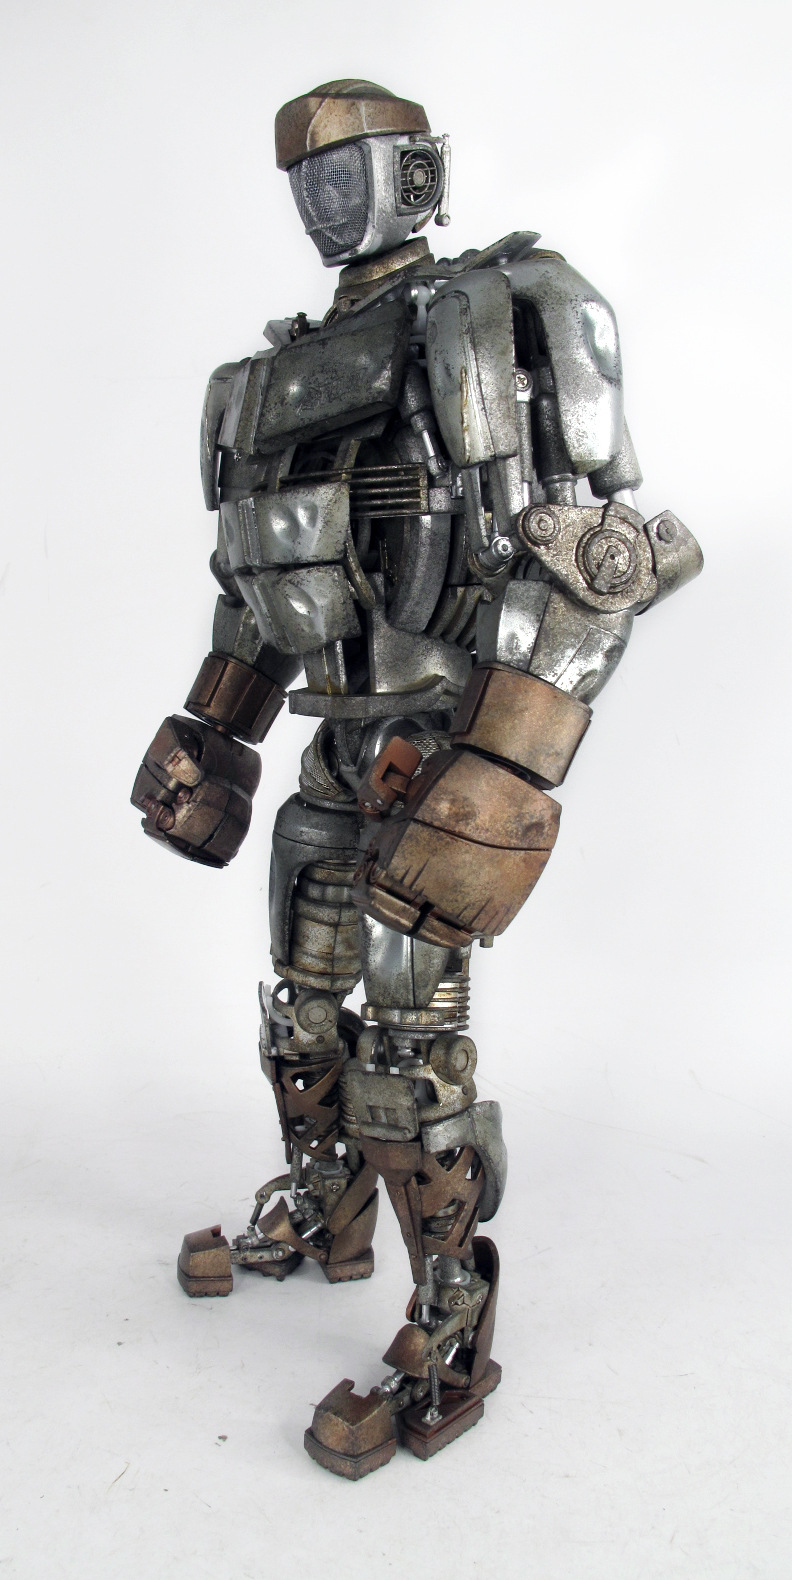
4. 3A Real Steel Ambush
If you had asked me 6 months ago if I’d have a toy based on the Dreamwork’s Real Steel movie in my collection, much less in my top ten of 2012 list, I’d have given you a sideways glance that’d cleave you in twain. The movie was.. well, it was what it was. Big CG robots, punching each other time and time again to the tune of a thin script and a fairly silly plot. The idea of making kids toys based off the line is a no-brainer. On the other hand, the thought of making a high-quality, expensive, designer toy based on the franchise sounded nuts.
3A didn’t see it that way. They played to their strengths and showed the industry how it’s done. They took a mediocre, second rate, movie character and turned into one of the coolest, most surprising and detailed toys in my collection. If you have him in yours, you know exactly what I’m talking about. If you don’t, good luck finding one for a reasonable price as they’re pretty scarce. The good news is, it looks like Atom is right around the corner. I wouldn’t miss out if I were you.
Read our full review of Ambush here.
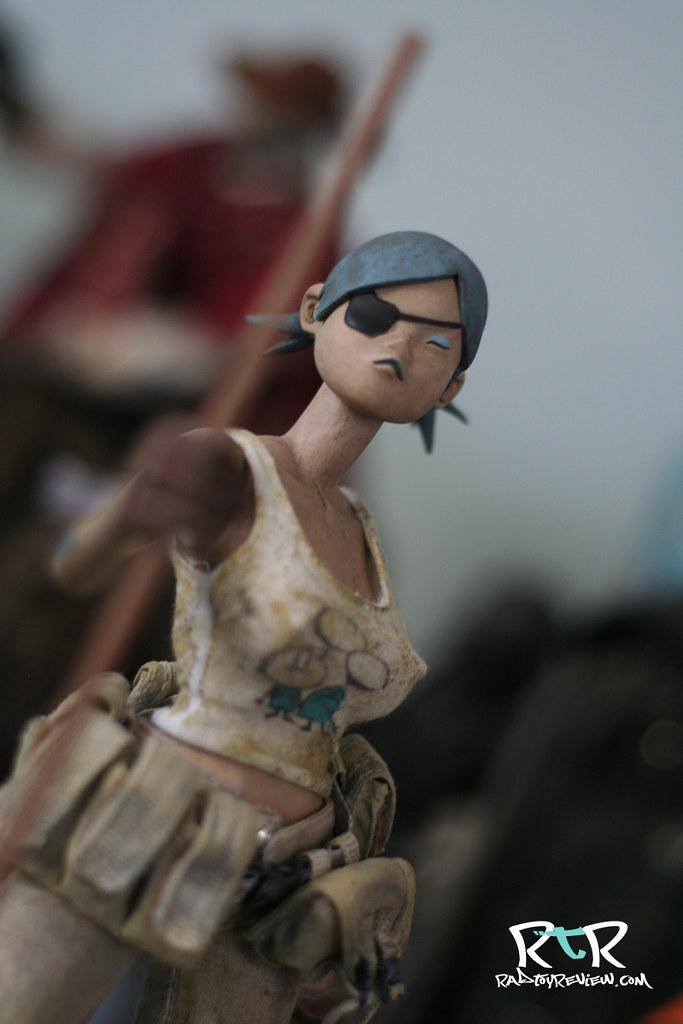
3. 3A Queenie of 7 Bones
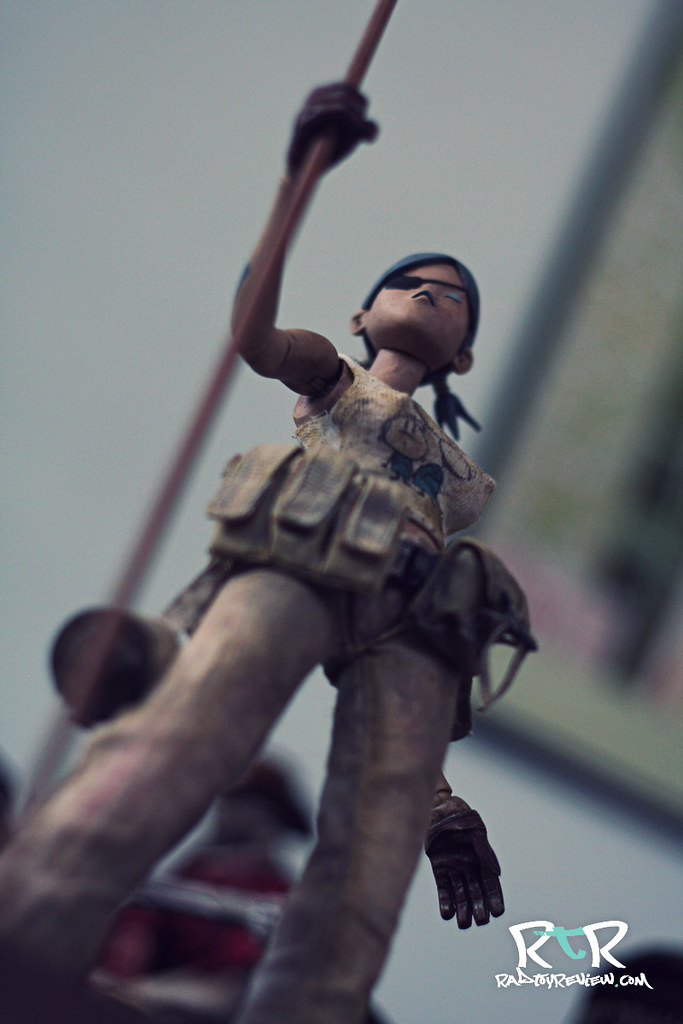
The 7 Bones collection from Ashley Wood’s Popbot line is one of the most readily collected amongst 3A fans. To the majority of Popbot aficionados, it’s hard to go wrong with Tomorrow Kings. They’re basically samurai crossed with jedi in hip, urban gear. So, generally epic. They are assassins and warriors for your showcase that are as fun to play with and pose as they are awesome to have on display. Tomorrow Queens on the other hand, have always been relegated to simply standing there due to their vastly more limited articulation/clothing combination. To many, they come off as glorified if not overly sexualized barbies with bigger boobs and slightly more fire power. Many love them, but the love isn’t nearly as widespread. I’ve had a few in my collection over the years, but they’re always the first to go when some collection thinning is in order.
That all changed with Queenie. Unlike much of what we see out of 3A, from clothing to sculpt, Queenie is/was completely new. As the leader of 7 Bones, Ash thankfully saw it fit to give her a new, more articulated body as well as a bit more dancing room in her pajamas. She’s also the only 3A figure to carry a bo staff and sport an eyepatch (other than Bleak’s dog, Custard). She’s still curvy and almost awkwardly big boobed, but she comes across as a no-nonsense tough girl who can handle herself on the battlefield.
Queenie feels like an individual and all her own. Among the multiple variants of Zombs, Tomorrow Kings, Grunts, Dropcloths, Caesars and Popbots, that’s an incredibly refreshing thing.
I’m crossing my fingers that 3A has more unique characters like her in store for us in 2013.
Read our full review of Queenie here.
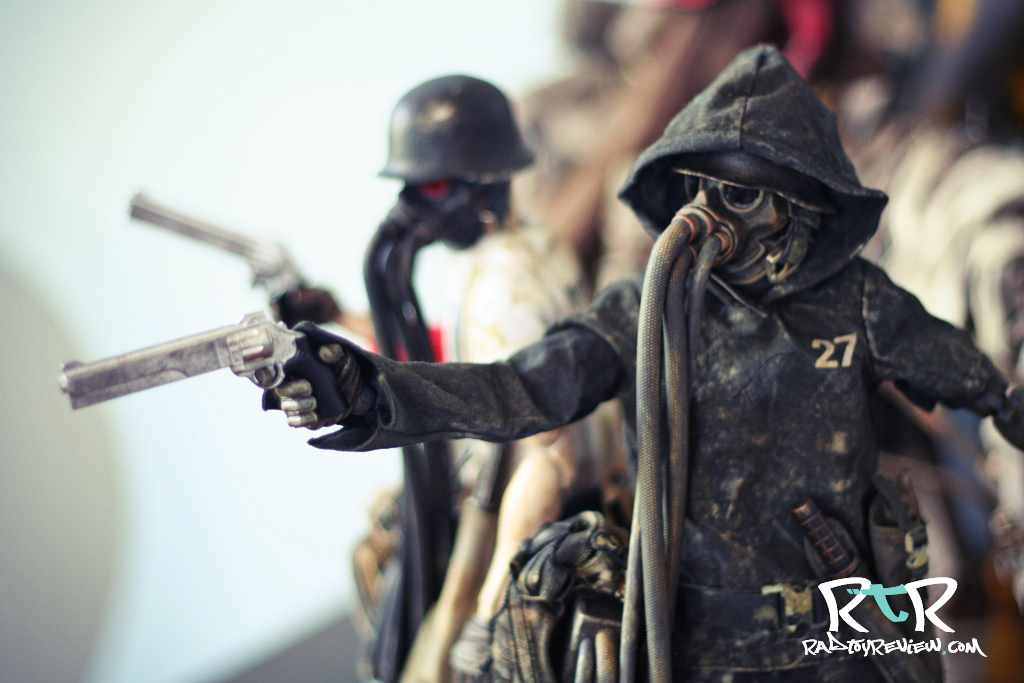
2. New Noms 4th and 27th
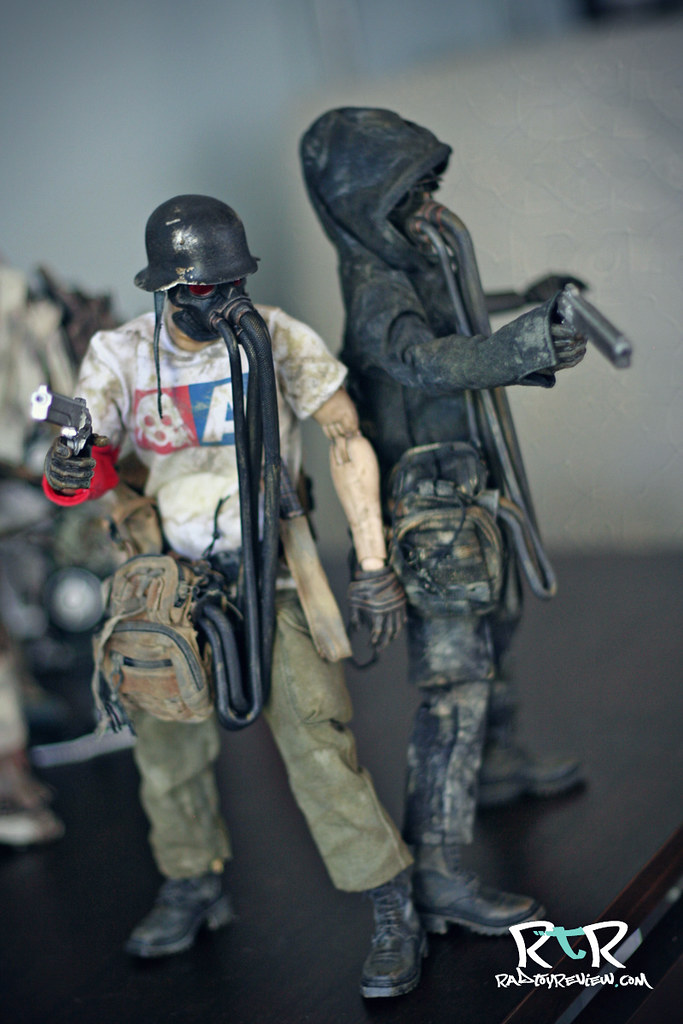
When I saw the new Noms at SDCC this year, I was ecstatic in the confident knowledge that I had broken down just weeks prior and pre-purchased both. Behind the shiny clear glass, they looked amazing. The new Noms consist of Nom 4th, a fit redesign of the orignal Nom De Plume and Nom 27th, a dark all new take on the classic design, under the guise of “disciple”.
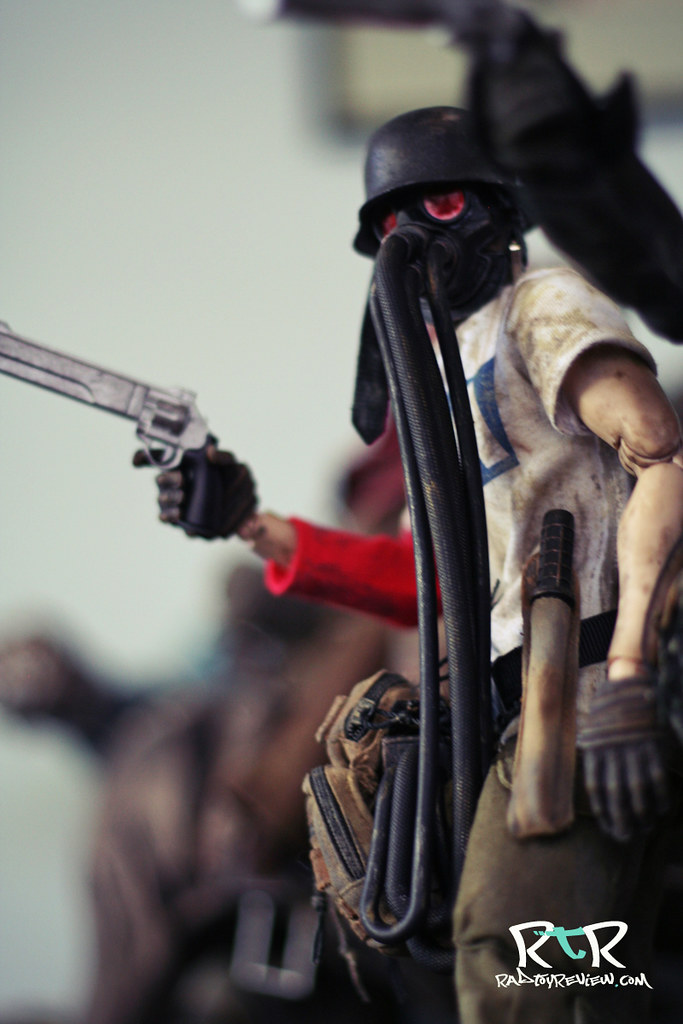
In that glass case on the showroom floor, Nom 4th was the show stopper. Once the boys finally landed on my porch and I got them free of their packs, Nom 27th took the lead by a nose with his cool hooded shirt and substantially more menacing appearance. I bounce back and forth between which I prefer, thus the shared ranking on the list.

Ashley Wood claims these are the Noms he wished he could have made from the beginning, had money been no object. A generous host of gas mask hoses, actual laced boots, sheathed dual guns and baton as well as some truly lovely stitching support that claim. I still love the classic Nom designs with Jung De Plume being a prize in my own collection, but the new Noms certainly have the character and style befitting the Nom name.
If you missed out on 4th and 27th, don’t loose hope completely. If you’re interested in grabbing a 3AA 2013 membership, come January, you’ll have a chance to grab Blanc Hunter as part of the deal!
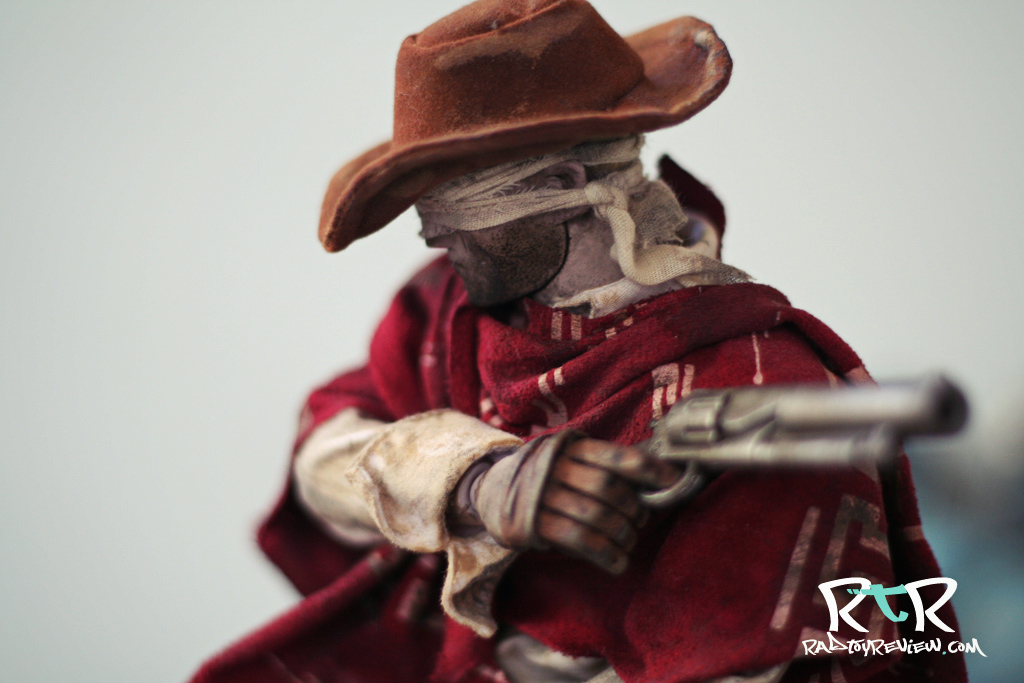
1. Blind Cowboy and Ghost Horse Super Set
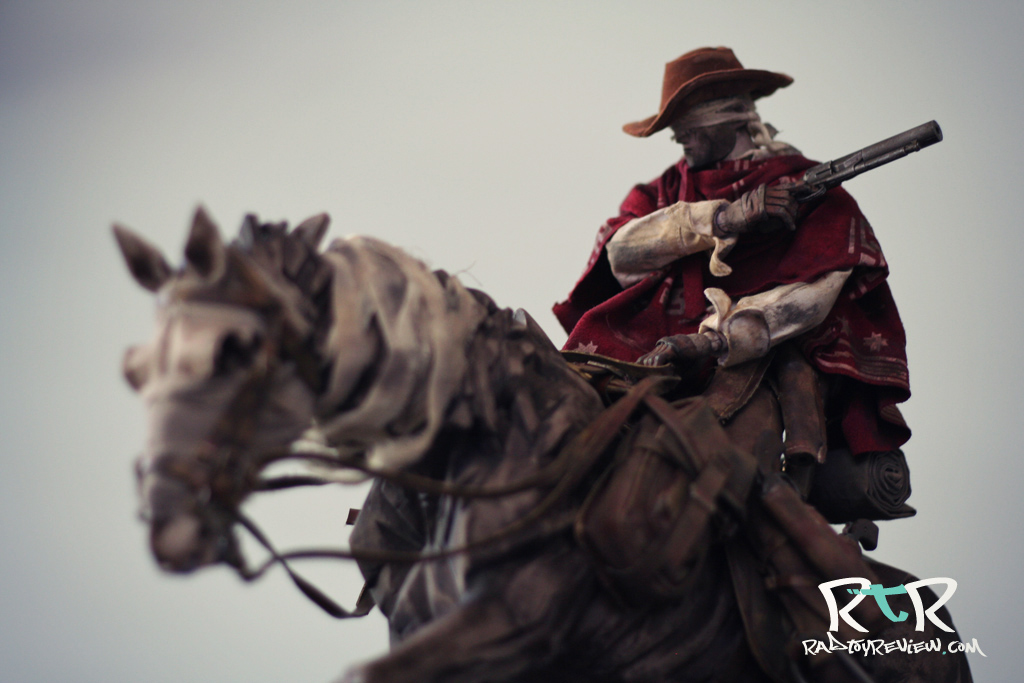
I knew what my number one was going to be long before I sat down to make this list. There isn’t anything else like it out there. This duo stands out in a room, regardless if they’re stuffed in a crowded display case or set up all Lonestar on top of a bookshelf.
Alone, BC himself is actually one of the more.. muted figures to come from 3A this year. He’s not perfect. His hat is a little on the puffy side and his white shirt lacks the fit that you probably wish it had thanks to a weird velcro strip. He’s also light on a few accessories that could have taken him to the next level. It’s not that he comes bare-arsed or anything. He’s got a gaggle of hand canons strapped around his waist, a cool red poncho draped over him and a dirty bandage covering his scarred visage. He’s got character, it just doesn’t come screaming out at you when he’s by his lonesome.
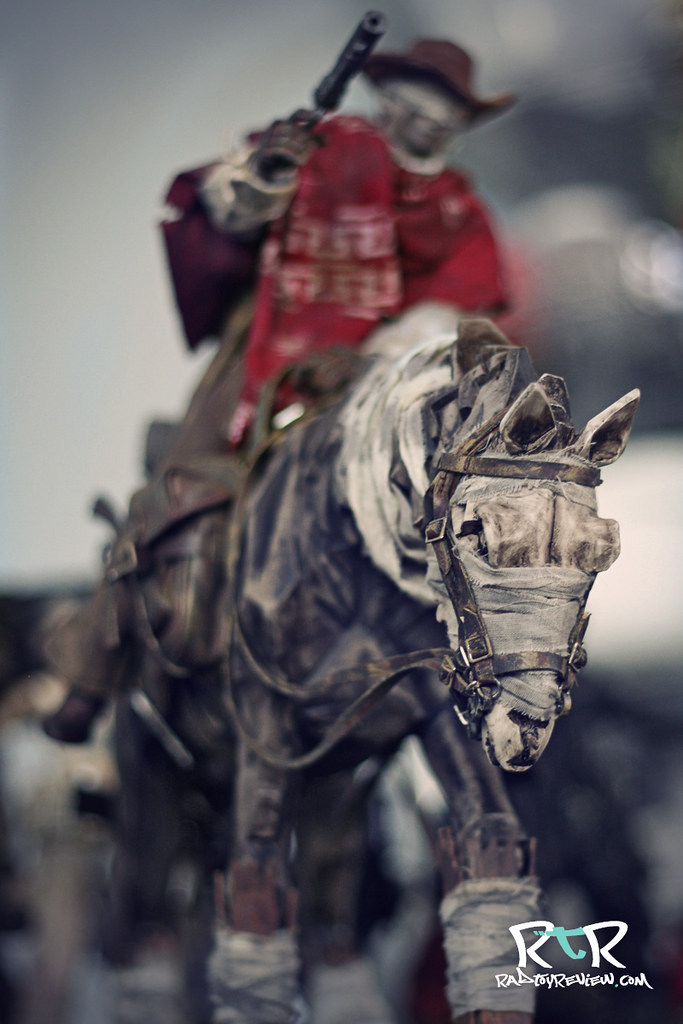
Paired with his trusty and very dead steed, Ghost Horse, they become a different thing altogether.
Few pieces can match the presence of this set. Toy enthusiast and annoyed wives alike have marveled at it on various occasions.

BC & GH summarize what makes collecting high end designer art toys so satisfying. It’s a near perfect balance of something to play with and something to admire. You have the action figure element, with guns and boots and bandages, and then you have the artistically and impeccably executed Ghost Horse sculpt that could make you question what exactly defines something as a “toy.”
If you want to read more about our opinion of this set, you can check out one of the thickest and most picture stuffed reviews out of the RtR chamber to date right here.
As an initially planned one-off, those who missed the set looked left to drink their own tears for the foreseeable future. Luckily for you, 3A decided to release a second run in 2013 dubbed the Dead Equine Super Set , essentially a monotone version of the same set.
That means that those of you chomping at the bit to add the Blind Cowboy Super Set, our official pick for 2012 Toy of the Year, to your collection have a very good shot at making that happen.
That also means that 2013 already has a Toy of the Year nominee!
Some Honorable Mentions:
3A Light and Shadow Oya Set – I’d have tossed this set in the top ten in a second but I feel that since they were gifted/awarded, never available for sale and are incredibly rare, they’re not really a release at all. They’re still awesome though!
3A’s Metal Gear Solid REX – He’s still set to ship out soon. A tiny handful of people somehow ended up getting their orders around the same time we got our review sample, but the official shipment hasn’t gone out and isn’t scheduled to do so until February of 2013. Keep your chin up REX, there’s always next year!
Thanks so much for a great year guys! We really appreciate you guys swinging by and checking out the stuff we’re doing. We have a few new things planned for 2013 that are sure to up the ante around here and we’re excited to show you!
See you in 2013 with more in depth, photo-filled toy reviews!
Happy New Year!
– Knives
Check us out on Facebook and Twitter to stay in the loop-de-loop!


