Think of it as a belated Christmas gift.. or whatever flavor of gift you prefer. Unless you don’t like gifts, in which case you’re a sour puss and have no joy in your soul.
Regardless, my main man Paul Benson is back with another great workshop for kids and grownups alike.
– Knives
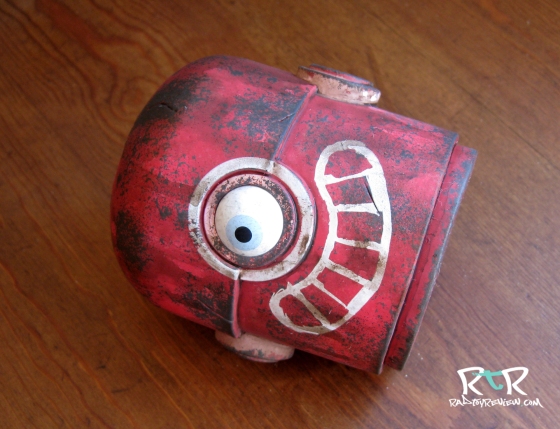
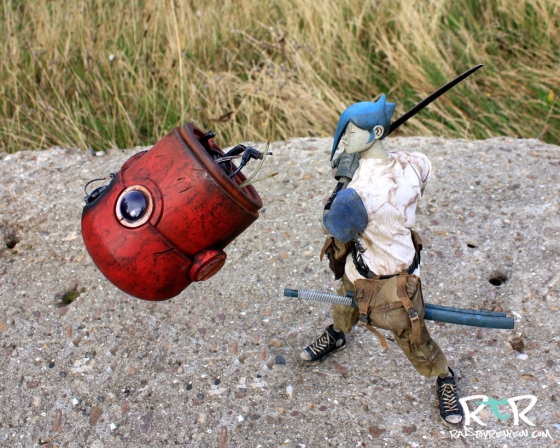
Custom Nabler head to Bothead
ThreeA have released a number of severed Botheads, including a Mortis Intruder Bothead in 2010 which I really like, although don’t have one in my collection. I saw the opportunity to convert a similarly shaped Nabler head into a severed Bothead.Can I say again, my workshops are not about following the script, but they stand as set of techniques and tips that may be useful to someone out there customizing.
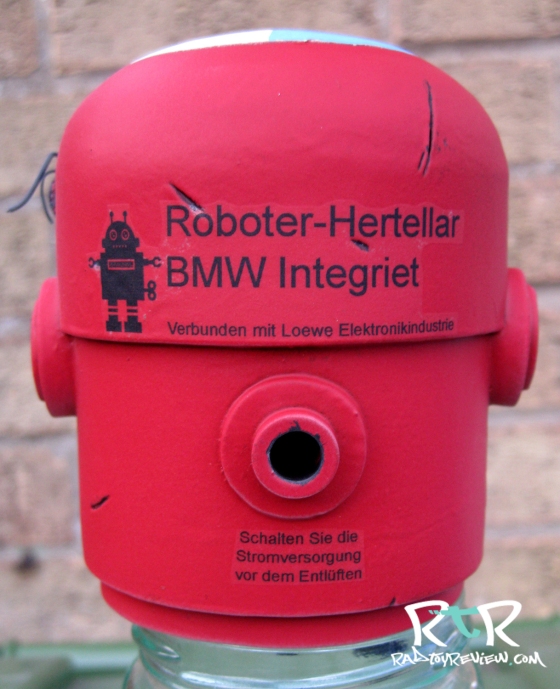
So, here is the Nabler head I started with.
CONVERSION:
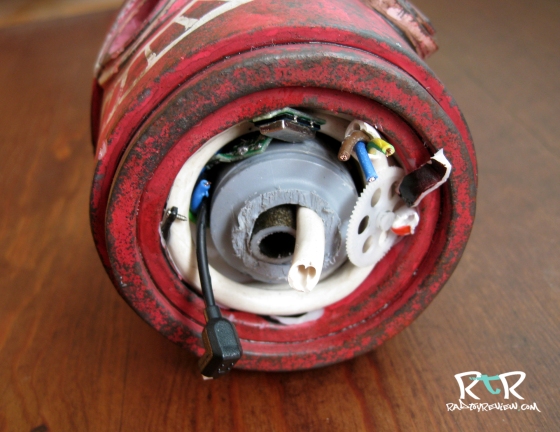
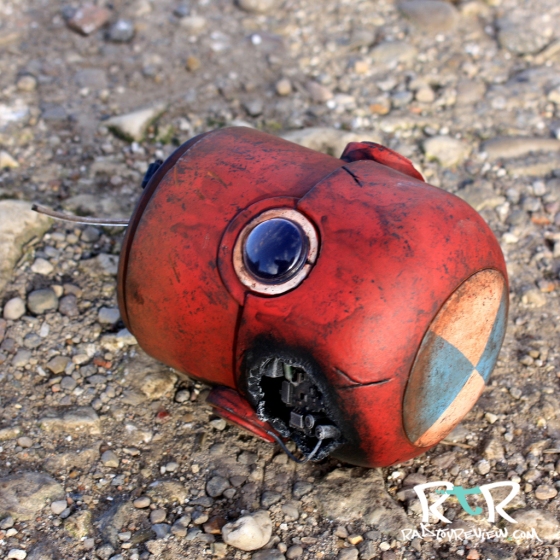
I set about the conversion by removing all the pipework in recessed bottom of the head using a little circular saw tool on a Dremel. Tidying up was done with a scalpel. The plastic from which the head is made is surprisingly soft and fairly easily cut with a scalpel blade. The eyeball was carefully cut up into pieces using the Dremel, the pieces being taken out through the front of the orbit using fine nosed pliers.An oval shaped piece of plastic was removed for the head to give the impression of damage and a possible internal explosion. Several burning matches were run along the edges of the hole to soften the plastic so that it could be bent slightly upwards and outwards. By accident the plastic caught fire and took on a charred appearance which hinted at the damage sustained after a fire.The next step would be to find bits that would look like internal workings of the head and severed electrical wires and hydraulic pipe work. I have a plastic box into which I throw all manner of bits and pieces that might be useful for converting things. I wanted something that looked like it would connect mechanically downwards to the rest of the robot. I settled on a plastic linkage part for plumbing. I cut this in half with a saw and dry fitted it into the bottom of the head. There is narrowing inside of the head with a continuous wall which narrows the diameter. The plumbing fitting would glue onto to this perfectly. I felt it would be good to see some sort of internal computer/electrics. I needed something that might contribute both little circuit boards and possible mechanical workings. Time to sacrifice one of those mini RC helicopters, the ones that fly indoors, that no longer worked. I careful pulled it apart and ended up with some framework, with a small circuit board from the fuselage of the helicopter and the drive shaft to the rear rotor. After several tries and tweaks the circuit board was wedged up against the hole at the top of the Nabler head, in a position so that it looked like it had just be thrust into the opening by an internal explosion. The drive shaft was threaded through the plumbing part as it was glued into position and then wedged within internal bore of the same with a piece of styrene tubing and electric cable.
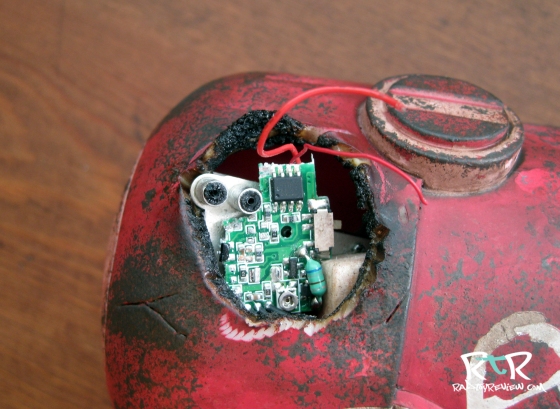
I used 3 core electric cable to further wedge the plumbing part in place within the head. All parts, at this stage, were then secured in place with Superglue. The cable was used as is, or with the three wires protruding and with the three wires removed. One of the drive shafts from the heli was glue into position as though it had been wedged into position when the damage occurred. A couple of bits of plastic that had been cut away with the pipework was removed were just stuck randomly in position.
The little charging cable with fitting was detached from the heli controller and wedged into position amongst the parts in the recessed head and then glued into place.
I guess the watch word for the internal fittings, was ‘just be creative’.
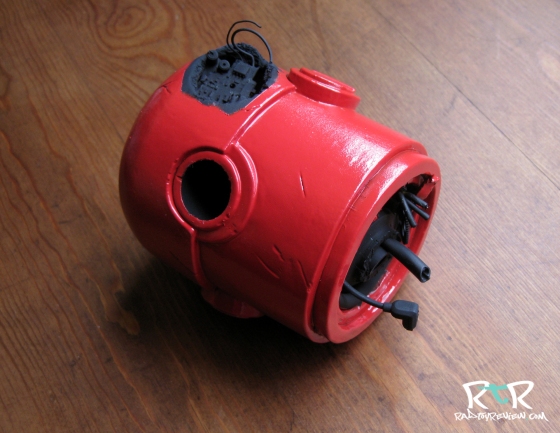
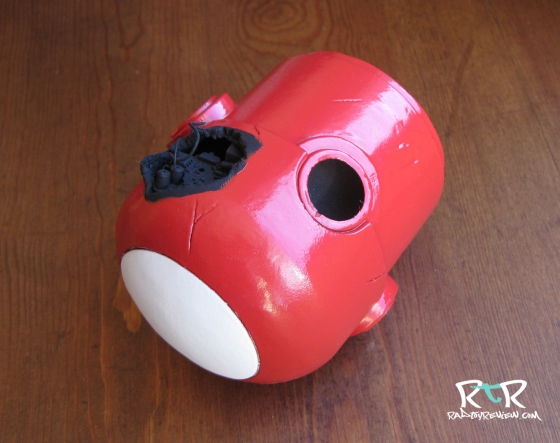
The next stage was painting. I tend to use Humbrol acrylic aerosol paints as base colors Starting with matte black the recessed bottom of the head, eye orbit and damaged area were spray painted first. These areas when them masked off using kitchen paper and masking tape. Although the Nabler head was originally red, I fancied that color for the finished Bothead too. I went with a shiny red as I remember from my aircraft modelling days, it is best to put waterslide decals on a prepared shiny surface as it reduces ‘silvering’ where silver like marks show up underneath the decal. I would matte spray after applying the decals.
The circular top part of the head was then masked off and sprayed matt white.
To make the decals, that would be placed on the back of Bothead, I bought some clear waterslide inkjet decal paper. The decals were designed on Photoshop and printed on to the shiny side of the paper. After letting the printed images dry properly they were then sprayed with 3 coats of clear acrylic spray, allowing 30 minutes for each coat to dry before spraying the next coat.
The decals were then cut out with scissors. The decals were then placed into a shallow container of clean water. The decals were then positioned on the head and carefully slid off the backing paper. Excess moisture was then removed with kitchen paper. To matte down the red paint and seal the decals, the head was sprayed with matte acrylic varnish. Unfortunately a little silvering was present, but I would cover this over with paint when applying the weathering.
PAINTING:
As the first part of the brush painting stage I started by using thin strips of masking tape to section off two quarter segments of the white circle on top of the head. I have found that masking off is just as useful when using a bush as when applying paint by spraying it. It works in exactly the same way and can give perfectly straight lines. The unmasked segments where painted a pale blue. I painted round the eye and the two semi circle on each side of the head with white.
All of the recessed bottom part of the head, cabling/pipe work and the hole higher up on the head were then drybrushed with a dark grey and then a light grey to bring out the detail.
I have begun to use Citadel ink washes, bought online or from a Game Workshop store, more and more and selected a sepia colour mixed with black to give the head a complete wash. The head was placed in the open top of a jam jar to keep it upright as the wash dried. More of a darkened wash was applied in certain areas and encourage to flow down to look a like oil leakage. Some of the scratches and depressions on the head were picked out in black.
To give the impression of wear and tear lots of little specks, in dark brown and black, were applied all over the head using bits of sponge. Through trial and error I discovered the best type of sponge to use is an artificial copy of a natural sponge, if you know I mean. Cut up in random shaped chunks probably no bigger than 5 cm by 5 cm. I tend to mixed paints on an old piece of glass, so having put some paint on the glass I dip a piece of sponge into the paint and dab of the excess onto kitchen paper. I just worked round the head dabbed the sponge against it and there in a random manner.
I then used MIG weathering powder, old and new rust, on and old paint brush. The powder was run over some of the white areas to give a rusting effect. It was run around some of the detail half way up the head, round the eye etc. and round the bottom of the head. The spray over with matt varnish later would fix the rust pigments.
Final detailing just included emphasizing the dints and scratches by painting them black. More oil trails were half applied with a brush and half allowed to run down the side of the head from the structures on the side of the head and the hole at the back. Watered black paint was used.
Next to paint with silver to give the impression of paint being worn off back to bare metal due to wear, this was done after the head had been sprayed with matt varnish to matt down all the paint and fix the weathering pigments. Matt varnish over silver does not work and ends up looking grey! The silver was drybrushed onto the head around the lower edges at the bottom of the head and inside the recess on one or two parts, that well be metal.
Finishing touches.
The eye had been left open and would be covered. As a clear cover, I went for one of those ‘googly eyes’ I took from a mixed set of sizes bought at a local craft shop.
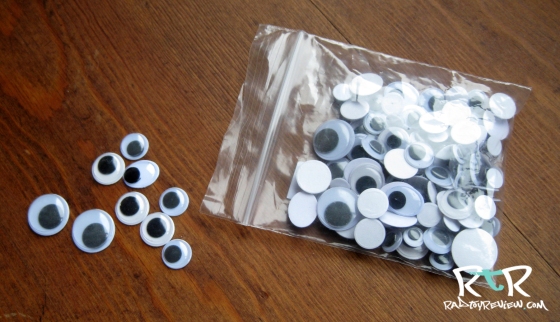
The 20 mm was the perfect size although no so straight forward to fit as I thought! The back part was careful cut away with a sharp scalpel and the little black pupil discarded. Fine forceps were used to hold the clear cover whilst a little Superglue was applied to a small section of one side opposite to the forceps. It was then gingerly placed into the eye hole and held in place until the glue took. More Superglue was then applied around the edge of the eye hole. A piece of Bluetac was gently applied to the front of the cover so that it just held the cover. The tweezers were put down and the eye eased into placed. The Bluetac was take off when the glue had taken. Now it would have been handy to have and extra hand to do this and I did need several tries to get it right! I don’t think this is strongest fix and the cover would probably fall through into the eye orbit with a heavy tap, but is has held in place despite taking the eye on outside trips for photography.

I wanted to put into the recess some extra pipe work dangling out. Thought it would be good idea to have some clear tubing, looking as thought it had just drain from it. I found some clear heat shrink tubing used for insulation. The idea being that when it is heated it contracts in diameter onto wire. Placed in hot water it contracts down to narrow clear tubing that works fine. Having cut suitable lengths I made up some yellowy brown thin paint and sucked it up into the tubes. It was then allowed to dry in the tubes, which it did in various random patterns which looked quite realistic. The tubing was then just glued into place were there was slight gaps.
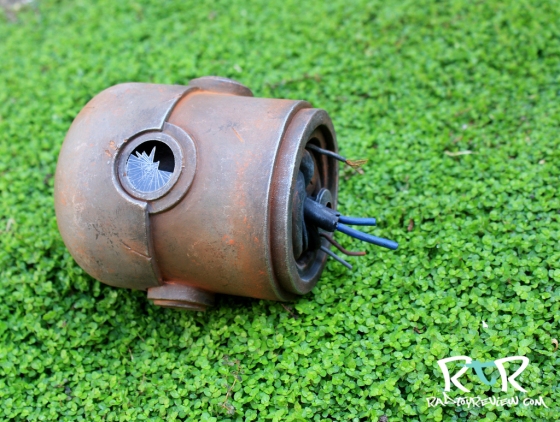
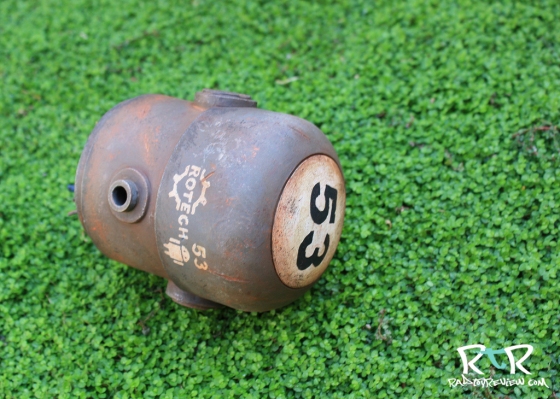
The Nabler to red Bothead conversion was my second go. Included below is my first one, which I painted grey and applied more rust as a filter. The eye was done in a slightly different way. A circle of clear plastic styrene was cut and then small triangular section cut away to represent shattering. The lines to show cracking were etched on with a sharp scalpel blade.
A big thanks to Paul, who in my opinion is a master of the toy mod community and a big thanks to all you who keep coming back for more here @ RtR!
Happy New Year!
.
.
.
.
.
.
.
.
.