The Workshop: Paul Benson’s Nabler to Bothead conversion!

Think of it as a belated Christmas gift.. or whatever flavor of gift you prefer. Unless you don’t like gifts, in which case you’re a sour puss and have no joy in your soul. 

Regardless, my main man Paul Benson is back with another great workshop for kids and grownups alike. 

– Knives

Custom Nabler head to Bothead 

ThreeA have released a number of severed Botheads, including a Mortis Intruder Bothead in 2010 which I really like, although don’t have one in my collection.  I saw the opportunity to convert a similarly shaped Nabler head into a severed Bothead.Can I say again, my workshops are not about following the script, but they stand as set of techniques and tips that may be useful to someone out there customizing.
So, here is the Nabler head I started with.
PICT 1
CONVERSION:
I set about the conversion by removing all the pipework in recessed bottom of the head using a little circular saw tool on a Dremel.  Tidying up was done with a scalpel.  The plastic from which the head is made is surprisingly soft and fairly easily cut with a scalpel blade.  The eyeball was carefully cut up into pieces using the Dremel, the pieces being taken out through the front of the orbit using fine nosed pliers.An oval shaped piece of plastic was removed for the head to give the impression of damage and a possible internal explosion.  Several burning matches were run along the edges of the hole to soften the plastic so that it could be bent slightly upwards and outwards.  By accident the plastic caught fire and took on a charred appearance which hinted at the damage sustained after a fire.The next step would be to find bits that would look like internal workings of the head and severed electrical wires and hydraulic pipe work.  I have a plastic box into which I throw all manner of bits and pieces that might be useful for converting things.  I wanted something that looked like it would connect mechanically downwards to the rest of the robot. I settled on a plastic linkage part for plumbing.  I cut this in half with a saw and dry fitted it into the bottom of the head.  There is narrowing inside of the head with a continuous wall which narrows the diameter.  The plumbing fitting would glue onto to this perfectly.  I felt it would be good to see some sort of internal computer/electrics.  I needed something that might contribute both little circuit boards and possible mechanical workings.  Time to sacrifice one of those mini RC helicopters, the ones that fly indoors, that no longer worked.  I careful pulled it apart and ended up with some framework, with a small circuit board from the fuselage of the helicopter and the drive shaft to the rear rotor.  After several tries and tweaks the circuit board was wedged up against the hole at the top of the Nabler head, in a position so that it looked like it had just be thrust into the opening by an internal explosion.  The drive shaft was threaded through the plumbing part as it was glued into position and then wedged within internal bore of the same with a piece of styrene tubing and electric cable.
 PICT 4
I used 3 core electric cable to further wedge the plumbing part in place within the head.  All parts, at this stage, were then secured in place with Superglue.    The cable was used as is, or with the three wires protruding and  with the three wires removed.  One of the drive shafts from the heli was glue into position as though it had been wedged into position when the damage occurred.  A couple of bits of plastic that had been cut away with the pipework was removed were just stuck randomly in position.
The little charging cable with fitting was detached from the heli controller and wedged into position amongst the parts in the recessed head and then glued into place.
 PICT 2
I guess the watch word for the internal fittings, was ‘just be creative’.
 
PICT 3
 
The next stage was painting.  I tend to use Humbrol acrylic aerosol paints as base colors   Starting with matte black the recessed bottom of the head, eye orbit and damaged area were spray painted first.  These areas when them masked off using kitchen paper and masking tape.  Although the Nabler head was originally red, I fancied that color for the finished Bothead too.  I went with a shiny red as I remember from my aircraft modelling days, it is best to put waterslide decals on a prepared shiny surface as it reduces ‘silvering’ where silver like marks show up underneath the decal.  I would matte spray after applying the decals.
 
PICT 5
 
The circular top part of the head was then masked off and sprayed matt white.
 
PICT 6
To make the decals, that would be placed on the back of Bothead, I bought some clear waterslide inkjet decal paper.  The decals were designed on Photoshop and printed on to the shiny side of the paper. After letting the printed images dry properly they were then sprayed with 3 coats of clear acrylic spray, allowing 30 minutes for each coat to dry before spraying the next coat.
The decals were then cut out with scissors.  The decals were then placed into a shallow container of clean water.  The decals were then positioned on the head and carefully slid off the backing paper.  Excess moisture was then removed with kitchen paper.  To matte down the red paint and seal the decals, the head was sprayed with matte acrylic varnish.  Unfortunately a little silvering was present, but I would cover this over with paint when applying the weathering.
PICT 7
PAINTING:
As the first part of the brush painting stage I started by using thin strips of masking tape to section off two quarter segments of the white circle on top of the head.  I have found that masking off is just as useful when using a bush as when applying paint by spraying it.  It works in exactly the same way and can give perfectly straight lines.  The unmasked segments where painted a pale blue.  I painted round the eye and the two semi circle on each side of the head with white.
All of the recessed bottom part of the head, cabling/pipe work and the hole higher up on the head were then drybrushed with a dark grey and then a light grey to bring out the detail.
 PICT 12
I have begun to use Citadel ink washes, bought online or from a Game Workshop store,  more and more and selected a sepia colour mixed with black to give the head a complete wash.  The head was placed in the open top of a jam jar to keep it upright as the wash dried.  More of a darkened wash was applied in certain areas and encourage to flow down to look a like oil leakage.  Some of the scratches and depressions on the head were picked out in black.
To give the impression of wear and tear lots of little specks, in dark brown and black, were applied all over the head using bits of sponge.  Through trial and error I discovered the best type of sponge to use is an artificial copy of a natural sponge, if you know I mean.  Cut up in random shaped chunks probably no bigger than 5 cm by 5 cm.  I tend to mixed paints on an old piece of glass, so having put some paint on the glass I dip a piece of sponge into the paint and dab of the excess onto kitchen paper.  I just worked round the head dabbed the sponge against it and there in a random manner.
 PICT 10
I then used MIG weathering powder, old and new rust, on and old paint brush.  The powder was run over some of the white areas to give a rusting effect. It was run around some of the detail half way up the head, round the eye etc.  and round the bottom of the head.  The spray over with matt varnish later would fix the rust pigments.
Final detailing just included emphasizing the dints and scratches by painting them black. More oil trails were half applied with a brush and half allowed to run down the side of the head from the structures on the side of the head and the hole at the back.  Watered black paint was used.
Next to paint with silver to give the impression of paint being worn off back to bare metal due to wear, this was done after the head had been sprayed with matt varnish to matt down all the paint and fix the weathering pigments.  Matt varnish over silver does not work and ends up looking grey!   The silver was drybrushed onto the head around the lower edges at the bottom of the head and inside the recess on one or two parts, that well be metal.
Finishing touches.
The eye had been left open and would be covered.  As a clear cover, I went for one of those ‘googly eyes’ I took from a mixed set of sizes bought at a local craft shop.
PICT 8
The 20 mm was the perfect size although no so straight forward to fit as I thought!  The back part was careful cut away with a sharp scalpel and the little black pupil discarded. Fine forceps were used to hold the clear cover whilst a little Superglue was applied to a small section of one side opposite to the forceps.  It was then gingerly placed into the eye hole and held in place until the glue took.  More Superglue was then applied around the edge of the eye hole.  A piece of Bluetac was gently applied to the front of the cover so that it just held the cover.  The tweezers were put down and the eye eased into placed.  The Bluetac was take off when the glue had taken. Now it would have been handy to have and extra hand to do this and I did need several tries to get it right!  I don’t think this is strongest fix and the cover would probably fall through into the eye orbit with a heavy tap, but is has held in place despite taking the eye on outside trips for photography.
 PICT 9
I wanted to put into the recess some extra pipe work dangling out.  Thought it would be good idea to have some clear tubing, looking as thought it had just drain from it.  I found some clear heat shrink tubing used for insulation.  The idea being that when it is heated it contracts in diameter onto wire.  Placed in hot water it contracts down to narrow clear tubing that works fine.  Having cut suitable lengths I made up some yellowy brown thin paint and sucked it up into the tubes.  It was then allowed to dry in the tubes, which it did in various random patterns which looked quite realistic.  The tubing was then just glued into place were there was slight gaps.
 PICT 11
PICT 16
The Nabler to red Bothead conversion was my second go.  Included below is my first one, which I painted grey and applied more rust as a filter.  The eye was done in a slightly different way.  A circle of clear plastic styrene was cut and then small triangular section cut away to represent shattering.  The lines to show cracking were etched on with a sharp scalpel blade.
PICT 13
PICT 14
A big thanks to Paul, who in my  opinion is a master of the toy mod community and a big thanks to all you who keep coming back for more here @ RtR!
Happy New Year!
Follow us on Facebook and Twitter to keep in the loop!
.
.
.
.
.
.
.
.
.

*Review* 3A’s Ma.K. Kröte PROTOTYPE


*please note that this version of Kröte is a prototype and final details may change before ship date.

INTRO

Just in time for Rad Toy Review’s 1st year anniversary, ThreeA shipped us their brand new Ma.K. Kröte prototype to play with. The bambaland.com drop fort the same item was just a few days ago, and has since come and gone. Never fear late bloomer, the retail version (the same version I’ll be reviewing today) will be available via 3rd party retailers very soon if you missed him the first time around!

I’ve been aware of  Kow Yokoyama’s designs from years of building my eclectic collection of robot and game design references. His designs are instantly recognizable and in my opinion, nudge away from the status quo of what the future of robotics will look like. There’s something very physical about the way he creates his robots in that while still “from some distant future” they look very conceivable given even the limitations of today’s technology.

Kröte probably wouldn’t have necessarily been my alpha choice for ThreeA to push out the door. That would have been a version of the S.A.F.S with an accompanying pilot. (Because, how awesome would that be?) That being said, what ThreeA has done by releasing Kröte first, whether intentionally or not, is show how amazingly well they can handle the minutia of unique details packed into Kow’s complex designs.

PACKAGING

As I received Kröte well before it’s estimated ship date, there wasn’t any packaging, posters or kittens included. Just Kröte loose in a well padded shipping box.

Consider this area a place holder for it’s future package art..

WHAT’S INCLUDED

Not too surprisingly, Kröte is basically self contained without any accessories to speak of. The thin long antennae and small radar grid are the only loose bits.  The antennae slides into a little hole on the side and stays in pretty well. The radar on the other hand, doesn’t so much as lock into place as allow gravity to sorta hold it there. After much wiggling about, I’ve determined that a small glob of paint must have snuck it’s way into the slot, preventing the radar from nesting properly. I’ll have to mess with it more later, perhaps simply glue it in place, but for now I have to remember not to bump into it for risk of losing it.

THE BREAKDOWN

Dang.

Kröte is one busy bot. Loops, chords, wires, bolts, switches, ladders, wheels, rivets. My eyes bounce all over the place on him and at first it’s challenging to find a spot to rest them. It’s probably a bit like beating a dead horse at this point, but by golly, ThreeA are the masters of their craft. There are so many incredibly small, yet detailed pieces literally head to tail on Kröte that I have a hard time believing it’s a mass produced product. It looks as good as what you’d expect a custom model maker to create.

If you’ve been collecting designer action figures for awhile, you may be a little jaded at just how well 3A bots are conceived and realized. Go to Target or Toys R Us and walk down the boys action figure isle. That should hopefully remind you.

Other than the various unique details littered all over Kröte, there’s a few new techniques I’ve not seen before on a ThreeA toy. The one that stands out the most is a pretty heavy use of “wielded steel”. Sections don’t just clip onto each other with a clean seam, they have wielded details to add to the believability that what you’re looking at is hard steel and not a PVC/plastic frankenstein.

One of the things I was surprised about is that 3A’s Kröte doesn’t feel especially fragile. Despite all the tiny details and things sticking out here and there, he feels solid. There’s places for your hands to naturally go so he’s pretty easy to grab and pose on a whim. In fact, the areas that you need to grab to move a joint seem to have details (like wires) that feature a little give so they don’t snap off should you need to apply a little pressure to pose.

The main thing to play with on Kröte is it’s legs. Honestly, I struggle a little bit with the look of backwards legs. It’s iconic and it’s a great design, but my stubborn “toes forward” brain rejects it. It took me some time to get used to it because as I mentioned before, Kow’s unique designs seem to ignore some of the standard norms of what robots should look like. For me, it’s at the same time, off-putting and refreshing.

The first thing I did once I had Kröte on the table in front of me was figure out what wiggles and what doesn’t. The head swivels back and forth like a tank turret to a full 360 if desired. Each leg has several points of articulation. The first is a ball joint at the hip that allows for the widest range of motion on the leg.

Following down the leg to the foot you run into 3 swivel joints, each with a different allowance for movement.

The joint next to the spring has very little range. Also, if you’re curious, the springs don’t actually do anything but add to the aesthetics. The “knee” joint will go from a 90 degree bend to almost completely straight. On the knees themselves are small adjustable shields. The ankle joint is also pretty limited in how much you can bend it, but they move enough to help keep Kröte balanced along side the heel flap that you can adjust up and down.

With legs fully extended as far as his balance would allow, Kröte stood just over 12 inches. Pushing one leg back and the other forward and bending the joints to their extremes I was able to get him as low as 9 inches.  (Antennae not included)

“Kröte, a toy for every any display case.”.. TM.

I do feel like there are perhaps a few missed opportunities where moving parts are concerned. For example, there’s a wheel in the engine detail that looks as though it should turn, but doesn’t. More starkly, the radar up top looks practically made to rotate, yet it’s stuck fast. There’s a few other small examples, none of which ruin the toy of course. It would have just been cool to have a few more things to figit with.

Overall, I’d say you get the appropriate amount of articulation for a bot like this. He won’t be pulling off any Jackie Chan moves, but I wouldn’t expect him to.

One thing about this review is that it should have come out days ago. But since what I received was the figure and nothing BUT the figure.. I had a difficult time figuring out what batteries were used for the lights and gun as their are no labels or symbols to guide me. I’m sure this won’t be an issue for the version you end up with as it’ll most likely include some well illustrated docs that clearly light the path. Me on the other hand.. I ran back and forth to town to grab sets of similarly sized camera batteries over the course of three days attempting to power this bugger up!

I finally caved and dropped Kim of 3A a note, something I probably should have done right away. He promptly sent back some photos showing that Kröte uses not two single batteries, but 6 stacked coin batteries.

Doh.

Palm to forehead.. moving on.

Pic Kim sent me to show battery placement

To install the batteries you must first open a hatch on the side of the head. This is also where the two switches for the electronic bits are. It’s a little strange that 3A decided to hide them in a spot that’s not easy to reach. Most people will just want to be able to tap an easy to access button to make the gun work. Instead, you have to remove the side hatch, then flick a switch on/off. It’s not as intuitive as it probably could be.

You can watch our short and sweet video of the switches and lights in action below.

As you can see, the gun rotates and the barrels flash as they “fire”.  The barrel rotated a little slower than I expected but the barrel tip lights are pretty cool. I like how the yellow lamp light is set back and gives a sort of yellow eyeball effect.

I think it’s a really cool feature done fairly well, I just wish the buttons to turn them on and off were in a place easier to get to.

The paint application 3A dolled out onto this version of Kröte is in the general ballpark of what you’d expect from them. Overall, it’s solid with some really nice weathering (particularly on the legs) and a few sharp decals. I really dig the white patina that’s added to some areas, really adds to the realism.

I think where it slightly misses is in the faint camouflaged areas. I used to work with a company that designs camo prints so I might be a little biased here. The patterns are so softly applied that they look more like random color smears than actual faded, rusted over camouflage. I tried to find some official Kow examples to see if this is how he designed the color scheme or if it’s purely a 3A design but couldn’t find anything conclusive. This criticism could also just be my preference in wanting a little cleaner of a bot for once. But making clean-ish robots isn’t really 3A’s thing.. making dirty, rusty, big robots is.

So if you came for that show, I think you’ll be very happy.

THE FINAL WORD

With Kröte, ThreeA continues to push the boundaries of what is possible in collectible toys. I say this knowing full well that I’ve claimed the same thing in the past three or four consecutive RtR 3A toy reviews. Full discloser  I’m going to keep saying it until it isn’t true. Kim and his crew at ThreeA’s Hatchery definitely know their stuff. But more than that, they show no signs of slowing down new development. Like Ambush and REX before, Kröte isn’t made up of a bunch of premade pieces. Most, if not all, of him is built brand new from the ground up.

As usual, through the fog of compliments and positive impressions, I did find a few things to complain about. Not everything perfectly hits all the notes with me, but it comes pretty darn close.

If you’re a fan of Kow’s Kröte design, then I really believe you’ll love how ThreeA respected it with another incredibly impressive (and obtainable) toy. It’s certainly has me looking forward to seeing how ThreeA handles the rest of the Maschinen Krieger Universe!

PROS:

  • Holy grandma, is this guy detailed. The level is such that a custom hand made model would struggle to match it
  • Kow Yokoyama’s design is almost perfectly realized
  • Light and gun rotating effect, while a little sluggish, looks really cool
  • Solid feel, despite delicate appereance
  • The most unique looking toy I have on display

CONS:

  • The switches for the lights and gun should be easier to access and not hidden away in the battery case
  • The radar piece didn’t fit securely on top of the turret
  • I wish the painted camo details were a little more crisp and defined
  • A few small details look as though they should easily move, but don’t

A big thanks to Kim and 3A for sending us an early taste of Kröte to play with. Much respect!

.

.

.

.

.

.

.

.

.

.

.

.

.

*review* 3A’s Metal Gear Solid REX

INTRO

As far back as I can remember, I’ve been an avid gamer. That joyous affliction is the result of my folks starting me on the fast track at a very young age. They had an Atari 2600 already in place in the living room before I was born, just waiting for me to be able to hold the controller in my tiny, baby hands. Games like Pitfall, Berserk, Centipede and Q Bert, were all at some point a part of our collection. All classic games and iconic characters that, even in my youth, struck various important chords to my psyche. A few years later, my folks purchased a Commodore 64 for their office, which I loaded up with a bunch of old keyboard clicking games like Kung Fu Master and Summer Games.

But gaming didn’t truly hit it’s full stride for me until the release of the Nintendo Entertainment System. The NES was responsible for game after game of trend setting, classic goodness.

Mario, Zelda, Bionic Commando, Punchout, Final Fantasy, Metroid, Contra, Ninja Gaiden and of course, Metal Gear.

Fast forward to 1998 and the great Hideo Kojima and Konami released Metal Gear Solid on the  original Playstation.

Bam.

To this day,  it remains as one of my most memorable video game experiences. The story, art, gameplay, characters, all of it. A historic game made only better on the PS2 with MGS 2: Sons of Liberty. While the Metal Gear series continues with spin offs on a variety of systems and numbered releases.. MGS2 maintains it’s absolutely epic status and remains steadfast among my top 10 favorite games of all time.

SO! I could go on and on about the Metal Gear series, how much I love it, how much the games and their “sneaking missions” shaped the types of games I play and enjoy most.. but that’s not why you tuned in.
We’ll move forward and take my Metal Gear Solid fanboydom as firmly given.
METAL GEAR SOLID REX!!

If you’re reading this page then you probably know at least a little bit about the young toy company, ThreeA. They announced they’re partnership with Konami/Kojima way back in 2009. The first toy to be released from the international handshake was to be Rex.

Being a massive Metal Gear Solid AND 3A fan, my ears perked up, my heart did a leap and my wallet ran off to hide in the shadows. A match made in.. “Outer Heaven.”

Whamp whaaaamp.

That was back in late 2009/early 2010. Suffice to say, it’s been a slow roasting process. Ashley Wood, who’s ties to the Metal Gear franchise go deep, continued to pump out fantastic designs from his own worlds for us to pose, photograph and play with. But despite how fantastic the larger majority of those were, they couldn’t satiate the craving of Metal Gear fans. It seemed like someone over on the official 3A forums was asking practically daily for more information, any information, about REX.

The year of our Lord, 2012 just also happens to be Metal Gear’s 25th Anniversary and just in time too! In February the massively pregnant wait came to an end as REX finally hit bambaland.com for a whopping $490 buckaroos! The seemingly steep price tag didn’t stop fans from throwing their money at their computer screens and yelling “Take my money! Take it all!”

The excitement was palatable.

3A has put out a ton of great, sometimes downright AMAZING, toys over its short four(ish) years in operation and today, I have REX sitting here on the table in front of me.

As we’re coming up to the tail end of 2012… let me tell you this,

stuff just got real.

PACKAGING

Do I need to say it? This box is HUGE! Look at the two crazy cute slobbery fifty pound pups sitting astride it. It’s silly big!

I had to laugh when I popped the lid open. The oh so iconic “!” beaming up at me like a pretty girl’s smile. Wrestling it from the packaging took some real doing. I recommend you snag a friend or friendly hobo to assist you. Keep him or her around, because you’ll need them for the next part too.

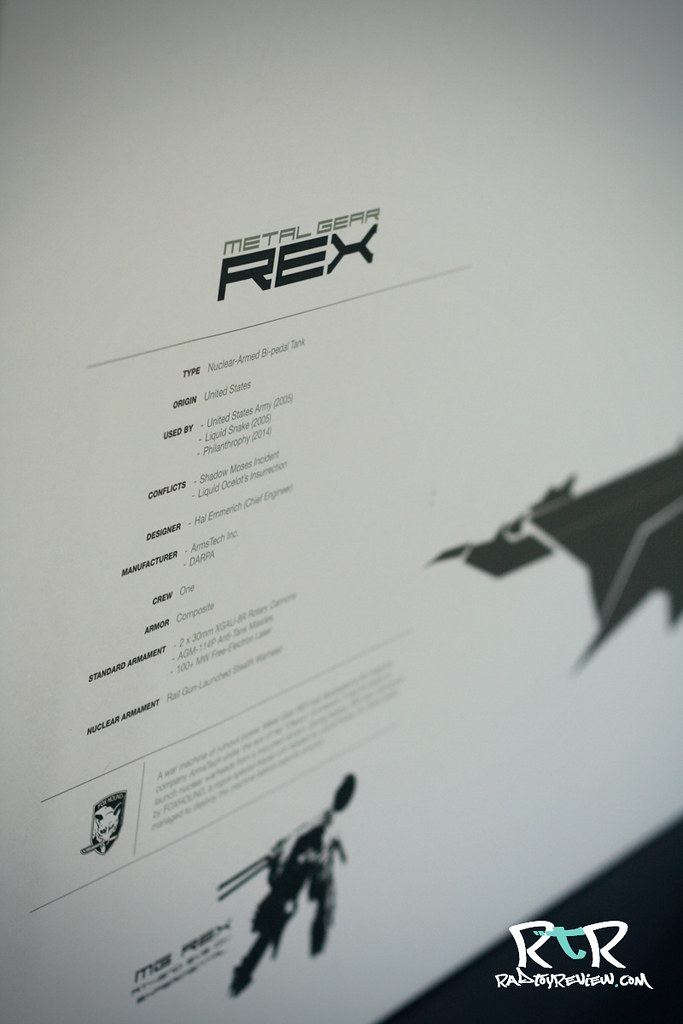
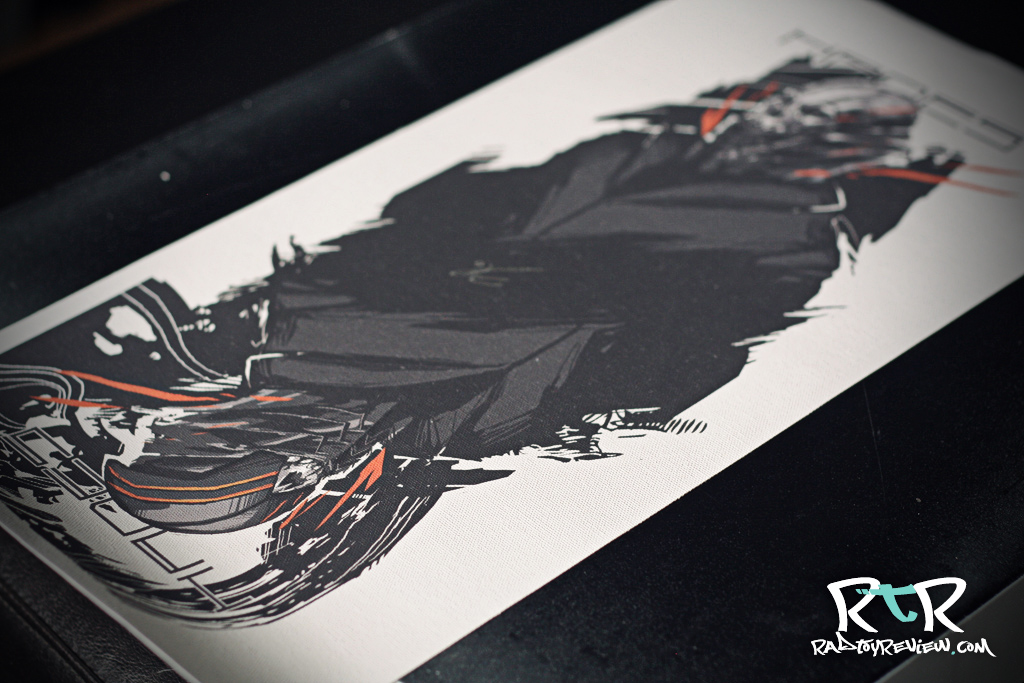
Ash’s inks dot the front of the box calling back to his work on the epic Metal Gear Solid graphic novel. On the back, we get REX SPECS(tm) and a little background on him.

WHAT’S INCLUDED

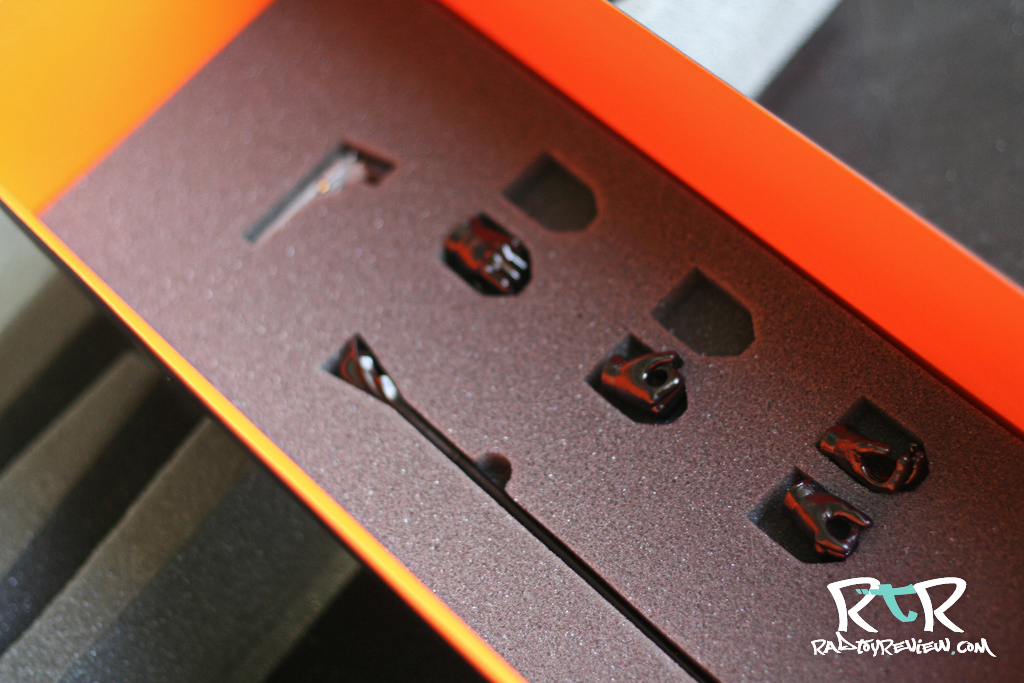
First thing to fall out was a ThreeA catalog featuring a bunch of toys you can’t get anywhere but Ebay or via fan based BSTs.  Next, to my surprise, was a couple of instructional booklets. Yes, there are booklets aimed at instructing you in how to play with your toy. Believe it or not fellows, you’ll probably need to read it and refer to it often. More on that later.

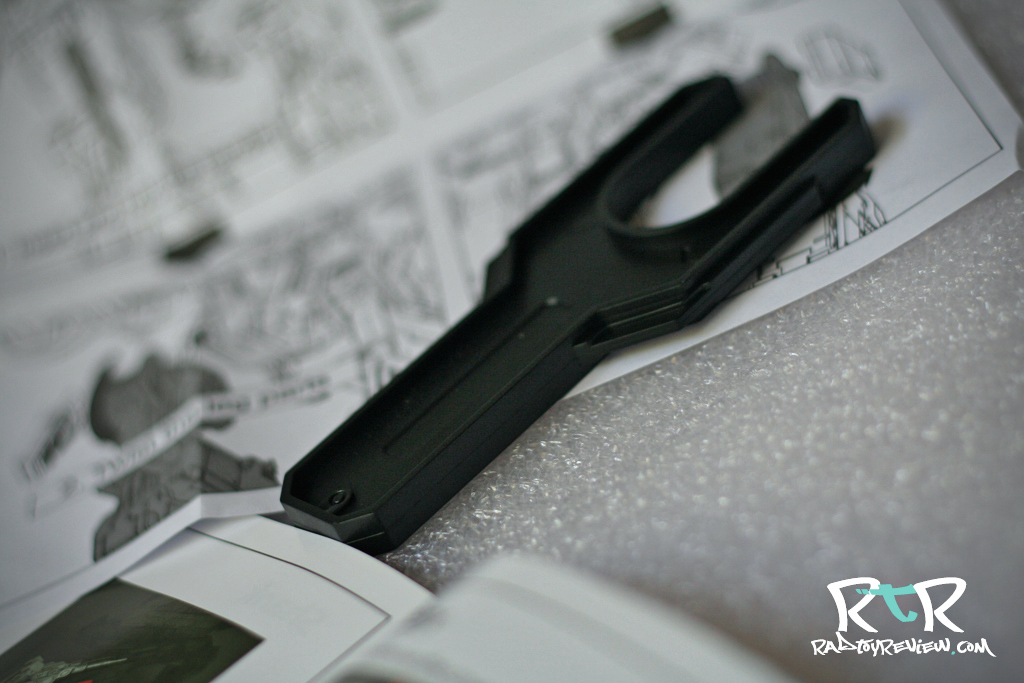
Also included is a little plastic wrench-like tool which you’ll want to keep close at hand. It’s your new buddy.

THE BREAKDOWN

I was unable to show the ornate process of me actually removing this guy from his box. I contorted myself in ways I’ve only seen tiny, exotic acrobats twist. As I tried to support the heft of the box and pull the styrofoam trays free, I kept wondering to myself “Why didn’t I wait until my wife got home?”

Keep that friendly hobo close, he’ll come in handy.

The long rail gun is separate from the rest of REX proper and snaps in with zero fuss.

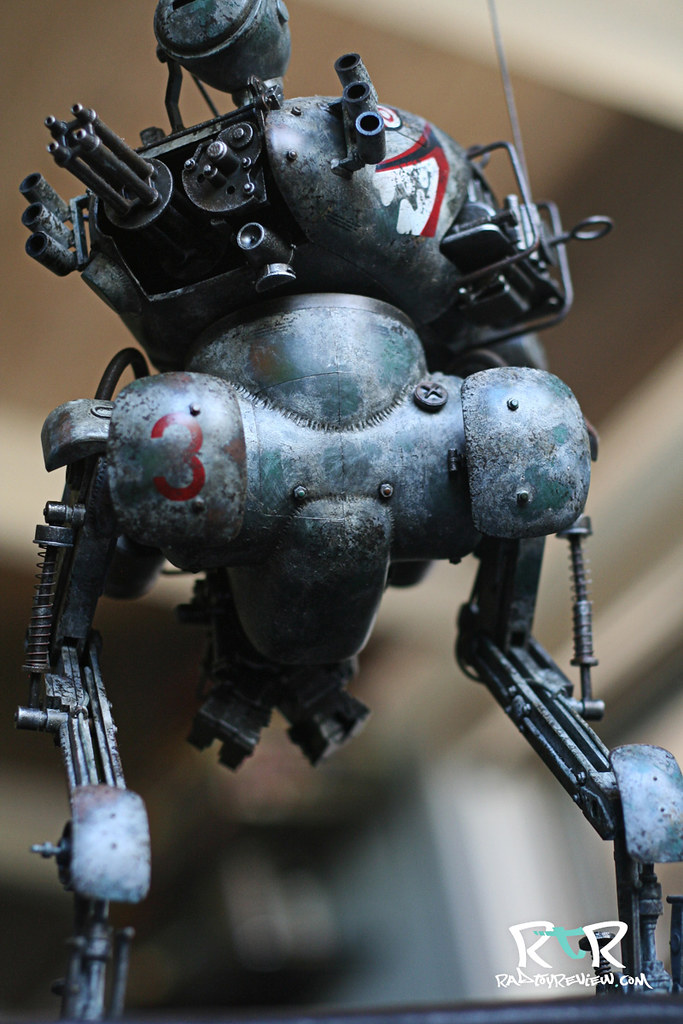
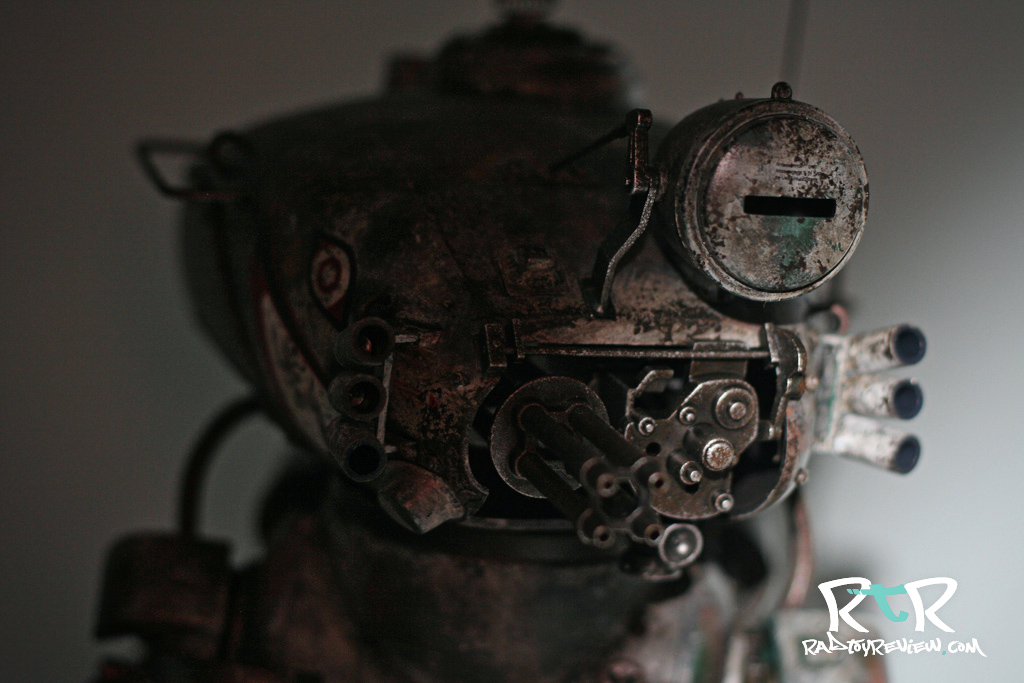
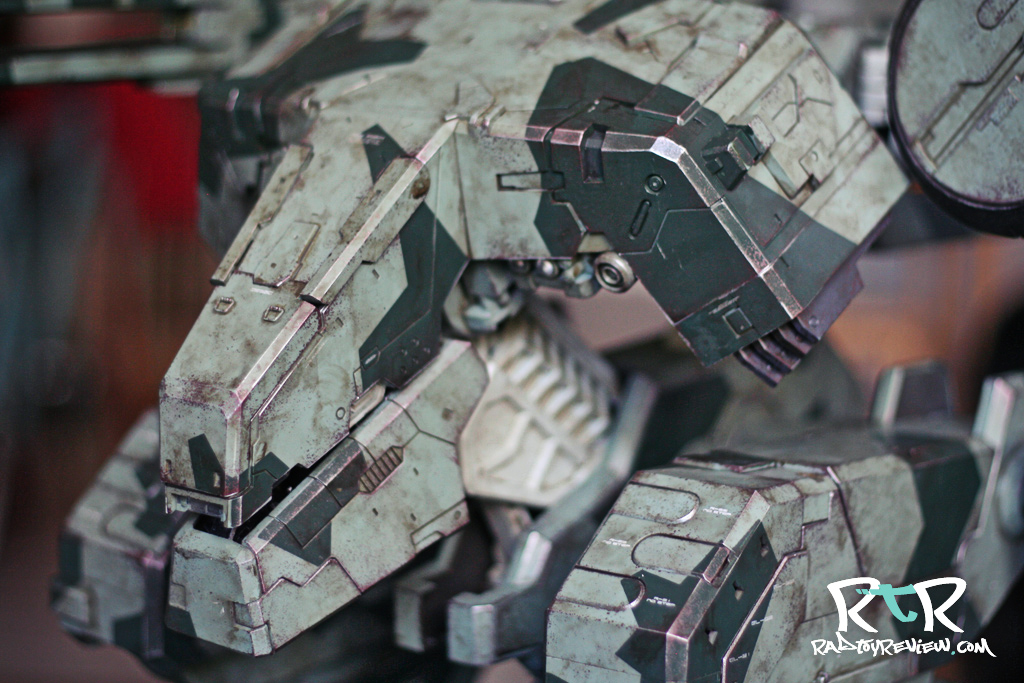
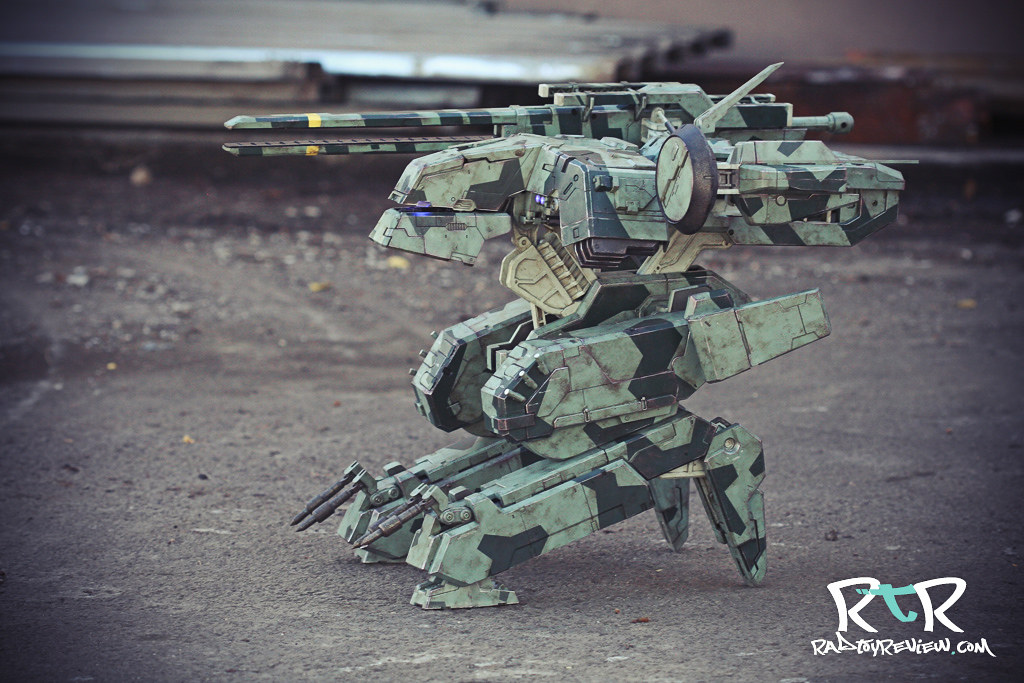
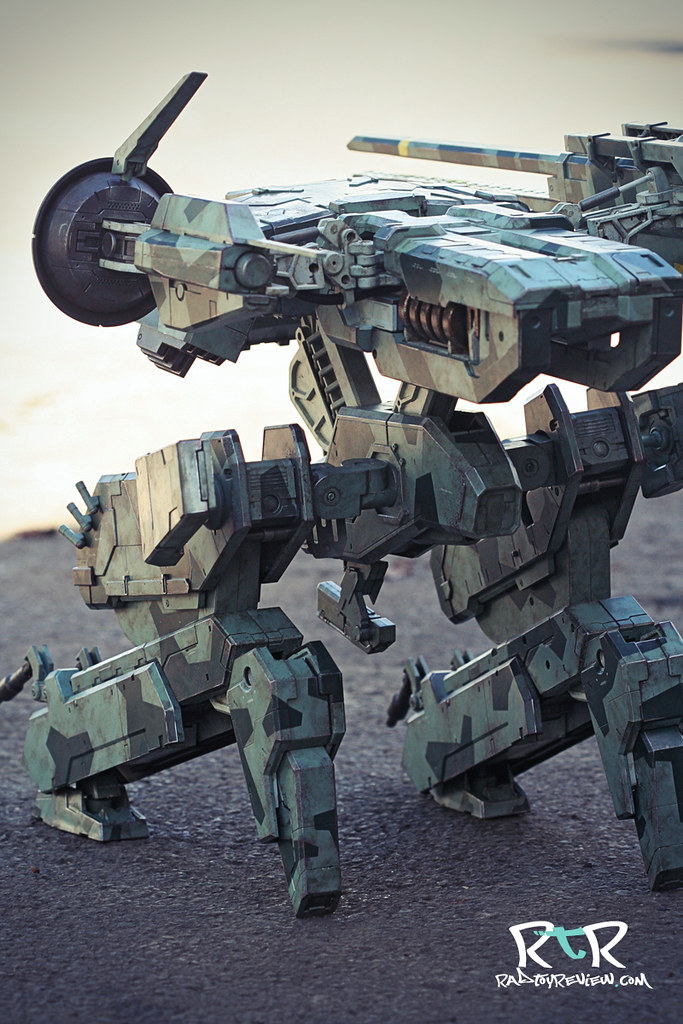
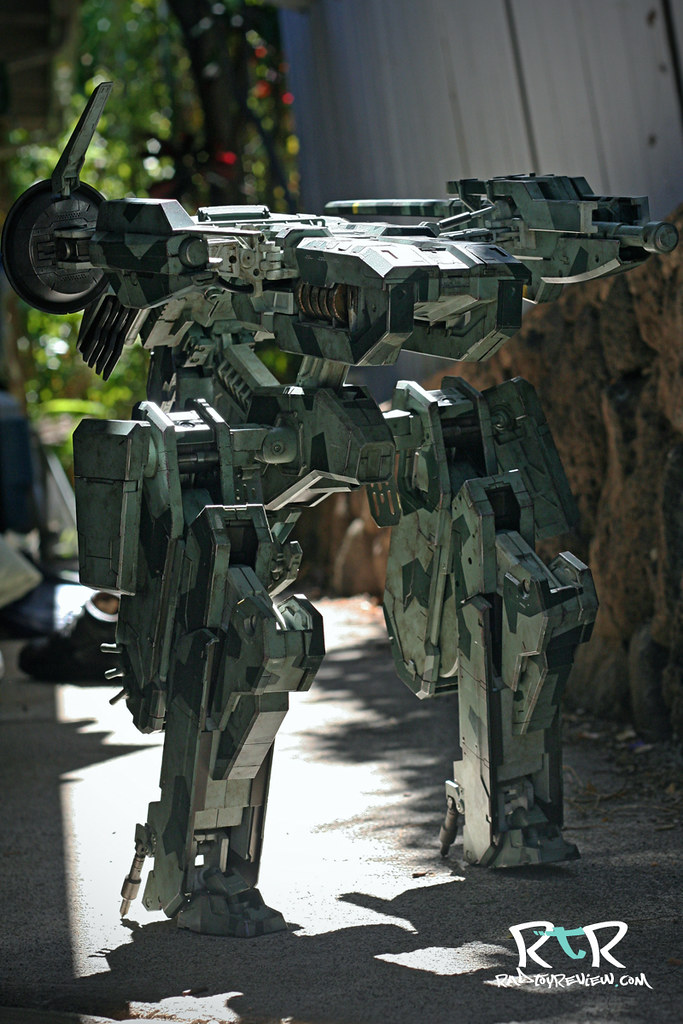
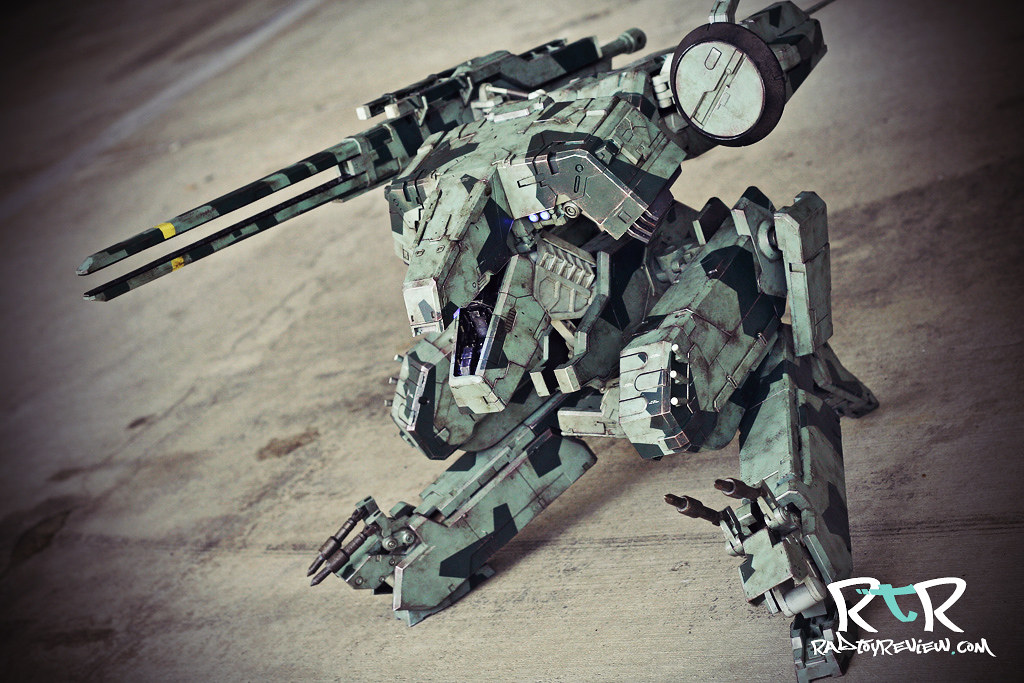
It’s possible I’ll say this a few times, so steel your resolve… “REX is huge!” I don’t even know where to start with him. There’s a ton going on with gears and removable pieces layered all over him. Not only is REX huge, he’s complex. There’s with good reason he comes with two instructional booklets and a tool.

I thought it best to start with some of the technical bits before I rushed out the door to snap away in strange territory. As mentioned, the gun is separate and has to be attached, as does the antennae to the satellite dish. There’s also a baggy full of tiny bits that attach to each of his legs as well.

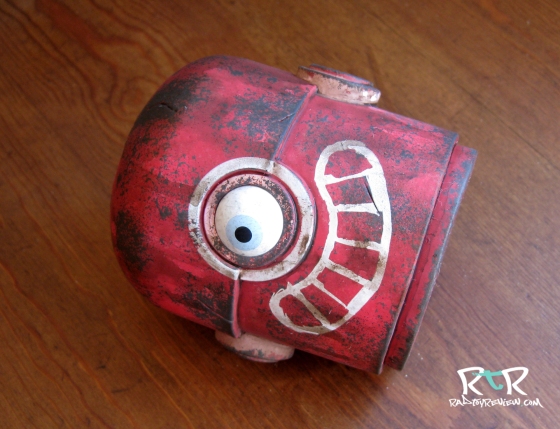
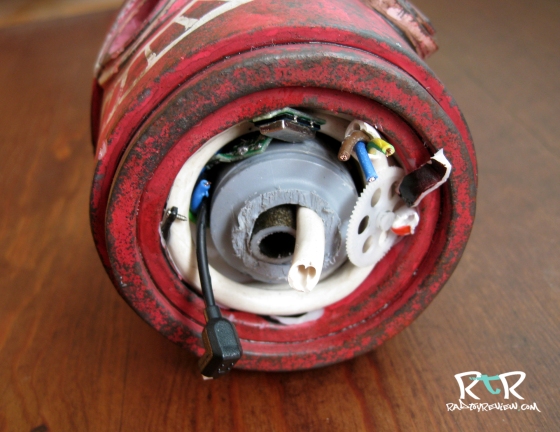
Even though I didn’t plan on doing any of my night shots until later, I went ahead and installed the batteries for REX’s various light features. He takes three AAA in the gun and three AAA under his head. Bring your own to play, none are included. The rail gun’s side pops off rather conveniently for a quick install. The head lights require you to unscrew a tiny screw underneath REX’s head to access the panel. You can light up the rail gun by pushing an easy to access button on top, but to turn the head lamps on, you have to hunt for a wee switch towards the bottom/back of his head. Easy enough if you have light.. an absolute pain if you don’t.

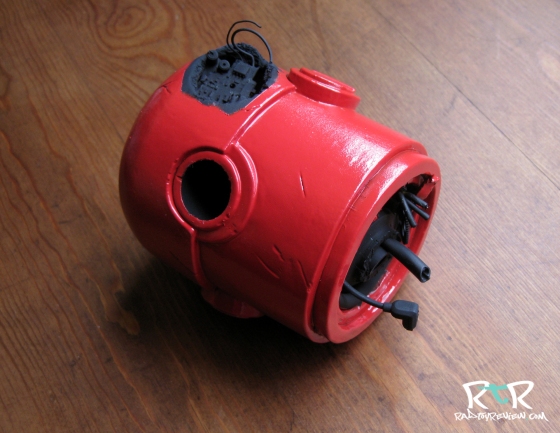
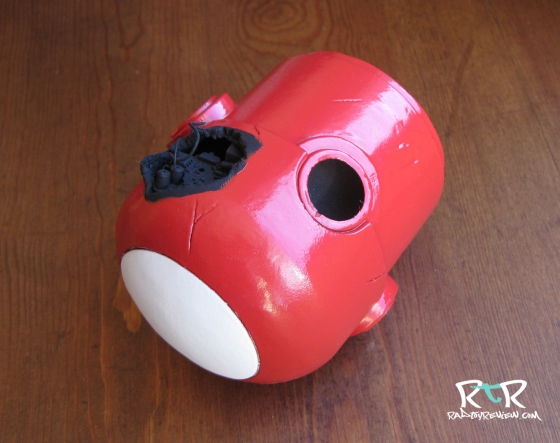
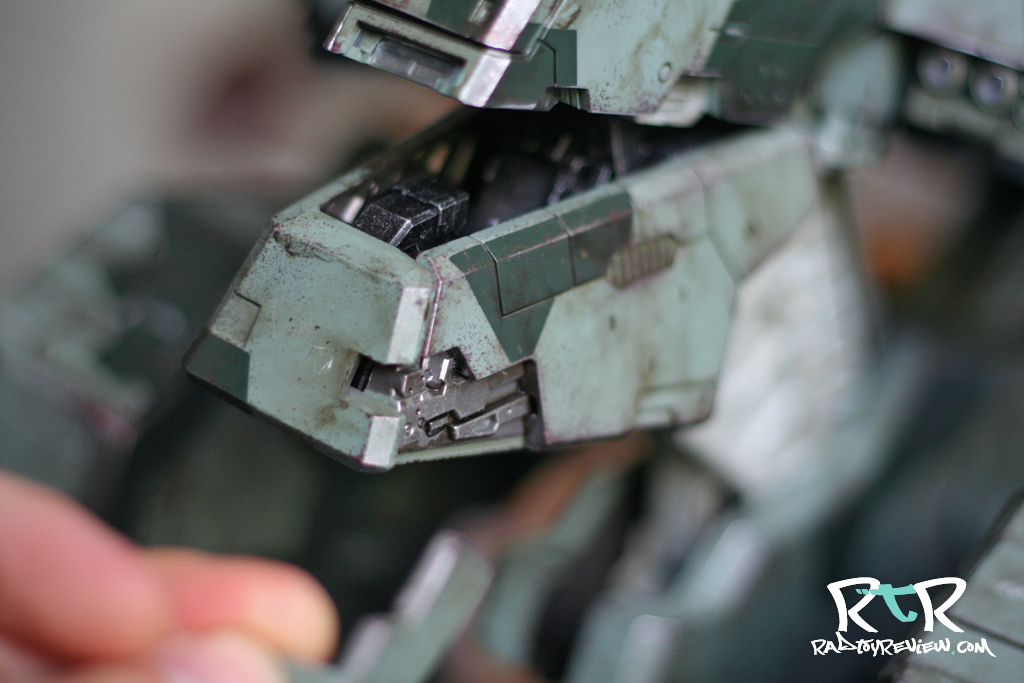
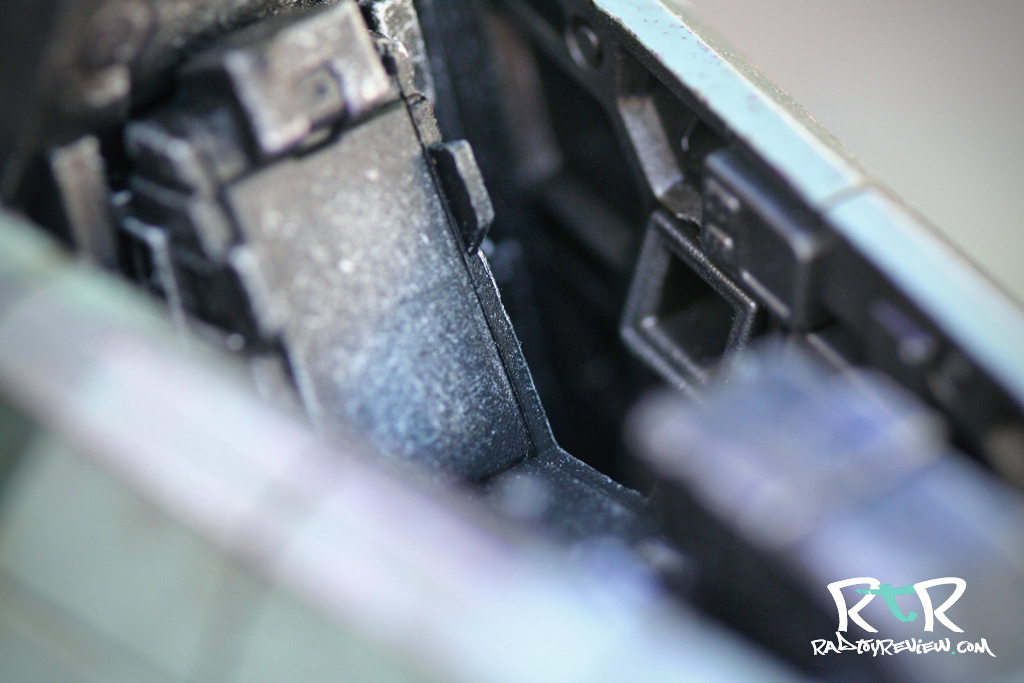
REX has a ton of removable panels scattered all over his body. The booklet will illustrate exactly where all of them are, but I thought it was fun to leave much of it up to discovery. The following pics showcase a few of the panels you can take off. Kim and company did a great job at accurately mimicking the body damage REX takes in MGS 4 all of which shows off the faux mechanics that make this monster work. It’s pretty fun popping them on and off to mix up his look.

(UPDATE: Since publishing this review it’s come to our attention that you may, in fact, be able to remove all the panels from both legs. However, I was unable to remove all the panels from the right leg due to how tightly they are attached. It’s possible they’re sealed on by paint but they literally feel permanently attached so I am not going to force them. We apologize for any misinformation. Most of the other removable panels on the body are still only one sided.)

It may be a confusing to some that you can knock off panels on one side but not the mirror side. For example you can almost completely strip down his left leg, but there’s nothing to remove on his right. I didn’t realize this at first and started cursing a little under my breath when I couldn’t get a matching panel to pop off like it had on the opposite side. It’s particularly confusing on REX’s back area because the side that isn’t meant to come off has some give to it and looks to have the same creases and recesses as the other. The only thing that seems to stand in the way is a small screw drilled underneath, through the middle of it.

It’s not a big deal and may not be off-putting to you in the least. I just thought I’d share my confusion so it doesn’t throw any of you who like to jump right in and start messing with things without reading the instructions first.

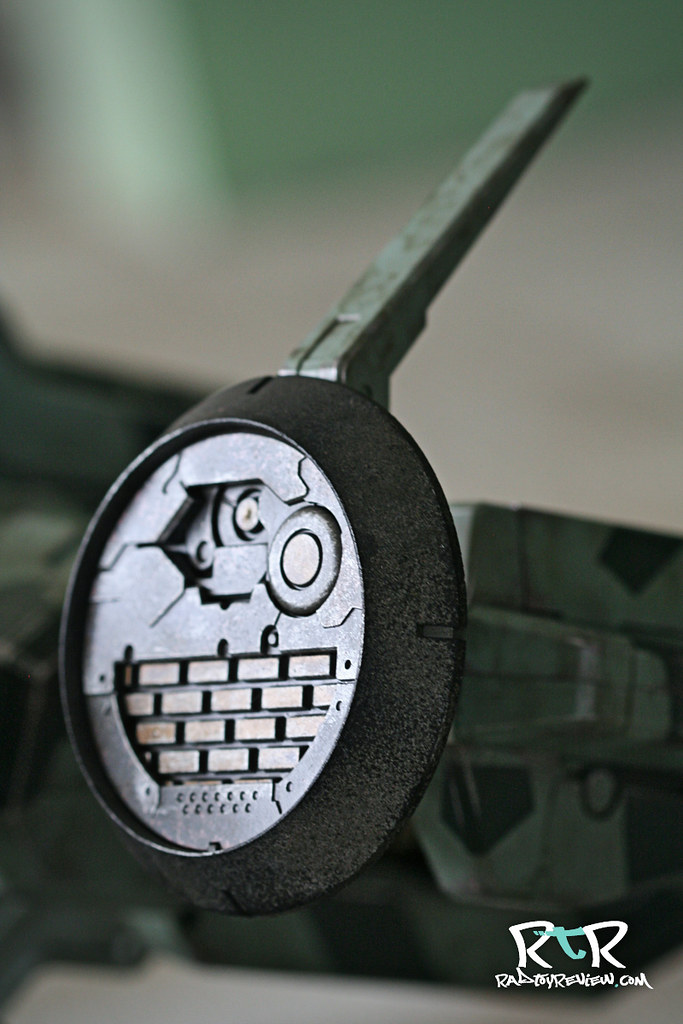
For the most part, I think I’ll keep his panels intact but I like the asymmetry you can achieve by taking a few off here and there. The satellite looks far more interesting without it’s cover.

After putting all the panels back on I thought I’d attempt to get accustomed to how REX moves around before I headed out to do the rest of the shoot. I popped out his heel supports and extended his toes to get a more dynamic and alive pose.

At this point you can que 15 minutes of me trying to figure out why the legs would not support his weight. Each time I got him into a pose I was happy with, he’d buckle either left or right.

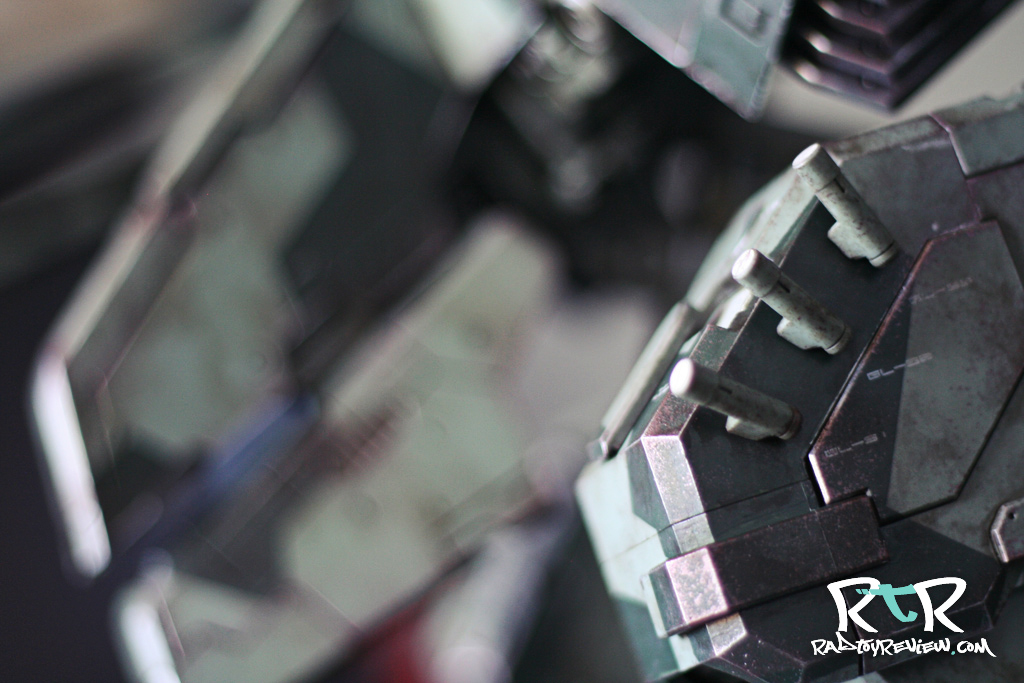
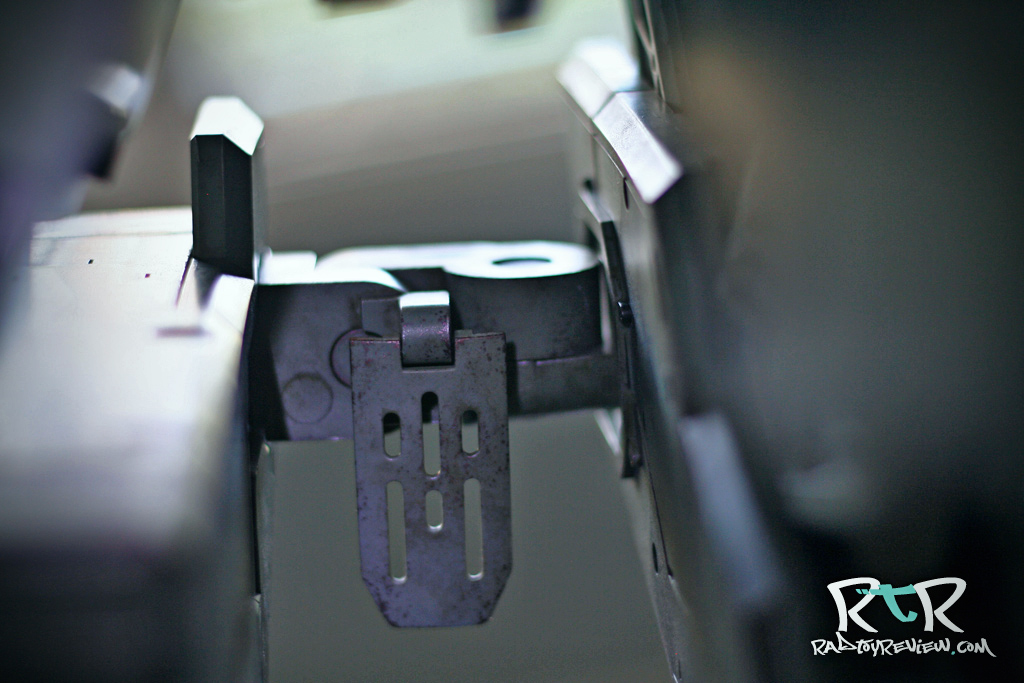
It turns out that my REX’s leg joints were twisted 45 degrees down on both sides. I only realized that after staring at the booklet and comparing it to what I had. Below is a pic of how your leg joints should look out of the box.  An easy way to tell, is that the metal mud flap-like things should be hanging from the front of the leg joints, not the bottom as mine were. It may not really matter in your case, but in mine the rotation joint that originally faced forward was a good deal looser than the joint that should have been. Thus causing the buckling under his weight. After I turned them to face correctly, my problem went away.

So what if your REX has ill-rotated leg joints or what if you want to just move the legs in general? Well there’s the right way to do it and a “do at your own risk” way.

To do it the right way, you need to break out the included black plastic tool and put it to use. You may also consider grabbing your friendly hobo as a spotter as well.

Warning: Please use hobos, friendly or otherwise, at your own risk. Hobos don’t know no better than to ride the rail.. they may wander off with a few of your things in a gunny sack if you don’t watch them carefully. 

I believe the idea with the tool is to give the quad-hinged joint some counter support to your twisting. There’s a substantial amount of resistance in the leg joints, necessary I assume to support the toys weight. That being said, I found some of the joints to be a good deal too tight. Twisting one leg out will put noticeable strain on the neighbor joints, something that I’m positive could lead to breaking if not handled carefully. The tool is there to help prevent that. In the images below, I tried to demonstrate somewhat how to use the tool.

In the image above, I’m using the tool to go across the top of a joint while I swing out the leg, which uses the neighboring joint. This gives the joint I’m NOT using counter support against the pressure I’m putting on it. I’m not 100% sure I’m using as intended but it seemed to work well for me. Don’t worry, it comes with it’s own instruction sheet so you can decipher the best way for you to use it yourself.

With or without the tool, it was a little stressful having to apply that much force to rotate a joint, particularly when loud cracking and popping sounds accompanying it.

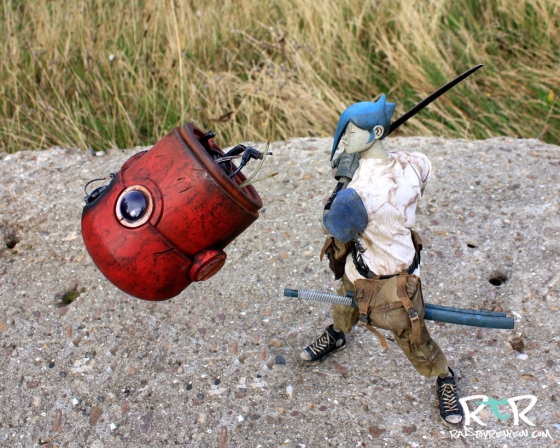
Taking REX on the road for some more interesting atmosphere was fun. I had about two dozen or so people stop and ask what the heck I was doing. I’m sure more than a few were concerned of the nuclear capabilities of this guy.

Confused civilian: “Whoa. What is that thing?”

Me: “It’s a toy robot”

Confused civilian: “Is it a transformer? My kid has those..”

Me: “Uh.. sure. Sort of.”

Confused civilian: blank.. long stare followed by walking off a few steps, only to stop and look back warily.

Rest easy civilian, I got this.

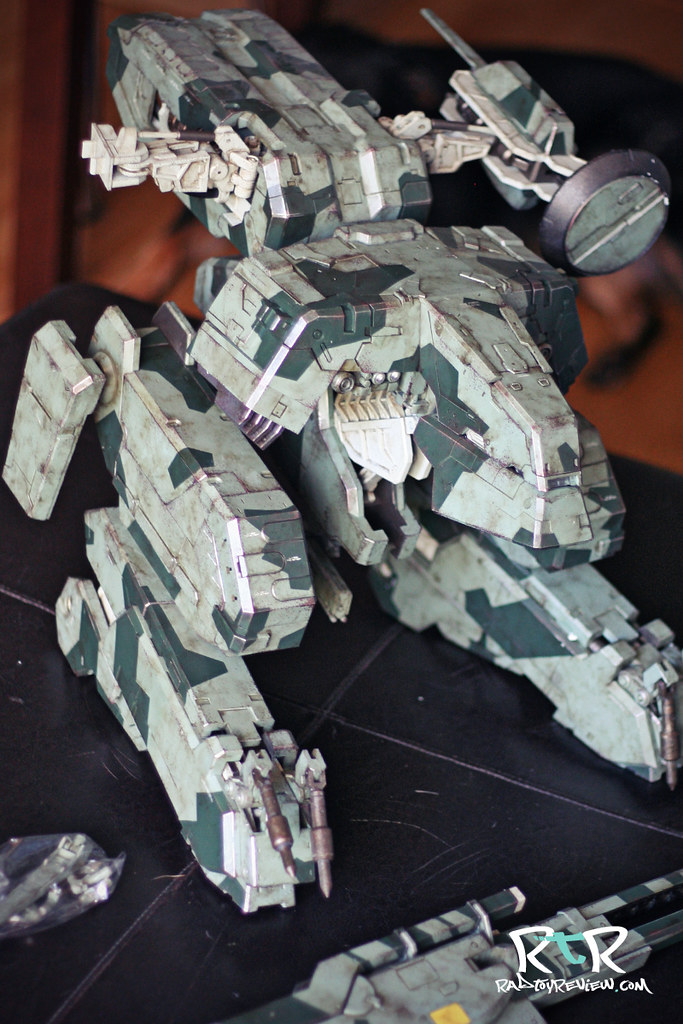
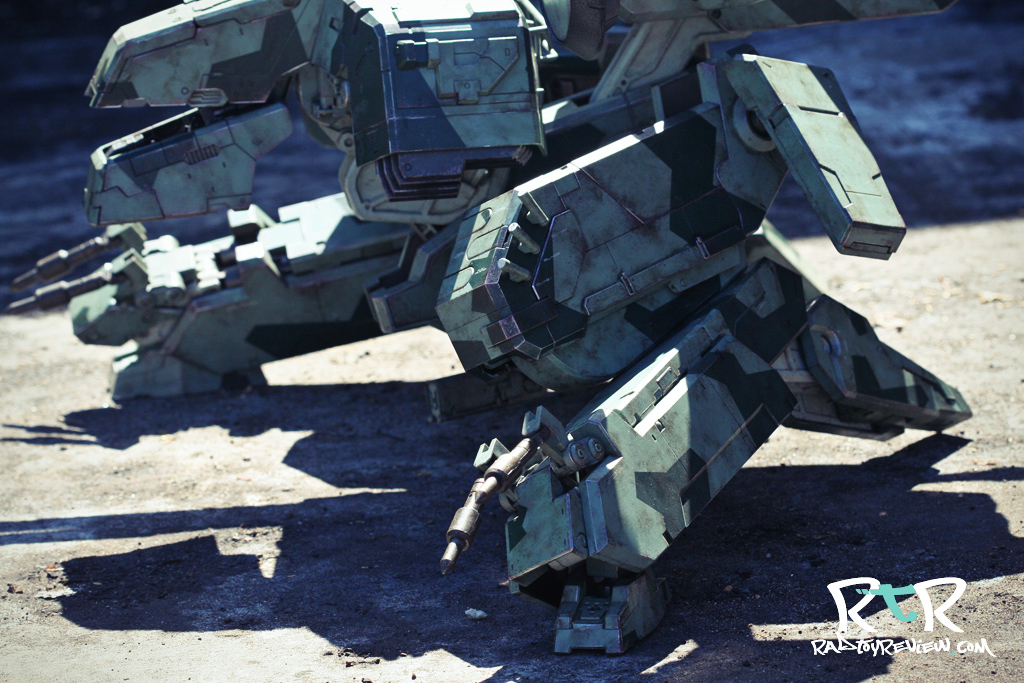
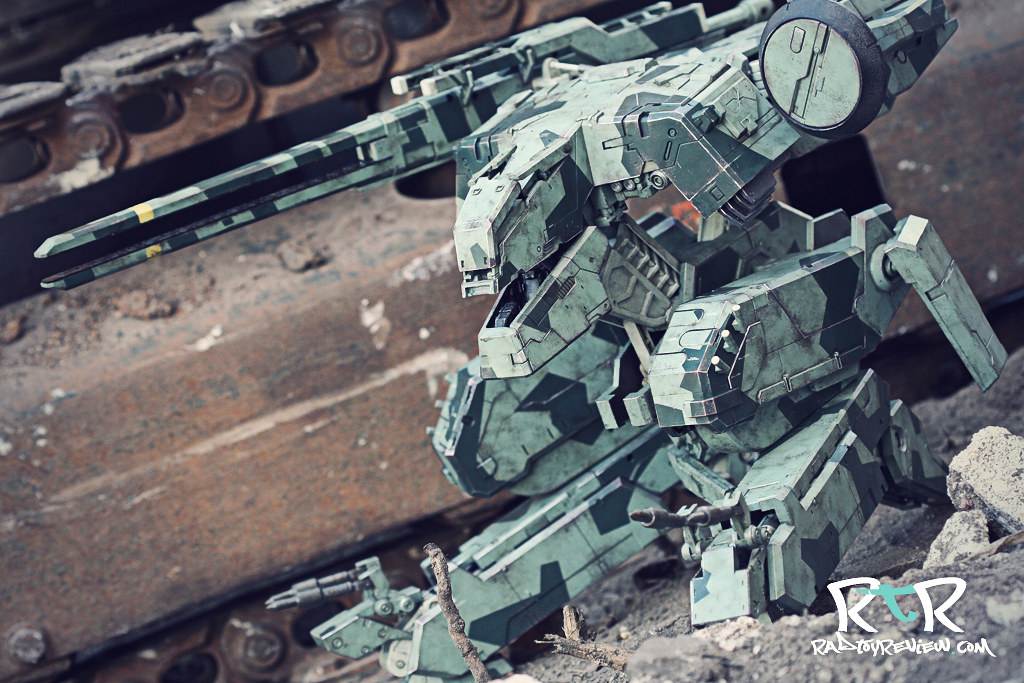
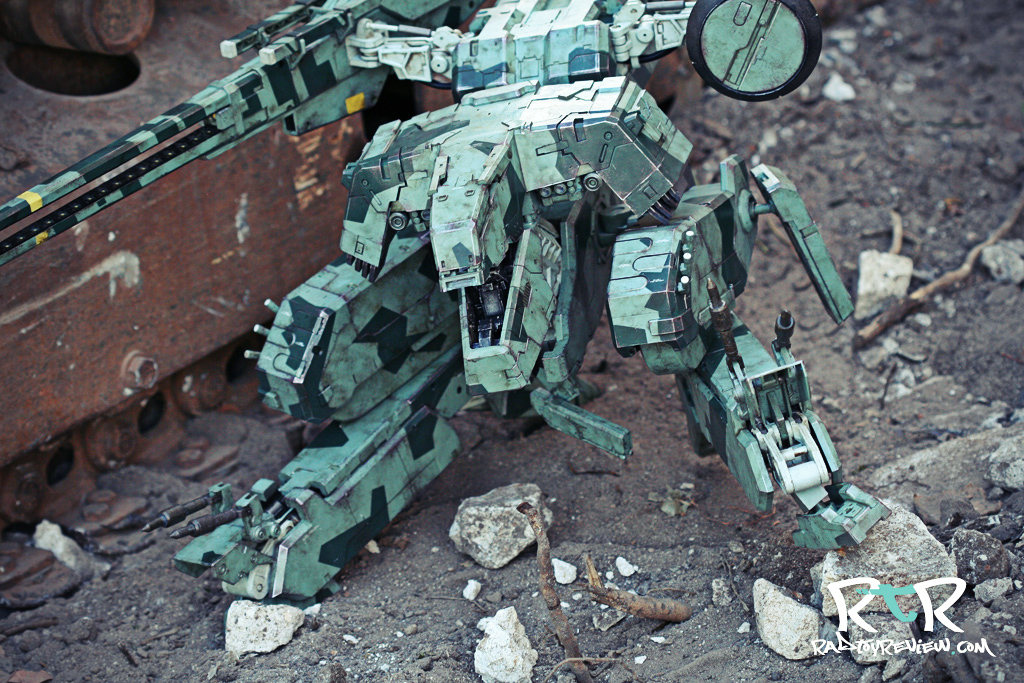
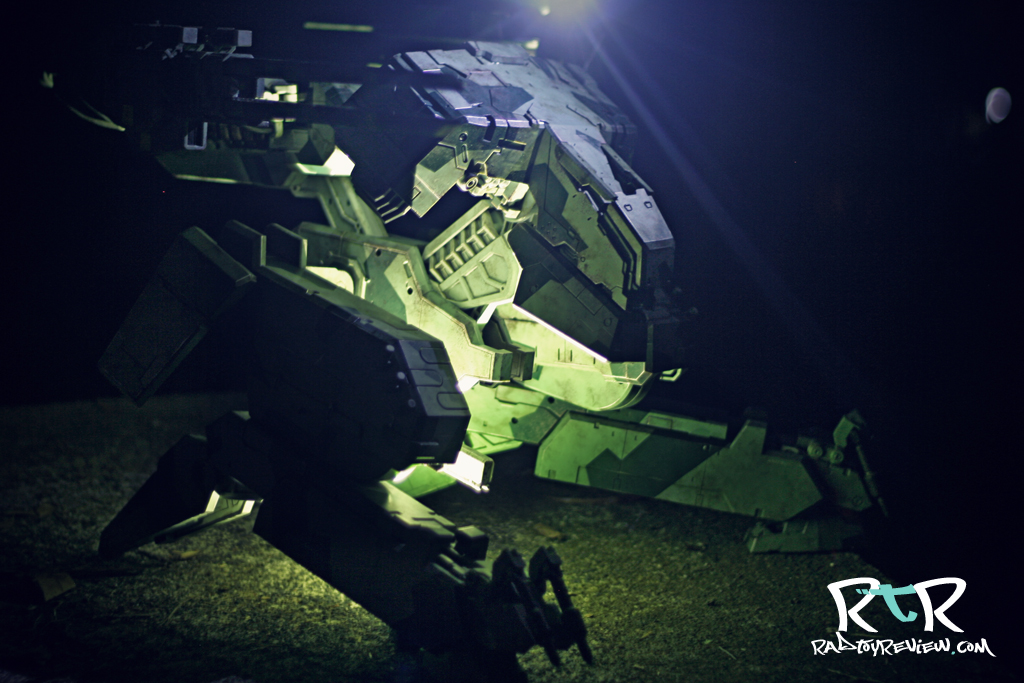
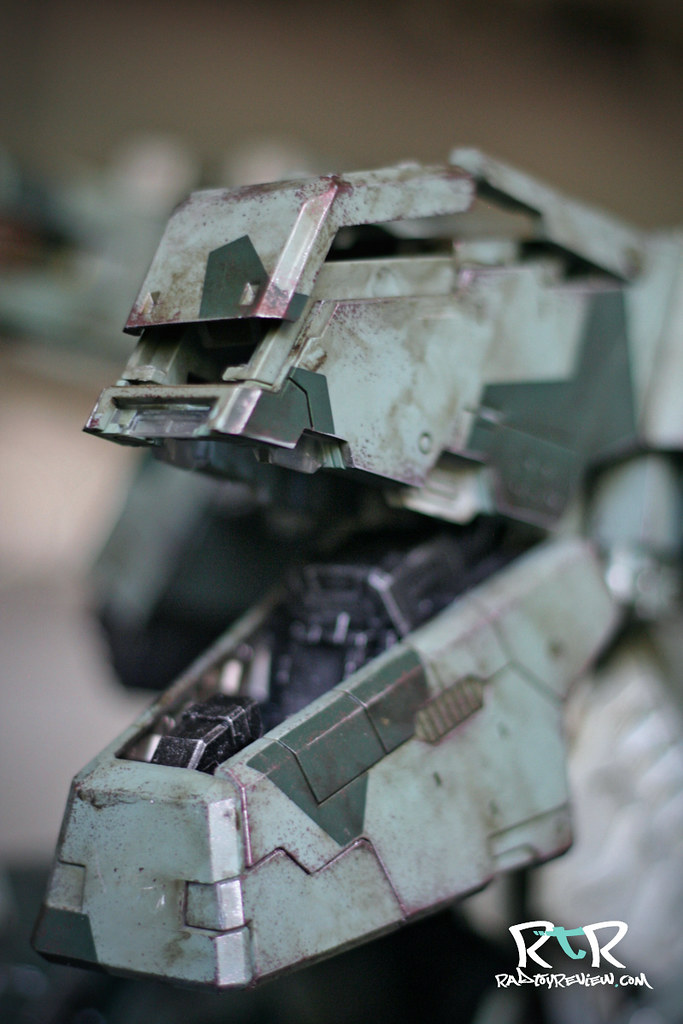
Once you get your nerves in check, posing REX is pretty fun. I found myself approaching him as more of a puzzle than something you’d simply grab and toss into a pose.  You have to think a little bit about what you want to go for before you do it. It’s difficult for me not to look at him as some sort of menacing, mechanical K-9, so I just went with it. Opening up the cockpit, lowering the head with the backend in the air, we could be playing fetch..

..or nuking a small village.

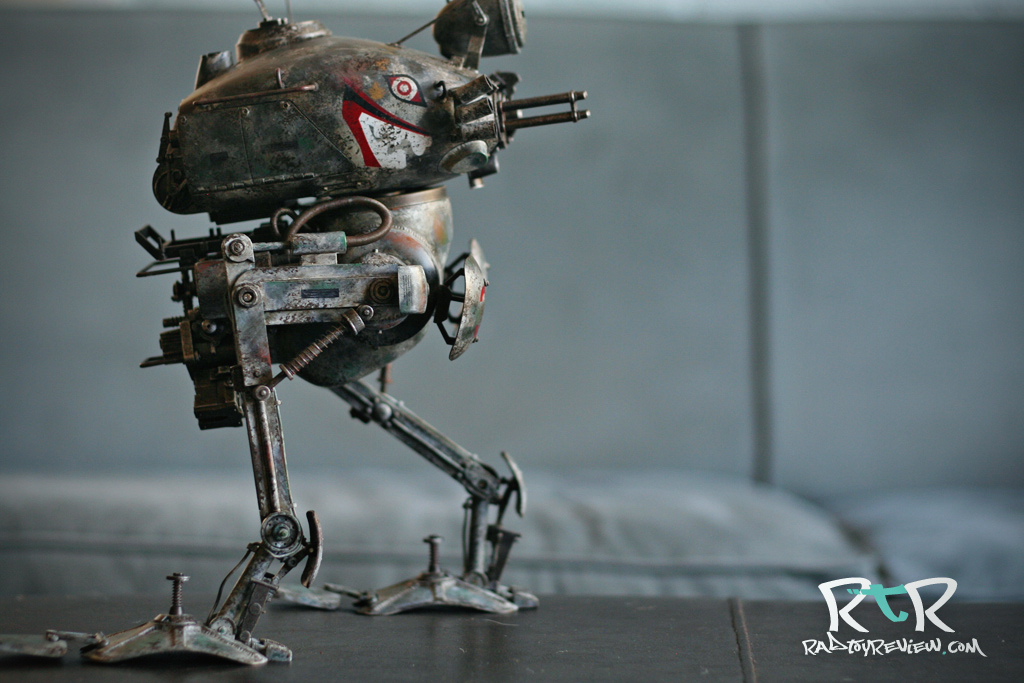
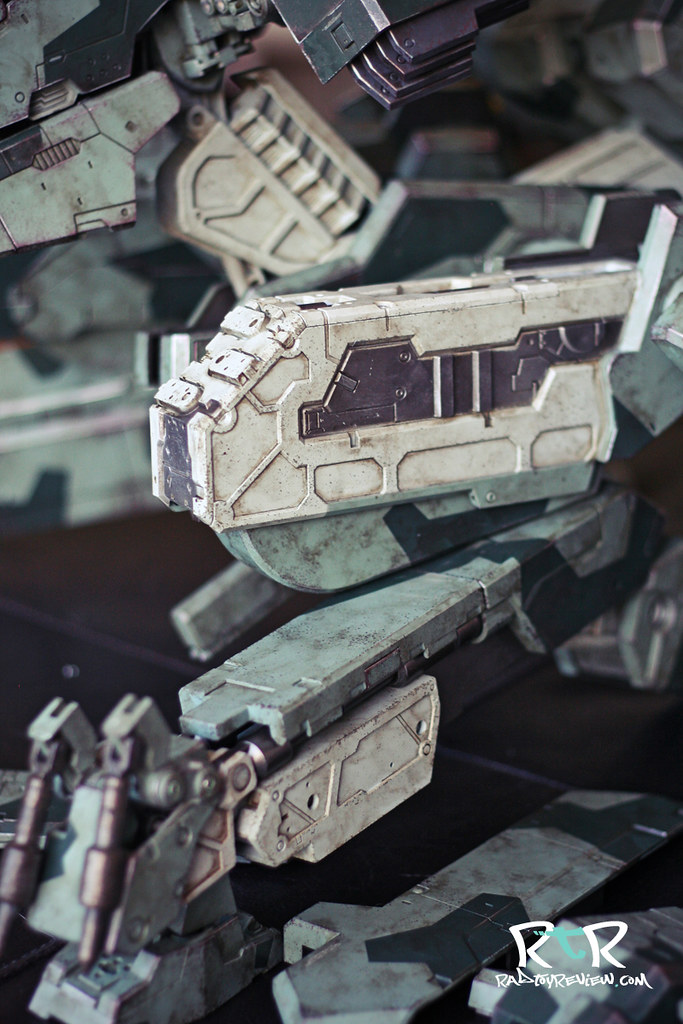
You can get a pretty wide variety of looks out REX simply by changing his leg configuration  The back heels have 3 different positions (and everything in between) that cause Rex’s look to go from rested to full alert.

The way his front of his legs extend is pretty nifty. You flip up the toe gates, which kick the motion into gear, then just pull out a bit. It only extends the leg maybe an inch, but it’s cool and gives a surprising amount of lift to him.

The body articulation on REX works a few different ways. You basically have a central, groin area that the leg joints attach to. From there you have the front end (head) and back end (tail) on their own support arms that can be lowered or raised. The back-end also slide extends to allow for more wiggle room.

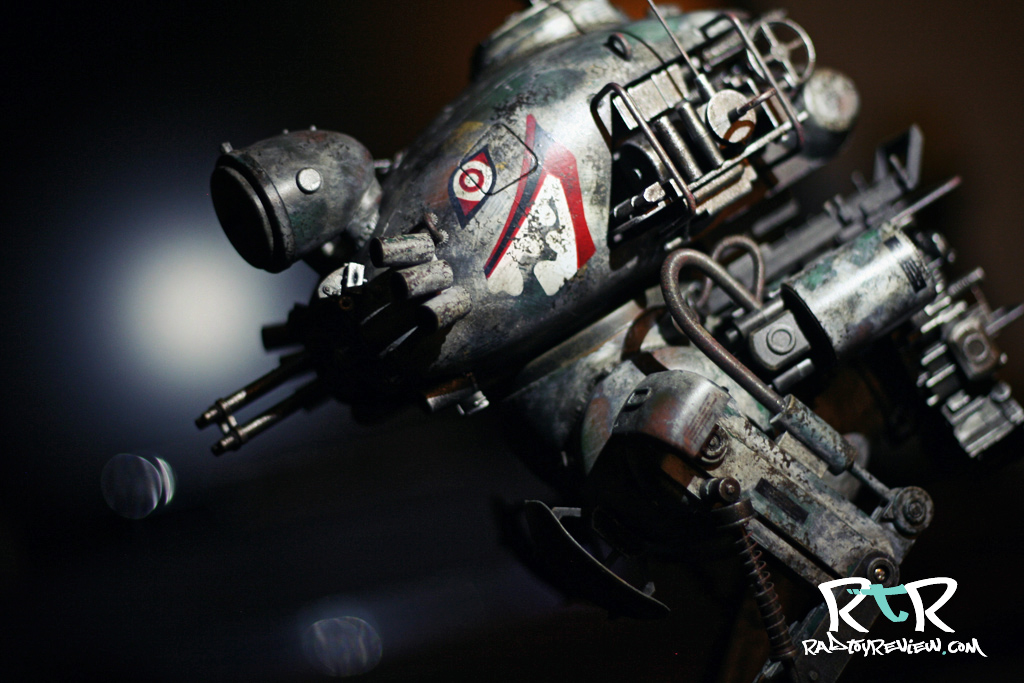
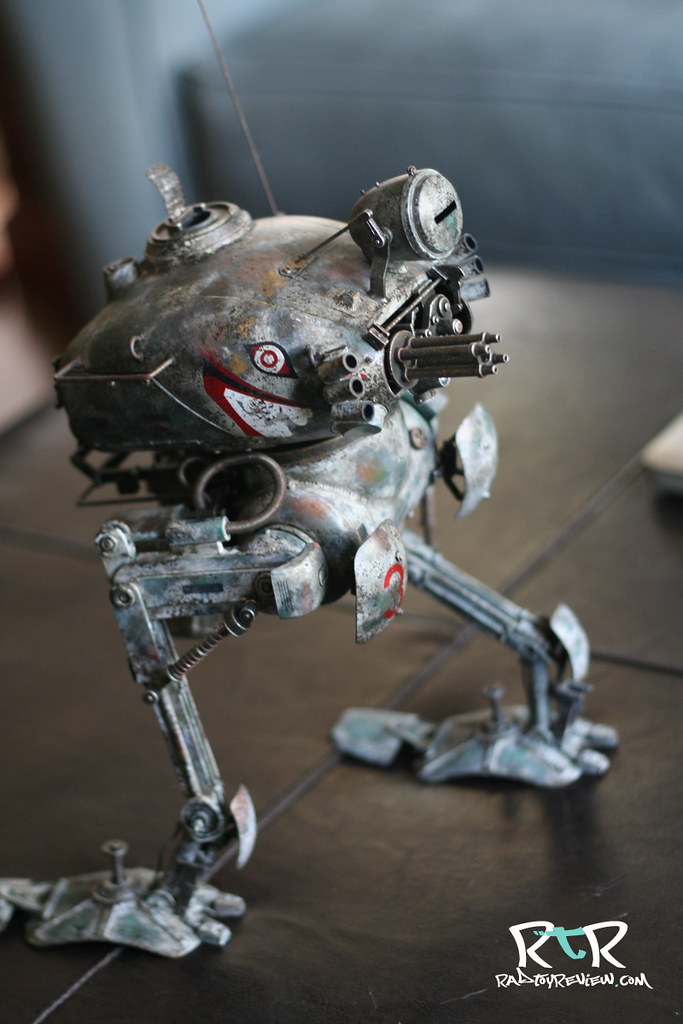
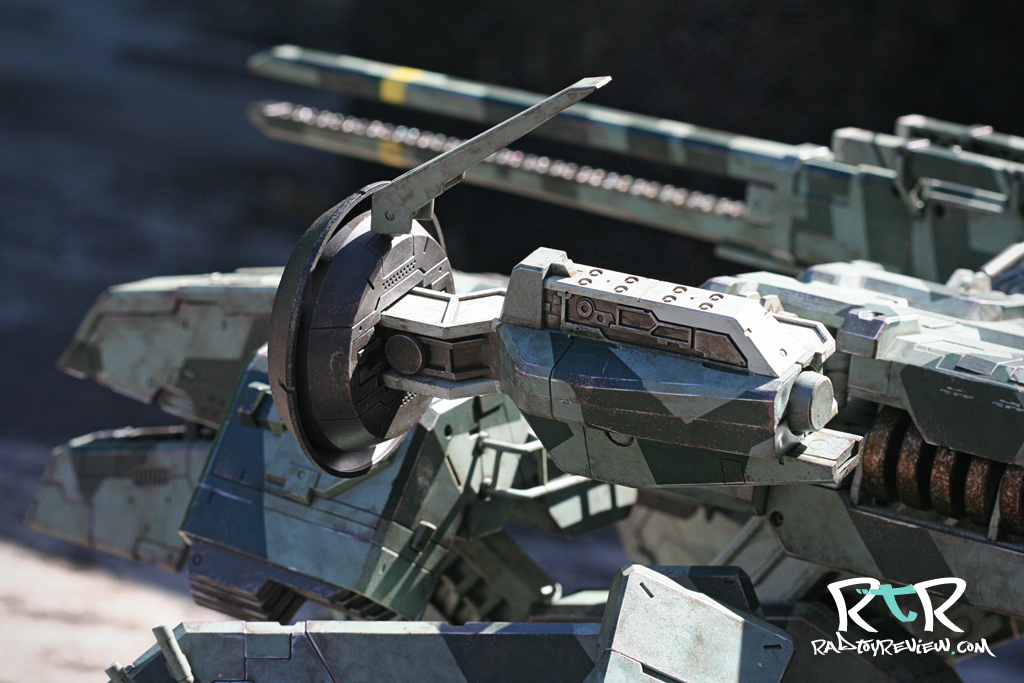
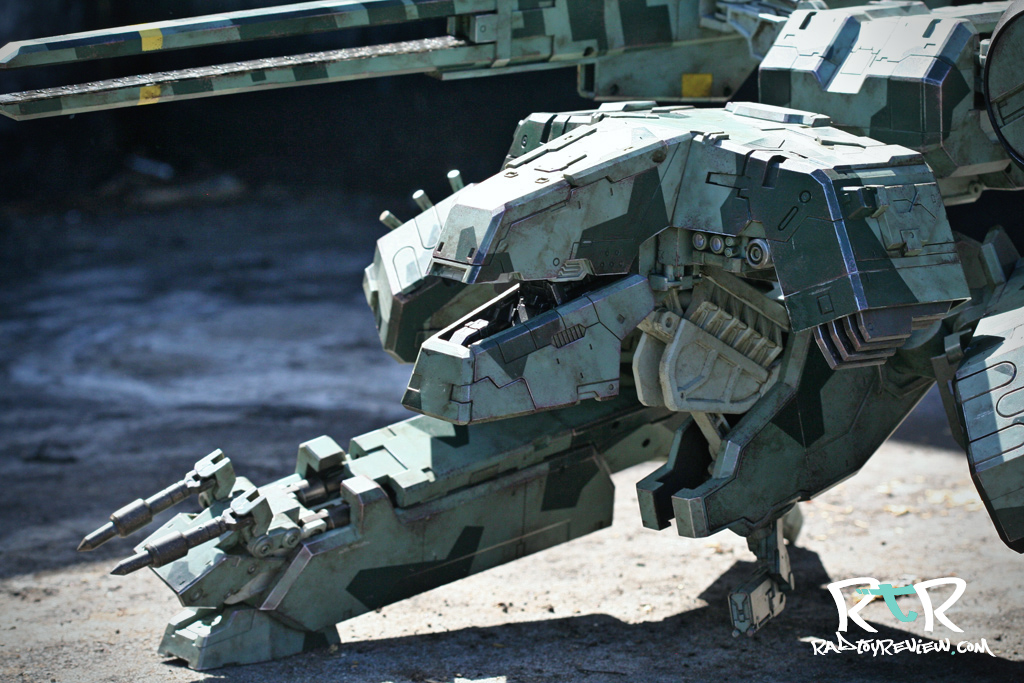
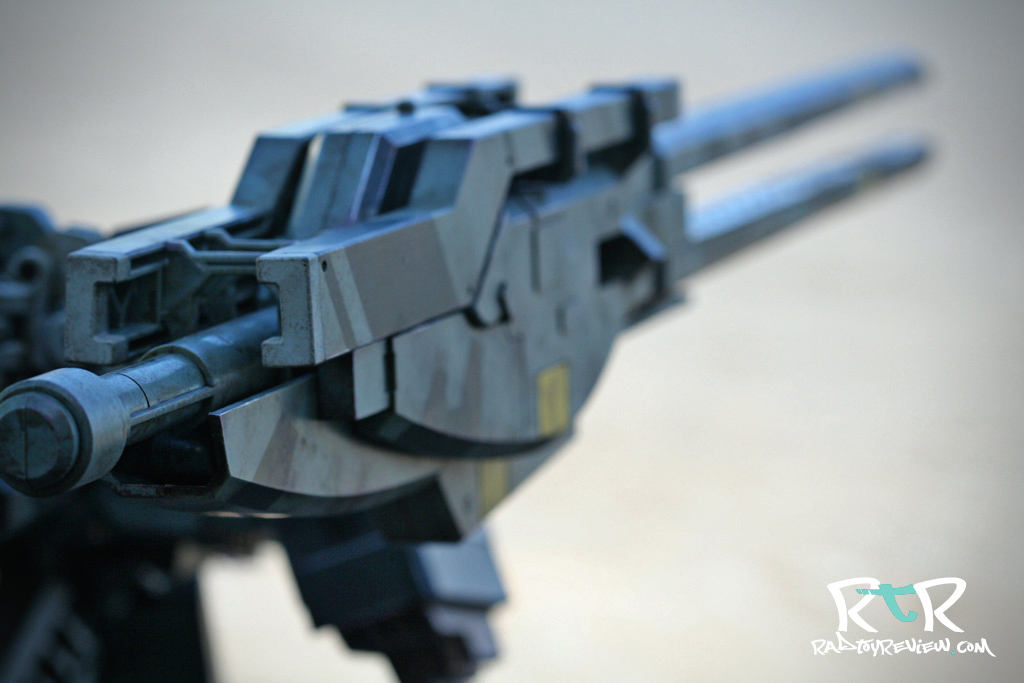
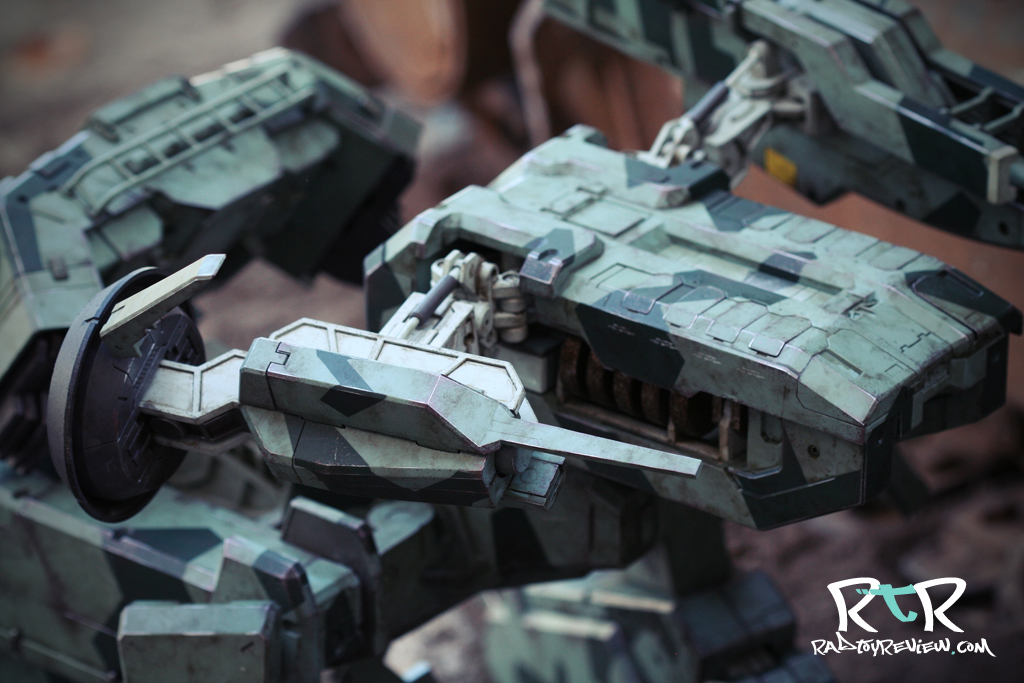
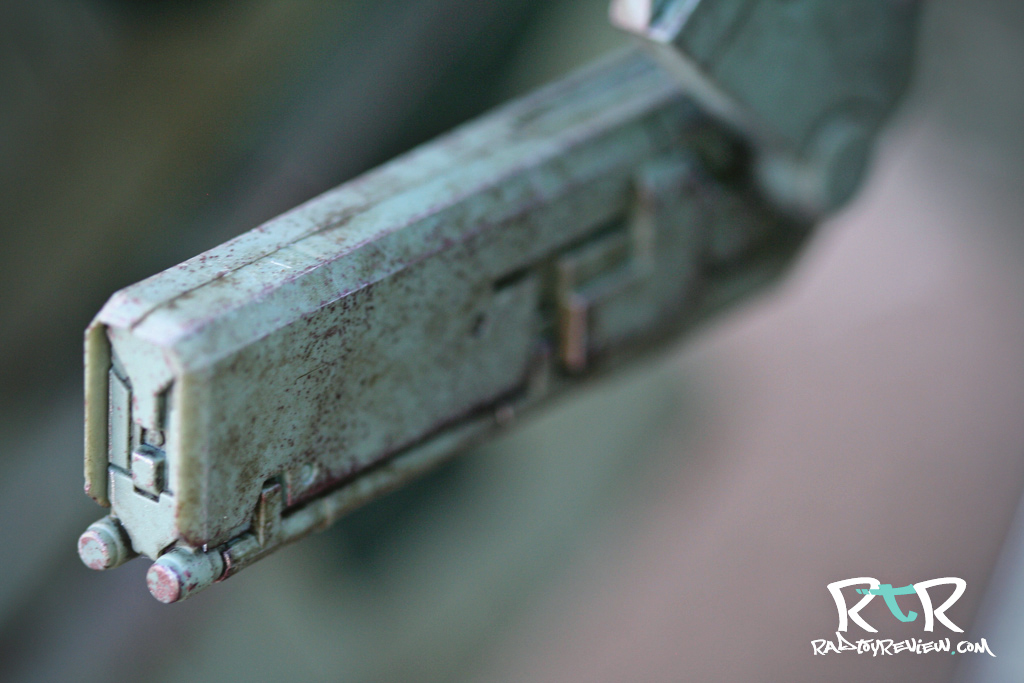
The rail gun is just so cool looking. 3A didn’t originally design it or anything, but they did a bang up job at recreating it.

The joints attaching the rail gun and satellite allow you to swing them in or out, as well as push them slightly forward or back. I naturally wanted to raise the gun up and down like you would expect to be able to do with a tank-like vehicle, but to raise or lower the nose of the weapon, you have to raise or lower the entire back portion of REX. This seemed a little inconvenient and took a little getting used to, but I believe it holds true to the source material so shouldn’t really be an issue.

One thing you may have already heard is that 3A didn’t implement any kind of head rotating articulation that the in-game REX appeared to have. In the game, Konami made REX much more alive and animalistic than what we’d generally relate to a nuclear tank-like weapon. I assume 3A’s decision was due to how much REX weighs and that adding a rotating joint would risk leaving him with a slack, hanging head. The harshly clicking joints are tight for a reason. It’s been bemoaned by many, but once you actually see this guy, I think you’ll understand just how complex and impressive he is.

While his head doesn’t rotate around, you can cheat to get similar looks by using the well designed multi-jointed leg hip/torso articulation. Through some finessing you can twist the entire body one way and the legs  the other and he’ll look as though he’s panning the landscape for Snake. It would have definitely been nice to have but after spending some time with him, I don’t miss the idea of rotation too much.

One thing that did slightly annoy me was that some of the little panels, particularly the vents on his legs, just will NOT stay in place. Some are literally just resting there thanks to the grace and magic of gravity. Just posing him and clicking a stiff leg out can cause 3 or 4 of the little covers to pop off and go jettisoning across the room. Just be mindful of that when/where you’re posing this guy so if one does unintentionally spring free, you won’t lose pieces.

Now it’s time for a flood of photos.

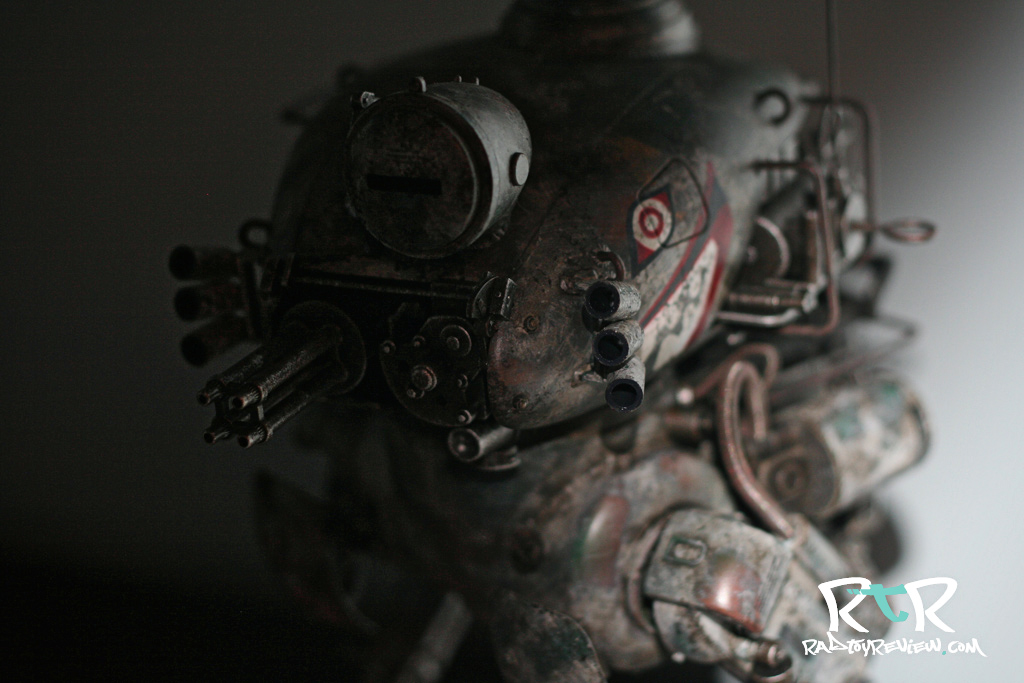
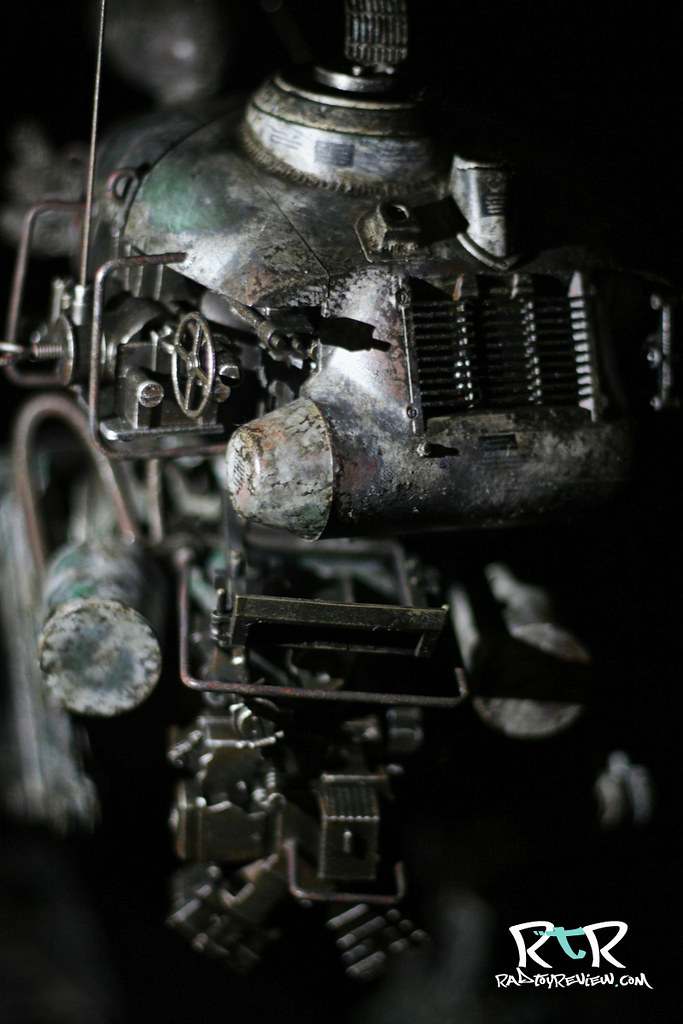
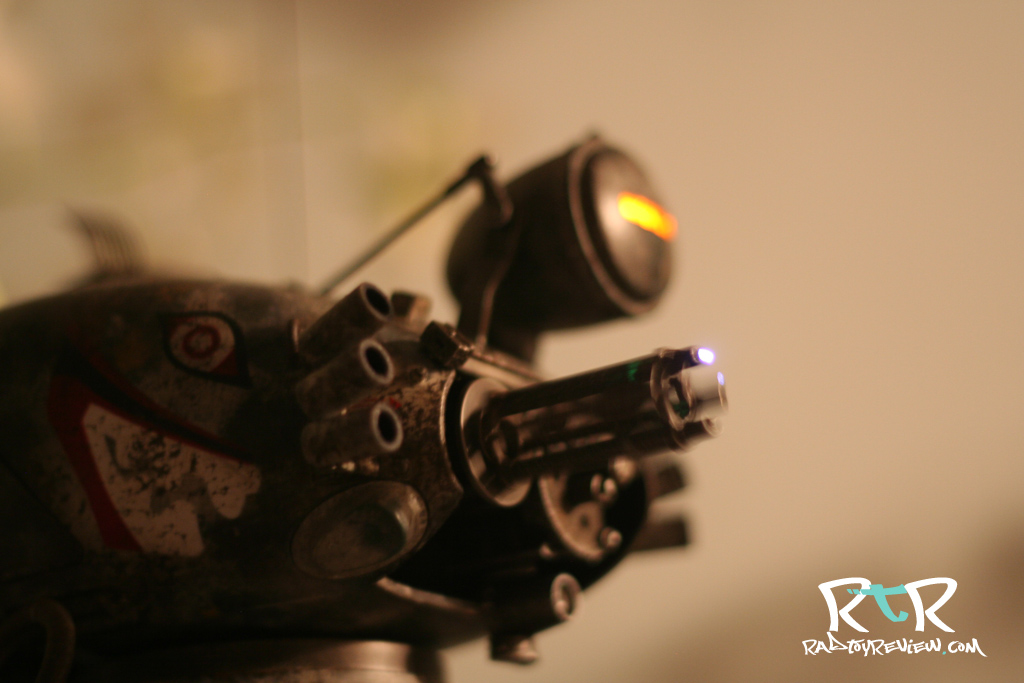
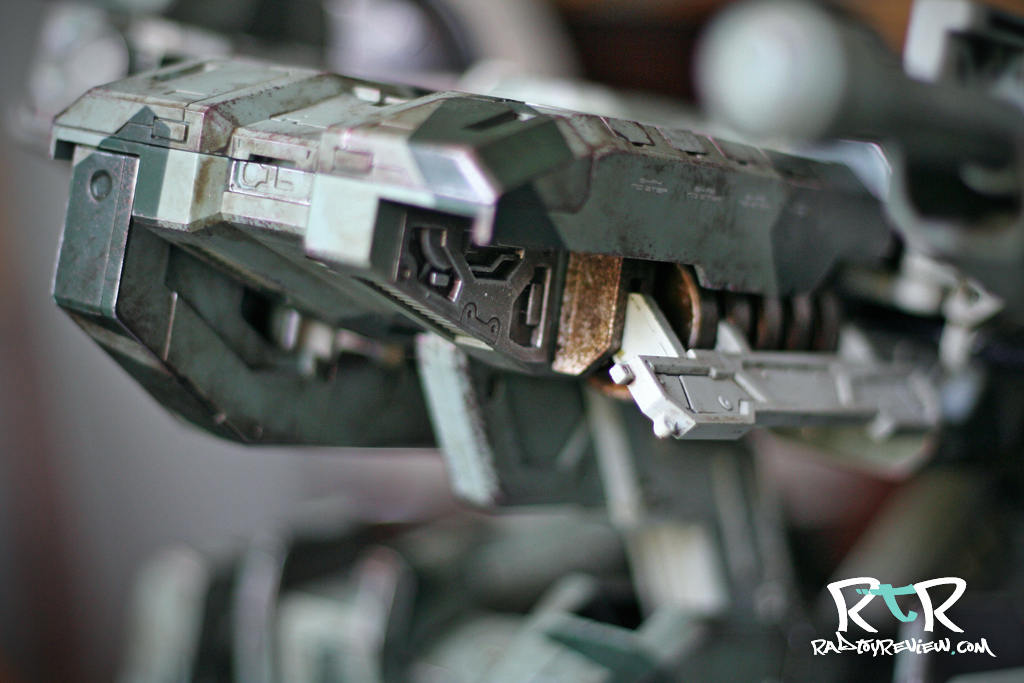
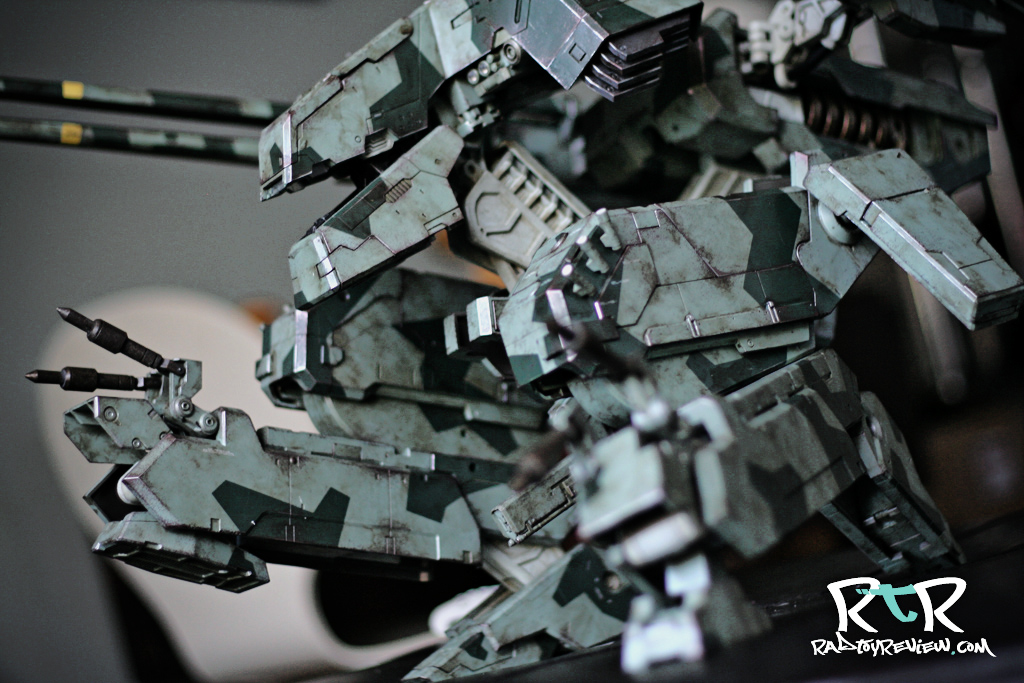
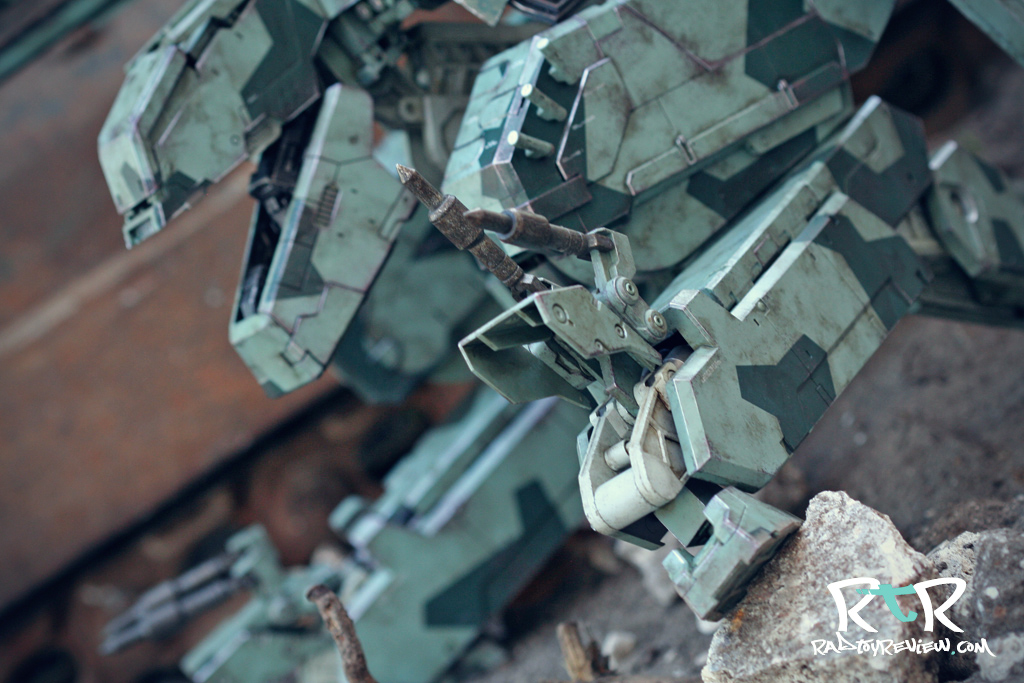
There’s so many cool little details on REX. The machine gun underneath him is one of my favorites.
edit: It was called to my attention that it isn’t a machine gun at all but actually a FE laser. The same one  responsible for slicing Gray Fox’s arm off. Thank for the help!

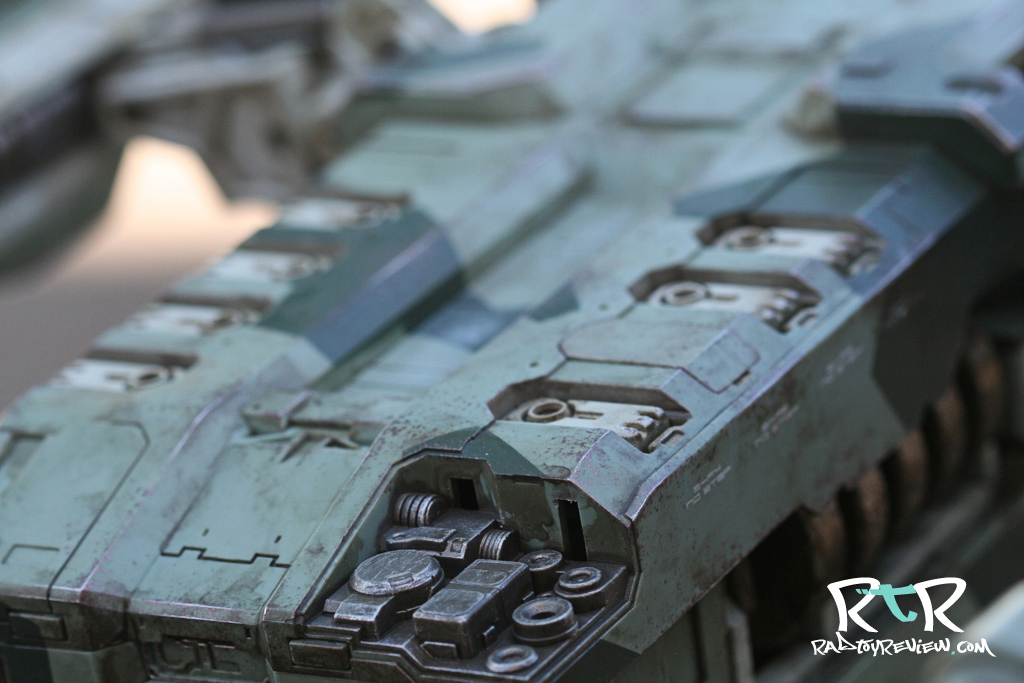
The afore mentioned removable panels shows a variety of cool engineering underneath.

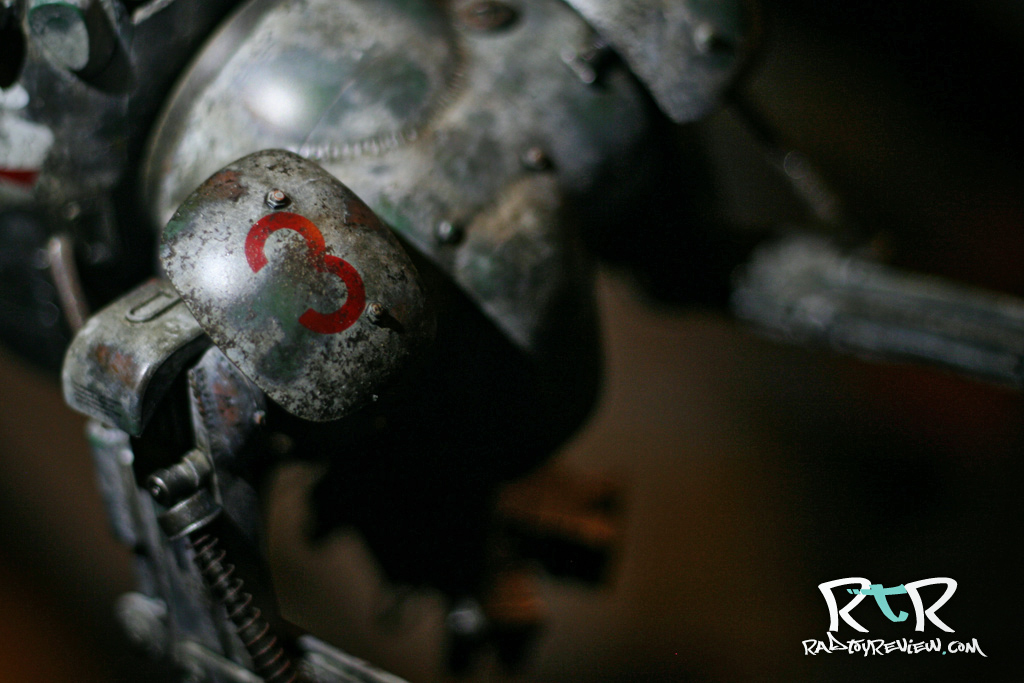
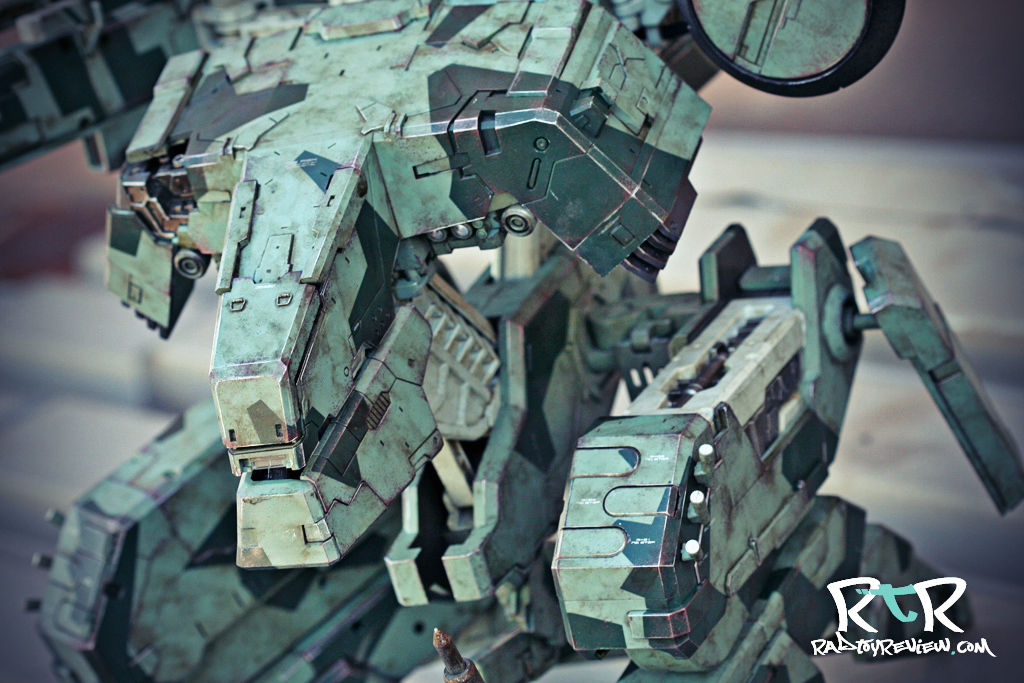
His paint application is top notch and stays on par with the best of what 3A has ever offered. Also, since some have asked and just in case you can’t tell from the photos, REX is mostly an unsaturated green in color.

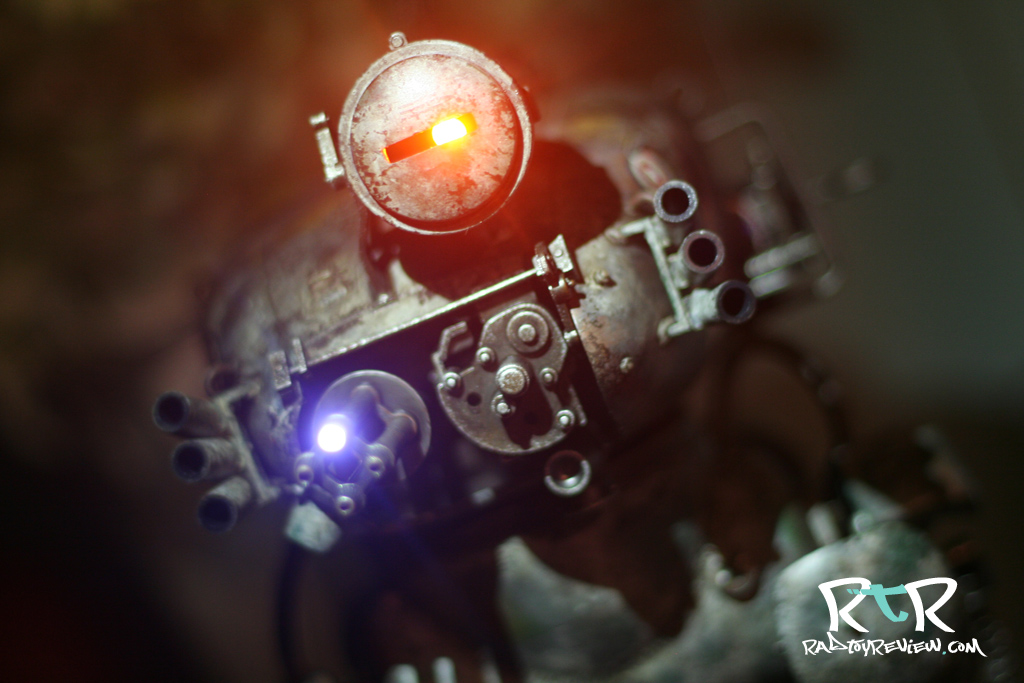
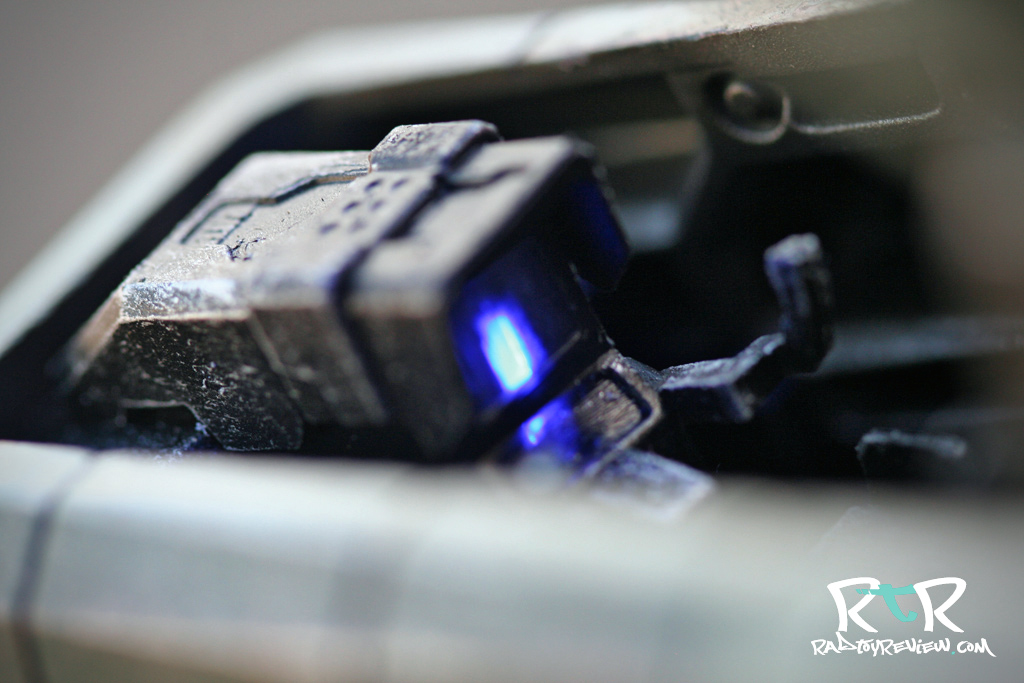
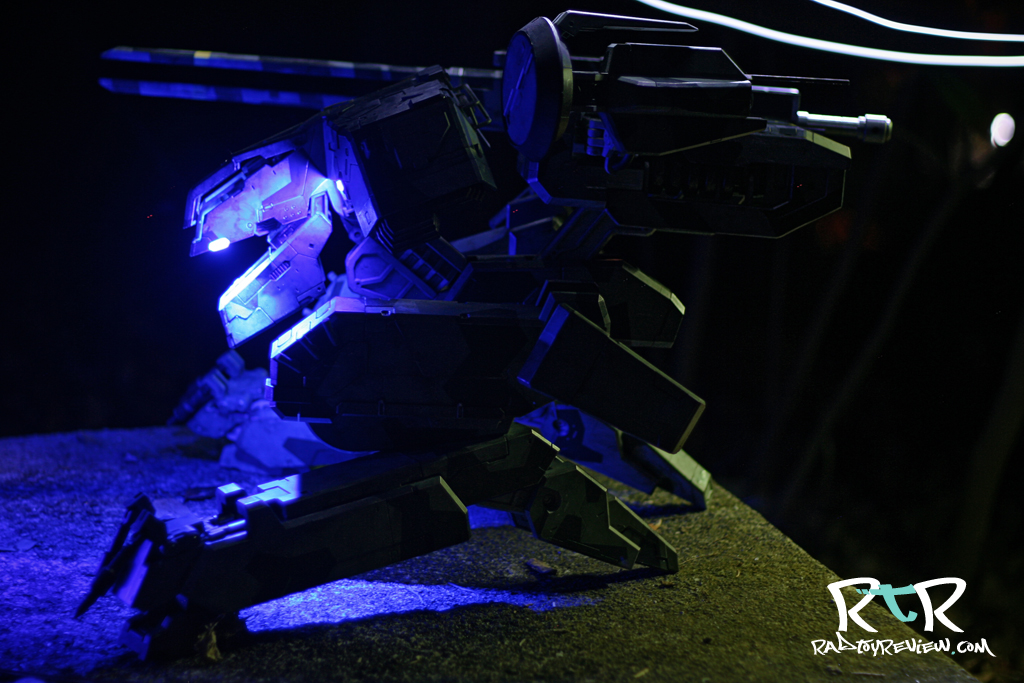
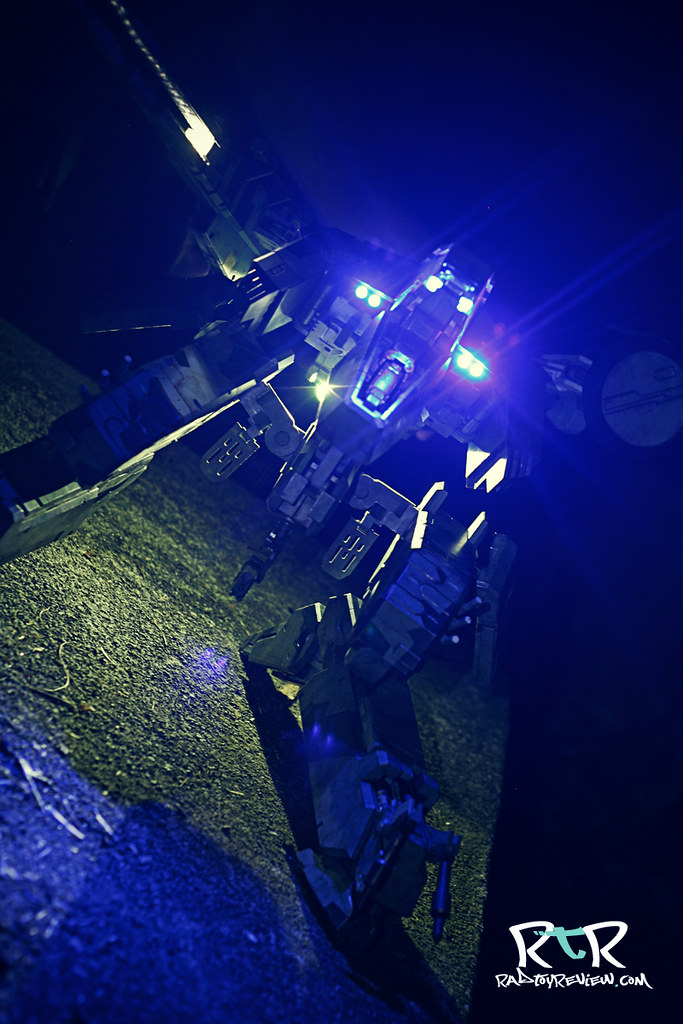
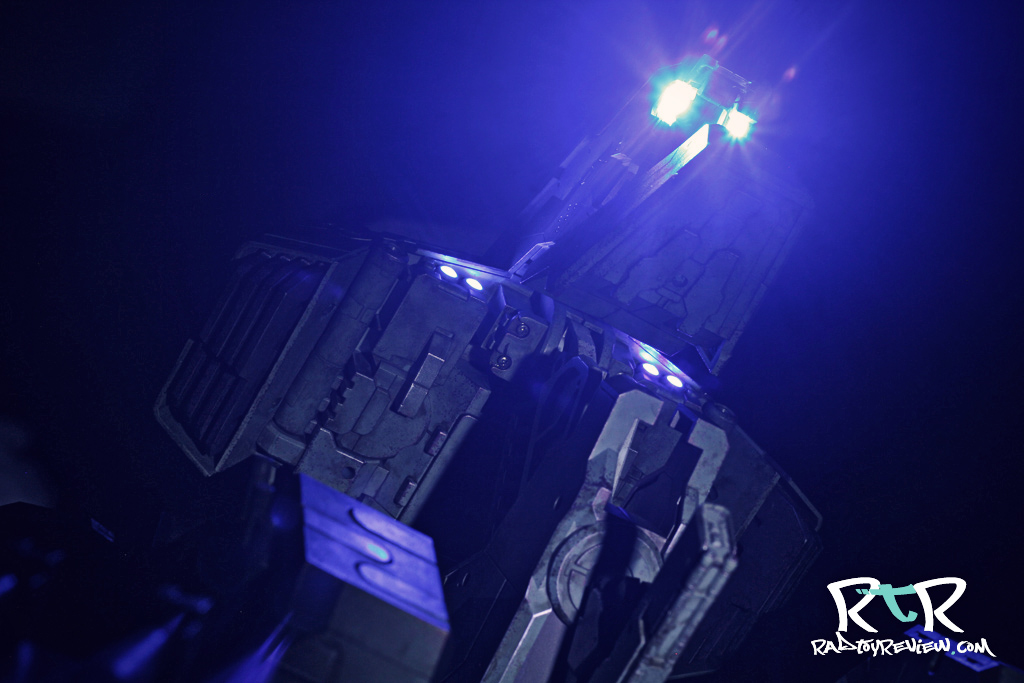
Here you can see some of the light details 3A worked in. I love the fact that the screen for the driver has a small light that you can only really see if you’re practically in the cockpit. Details man.. amazing details!

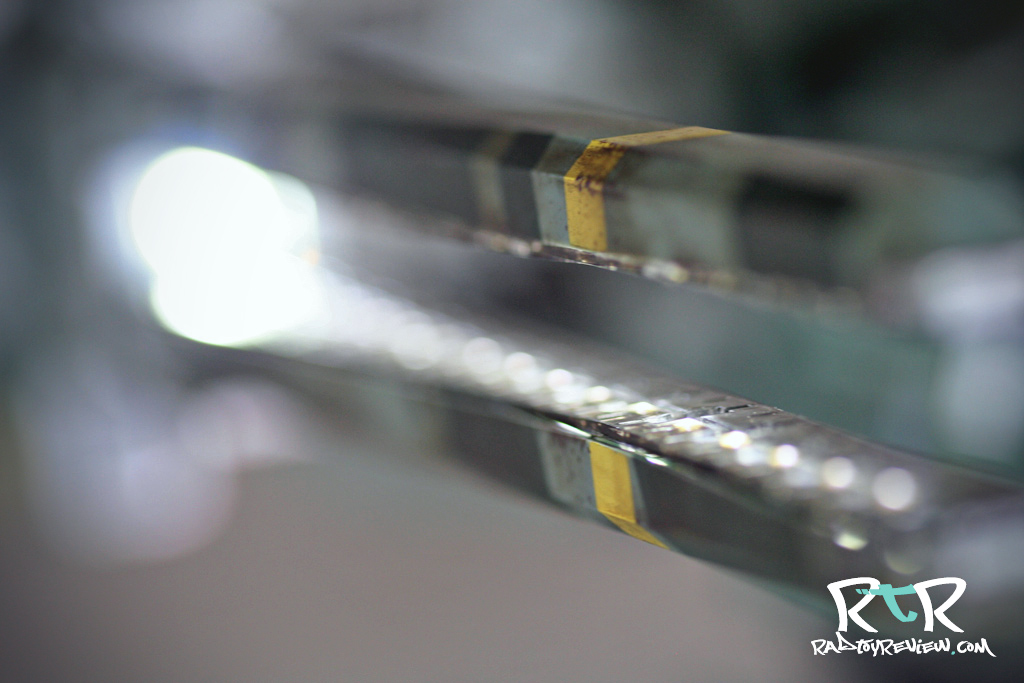
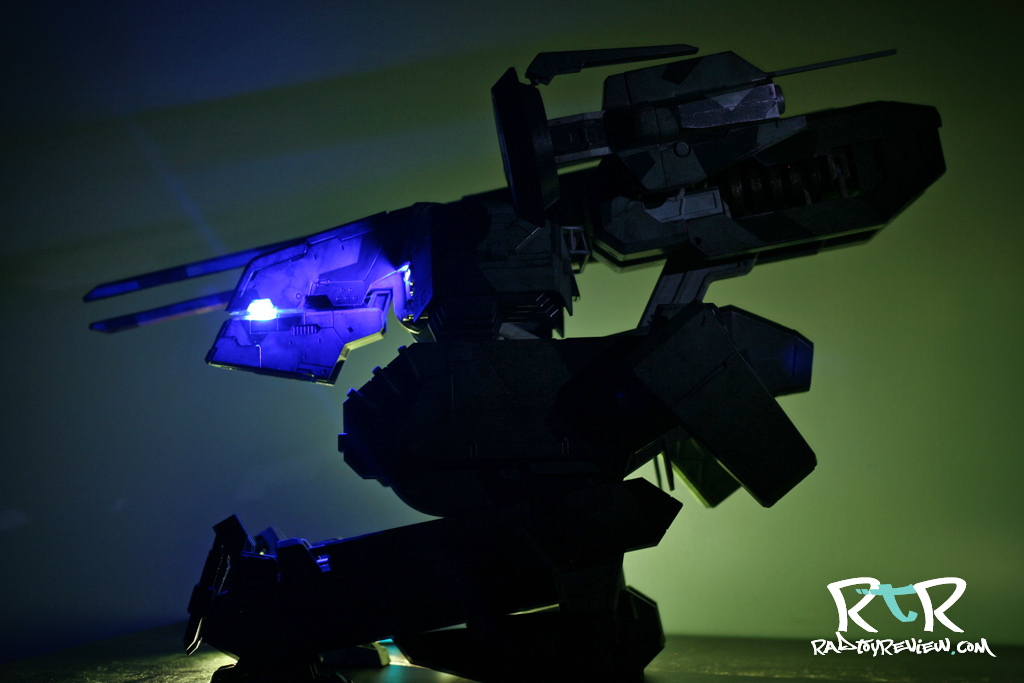
Other than the glow from the cockpit, you get 4 flood lights which basically look like Rex’s eyes and of course the ever impressive rail gun lights which pulse just before it evaporates your neighborhood.

Oh yes, I almost forgot to mention..

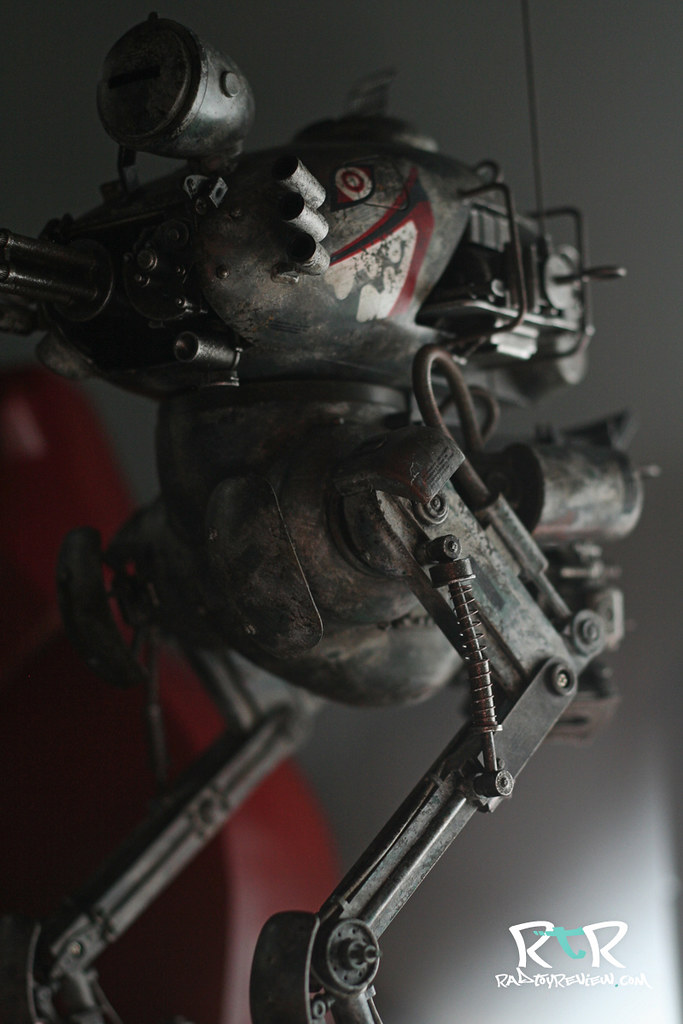
REX can also do this..

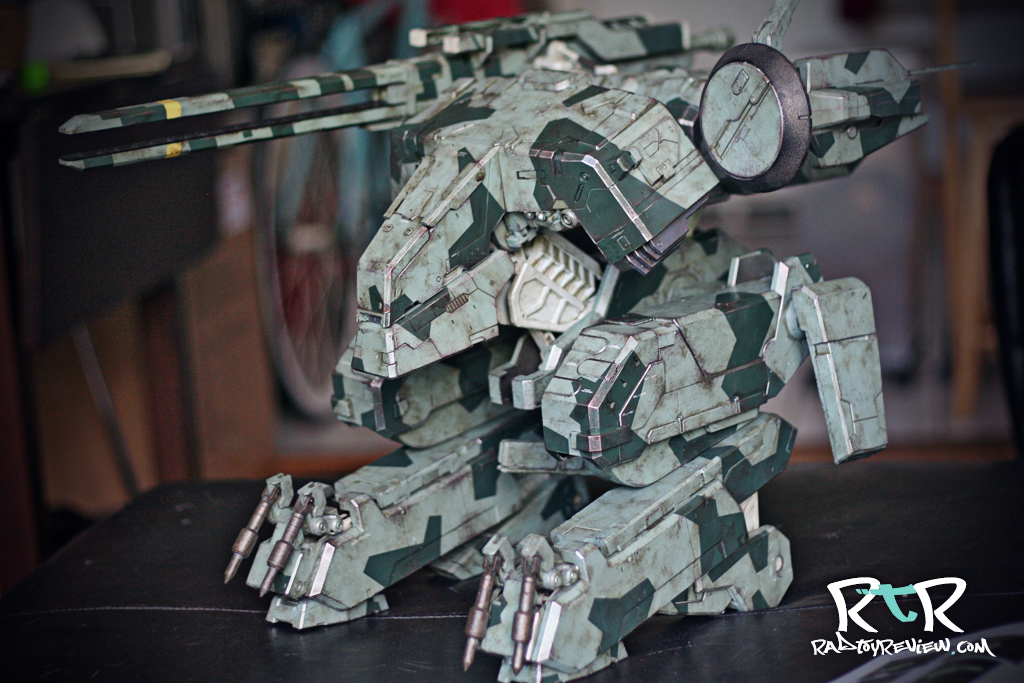
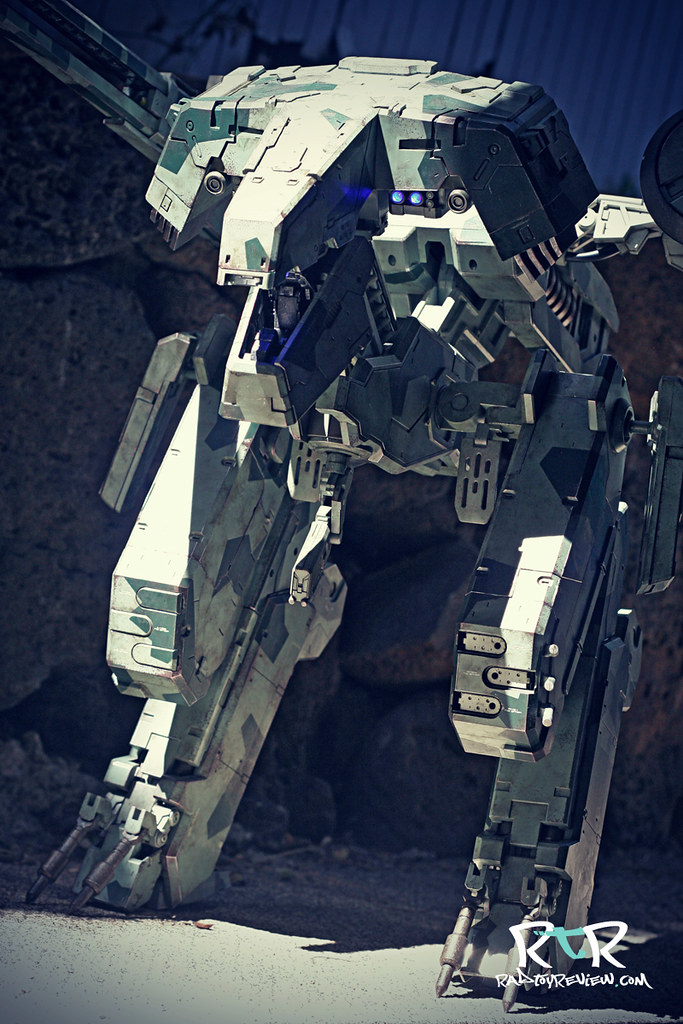
Yes, REX can stand completely upright without heel support in appropriate T-Rex fashion. He’s obviously intentionally designed to, but it’s challenging to balance and you need a good level playing field to do so. It’s totally worth the effort because he looks absolutely bonkers this way. REX just got huge-ER!

Just amazing.

We thought a good way to really show off the lighting system 3A has built into this guy, was to shoot him at night. Setting our shutter speeds to slower than your average bear, the fun really began.

(Editors note: Some extra lights were used for illumination and effect. IE REX does not have body glow or back lights)

The cab lights are really bright. Even with the hatch closed, blue light still spills out. I know this is basically a fun gimmick, but having the cool rail gun’s pulsing light effect made me wish there was an accompanying sound effect. Even cooler would have been having some sort of metallic/animal-like scream.
Real quick, I have to give props to my supporting wife who is responsible for many of the awesome night time photos you see here! Go team us!

On second thought, perhaps silence is golden. Everyone knows that toys with sound effects are the unholy work of Mephistopheles.

I wanted to show a few silhouettes of REX to give you a little better idea of how his back heel positions change his appearance.

THE FINAL WORD

3A’s Metal Gear Rex. Man, Oh man is he something special. If you were fortunate enough to pick one of these guys up, you’re in for a real treat come delivery day. Personally, I can’t wait to see how some of you guys will display him with the rest of your collection. He huge so he takes up a big chunk of real estate and isn’t necessarily to scale with much else I’ve seen.. (mini mates maybe?).  I have a few of the Play Arts Kai Metal Gear figures that I think would look cool sitting next to him, even if the scale is completely out of whack.  It’ll be interesting to see what you do.

Technically, there are things going on with Rex that I’ve only ever seen hints of before in 3A’s own Real Steel Ambush figure. They continue to push the boundaries of what’s possible in realistic, highly articulated, borderline seamless (the toy aspects, joints, buttons, etc.. are well hidden) toy robots. You will be in awe.

But there’s something else that struck me about Rex.

There’s really only so much you can do with him. He’s not a humanoid with articulated fingers and arms, carrying a bunch of weapons. He’s not a Transformer, jumping from vehicle to fighting robot with a few clicks. He’s basically, a very sophisticated vehicle. You can move his legs around to a half dozen or so different ways, tilt his head and body up or down and play with his light features. That’s really it. Combine that with the fact he’s somewhat challenging to pose, made easier only with the help of a friend or friendly hobo, it takes away some of the impulse to move him around very often, so after a few days, you probably won’t.

I’m not pointing this out as a negative, I’m pointing this out to manage expectations. Rex has a lot going on, with a lot of cool things to discover and move around. But most likely you’ll find a pose you’re happiest with and leave him like that, fondling only occasionally to trigger the rail gun lights and open/close the cockpit/jaw.

The fact is, I wouldn’t call REX just a toy. If anything, he’s too much of a toy.

I’d  more appropriately call him a display piece. Heck, he’s the CENTER piece.

He’s the one thing that your non-toy collecting friends will notice above all else when they walk into the room . They’ll scan over your collection of Hot Toys, 3A, Sideshow, vintage Transformers and GI Joes with dull, lifeless eyes, possibly mumble a few, “neat”s or “cool”s.  All the while, they’re quietly internalizing the question of their friend’s manchild-ness and how they can segue this unfortunate turn in activities into a drinking game.

However, when they get to Rex, I can almost promise you their eyes will widen and their jaw will drop. The words you’ll hear will be something along the lines of, “Holy ..!! That thing’s freaking incredible!!”

And you’ll be standing there, arms folded and cocky, nodding your head.

“Yeah, he is. He most definitely is.”

I can’t wait to see what 3A does next with the Metal Gear Franchise. The unpainted RAY prototype was on display at this years Hong Kong Venture and from the photos, looked very impressive.  However, not much has been said on availability, price, etc. RAY may be just as REX was. A very long wait. It could be mid to late 2013 before we even get the chance to drain our bank accounts into another plastic MGS masterpiece. Which would mean sometime in mid to late 2014 before he joins our collections on the shelf.

Don’t lose sleep over it. REX isn’t human and won’t get lonely. RAY’s long development gives us time to save our pennies and enjoy one of the coolest pieces 3A has put out yet.

In the end, if RAY turns out anything like REX, it’ll be worth every penny and every second.

PROS:

  • Incredibly detailed, accurate portrayal of a beloved and iconic video game character
  • Highly sophisticated articulation
  • Impressive looking and functioning lighting system
  • Massive to the point of shocking
  • Fun break away bits to show off hidden details
  • It’s a Metal Gear figure done 100% right

CONS:

  • His huge size and very tight joints make posing him a little stressful/difficult (aka, hobo/tool almost required)
  • Some of the break-away panels do not stay soundly in place.

Huge thanks to 3A, Kim, Cody and Gimbat for sending me Rex to review. Thanks for the support guys!

Follow us on Twitter and Facebook to stay updated with the latest rad toy reviews!

.

.

.

.

.

.

.

.

.

.

.

.

.

*Review* Foxbox Studio’s Hades

INTRO

Foxbox Studio may not be the most well known toy company in the world, but they have one of the most interesting premises of any toy line I’ve heard of in the past 2 years.

It’s called God Complex.

From what I’ve scrapped off the internet floor, and I won’t go into the real details here, it’s all about mythological gods being heads of modern (futuristic?) day corporations and criminal organizations. There’s a fairly well fleshed out back-story that hints at human revolution and warring factions. It paints a pretty epic picture and comes off more as something I’d expect from a movie script or comic book as opposed to a toy-line from a company that as of now only has two figures under it’s belt. You can get all the juicy details and back story for the characters, both released and unreleased, on Foxbox’s site here. It’d definitely worth the read.

I was fortunate enough to be turned on to these guys near the end of last year. Seeing some of the production pics and reading the extensive plot lines associated with it, I was incredibly excited to get my hands on whatever they were putting out.

The unfortunate thing is that by the time I managed to stumble across Foxbox, their first toy Hermes, had already come and gone. I had just learned about them and already, despite the cash in my pocket, had missed their virgin release. The search on the second market was a no go either. As limited as Hermes was, I found that it was crazy difficult to hunt one down and when I did find him, people wanted mucho grande amounts of cash for him. I just couldn’t do it and had to give up the chase.

About the time Foxbox Studio started to fade from my frontal lobe, they previewed their next toy in line, Hades. I jotted down the released date, set a bazillion reminders on my iPhone and waited patiently for February to roll around. On the drop date,  I was lucky enough to snag one of the first 50, which also scored me a limited edition signed print. (update: I was informed that the original print was given to the first 30, but due to some errors on Foxbox side, they extended it to the first 77)
I was excited, suffice to say!

Let me interject a thought here; I’m very used to waiting on designer toy’s production to delivery times thanks to my addiction to ThreeA, but it seemed to take an eternity for Foxbox to deliver this guy. Ordered in February, delivered in October. Nine whole months, and in that time, hardly a mention of any follow up.

That being said, Foxbox Studio, a young toy company with some big ideas, has officially delivered on their second toy from their God Complex franchise.

Hades is here.

PACKAGING

Foxbox packaged Hades in jet black packaging. Some minimal design elements that mirror the bright fire orange in Hades’ helm are emblazoned on the front. On the back a short list of creative credits to those behind the toy.

Inside, Hades and his accessories are safely packaged up in several layers of form fitting foam. The print resides rolled up in a separate cardboard compartment in the shipping box. The packaging is fittingly minimal by design and looks really nice. I love the almost luminescent glow the orange gives off once you open the box. The black and orange theme marry perfectly with the color pallet of Hades himself.

WHAT’S INCLUDED

Included in the pack is a gun, staff, a plethora of hands, the top half of Hades’ helm and of course, Hades.

Thanks to my impeccable skills at scoring low number toys (I kid, I kid..) my set also included a really nice looking canvas print signed by the artist.

THE BREAKDOWN

First impression? Sharp. Hades looks really sharp.  His cloths are very nicely tailored to the toy body underneath. All the stitching is carefully set with no frays or strays anywhere to be seen. The jacket actually appears ironed, being completely sans wrinkles.  Some very thin and nicely sewn silver details polish off the look of the jacket.

He’s a well tailored man all the way down to his shiny shoes, which match his shiny gloved hands. Opening the jacket to get a better glimpse of what he’s working with reveals a black, fitted, tucked in tee. At the pants waistline you can see where the fabric is pulling a little at the snaps, but it still looks good. Unlike 3A’s Rothchild, Hades’ pants are actually fastened at the fly.

Thank goodness.

The neck piece that goes into the skull is a very interesting design and adds a lot of character to the figure. It does however limit how much his head can move around. In fact, his head only turns left or right.

While the sculpt of Hades skull head is flat-out rad, the execution of it isn’t as awesome as I hoped it be. It has a great design and from a distance, looks very cool. However, up close, you may find it a little lacking.

First off, there’s absolutely no paint details. It’s a skull, it’s painted white. OK, maybe it’s off-white. It’s plain non-the-less.

There’s no light wash to make it pop or get into the recesses to show off form, etc.  There’s a very visible and ugly seam runs along the top of his head where you can easily spot the equally visible and poorly painted over magnet circles.

Again, the skull design itself looks really cool, it’s a shame it looks so unfinished.

With Hades helmet on however, it’s a different story. He looks killer! Again, thanks to the really unique designs by Bryan Lie.  The one negative here is that the unfortunately obvious magnets don’t do a better job at holding the helmet firmly in place. They’re pretty weak and it took a bit of tender finesse to get it too sit center and look right. I find it hard to believe that Fobox would toss any old magnet on there to attach such a key character element. My unscientific, blind guess is that they tested the strength of the magnets when they were unpainted and thought they’d work out great. Once doused with acrylic however, it’s possible that’s where their miscalculation went.

Anyway, once you get it sitting right, it’s looks pretty BA.

Hades comes with a cornucopia of swap-able hands. I swapped them out right away so he could hold his gun and cane. I was a little less than excited by the hand variety.  There’s no dynamic, wide fingers or tightly clenched fist or.. I don’t know,a rude gesture anywhere. There’s six hands with nine possible sets here, but they’re all just subtle variations of the last meant to hold his accessories in slightly different ways.

Pretty unexicting.

Perhaps that’s a good thing really, because it’s a pain in the rear to swap the hands out. The material they used to make them is very hard and unforgiving. A little sheet of paper Foxbox included in the packaging recommends you use a hairdryer before swapping any of them out. Come on man! I don’t have time to hunt down a hairdryer, I’ve got things to do, reviews to write!

You’re more likely to find a set that works with the gun and staff and just leave it at that. In the end it’s probably better for your nerves and safer for your toy.

I really dig the shoulder guard attached to the right shoulder of his jacket. From what I can tell, it’s not removable, so you better love it too. I was happy to see that it’s not a solid piece and thanks to it being sectioned, you can adjust it to whatever angle you mange to raise his arms to. If I had a complaint about it, it’d be the same as I had with the skull. There’s no painted details. It’s pressed plastic with a visible seam and that’s it. No decals, no rust, nothing. Some may be cool with that, but again.. if I had a second one of these guys, I’d add some highlights and a light wash to it so it reads as less plastic and more metal.

While I didn’t exactly disrobe Hades down to his birthday suit to inspect the goings on of his body, he seems to sport a fairly now-standard 1/6 action figure body. All the familiar points of articulation are here. But once you start pushing him around, you’ll run into his limitations.

Due to the well tailored, form fitted jacket, you really can’t move his arms around as much as you’ll probably want to. Jumping jacks would be impossible for this guy. The same for his waist. It’s difficult to twist him side to side which will most likely have you making due with predominantly front facing poses. His pants are a good deal more forgiving, though the material is still tight at the thigh. I actually found his ankle joints to be pretty loose as he took a tumble a number of times during this shoot.

The accessories themselves are pretty nice. The gun looked a little cheap in the preview pics, dull plastic grey with a slightly bent barrel, but it actually looks a bit better in person. It still looks more like a toy gun than something made of steel, but I think it passes. The staff on the other hand, is the bee’s knees. It has a really great design to it and makes Hades look ever more the self respecting villain when he’s holding it.

However, it’s something I had completely forgotten about that makes Hades just that much cooler. The staff is actually a sword. A frik’n cane sword! You can simply pull the lower portion off to reveal a bright orange, light saber-like blade. It’s gorgeous and just perfectly executed. A funny little thing to get so excited about, but it’s really fun to play with. Also worth noting that there is actual painted detail on the blade. It goes from a darker warm orange to a brighter, almost yellow orange at the tip. Maybe it’s because I’ve got a thing for cane swords but I think it’s one of the coolest and original weapon/accessory I’ve seen.

THE FINAL WORD

Hades is a sharp dresser and despite it limiting his articulation, Foxbox has done a great job in the tailoring of his clothes. Setting him in a simple pose with his helmet on, weapons out and he looks dangerously good head to toe. I really dig the head sculpt, it’s freaky and very well designed. The helmet itself is also a really cool element, despite it not locking in like it probably should.

The shoes make the man. When it comes to designer toys, it can come down to the accessories. I love the cane sword. It’s dynamic sculpt and hidden light-saber-like blade is perfectly befit a ruler of the underworld. Personally I really like the pistol in one hand, cane in the other combo. It’s not something I’ve seen much in toys before. In fact, I could say that for the whole character. For all his faults, Hades is unique.

On the negative side of things, there’s little to no paint detail. Foxbox seemed to rely mostly on the color of the plastic itself and flat tones of paint than worry with enhancing anything with gradients or variety in shade. The shoulder armor, while cool, is completely flat. The skull head, again very cool, is flat white. A bit more attention to detail there would have been appreciated I think. He doesn’t need to be covered in grime etc.. but some light wash to set off the cool sculpts would have gone a really long way. If these guys weren’t so hard to get, I’d custom him up myself.

From what I’ve heard from a few folks who actually own Foxbox’s first figure, Hermes, he was really nice to look at but incredibly fragile. Hades doesn’t feel fragile, but he looks and feels a little unfinished.

I definitely like him enough to buy the next figure in Foxbox’s chamber, Inari, but I’m hoping that he will be as much an improvement on Hades as Hades was to Hermes.  I also hope it doesn’t take the larger part of a year to deliver.

I’m cheering for Foxbox to work out the kinks and polish up their end product. With their fantastic figure designs and the compelling universe they’ve created around them, they have all the ground work laid for some incredible things down the road.

I’ll be watching.

PROS:

  • Fantastic and unique character design by Bryan Lie
  • Finely tailored and fitted clothes
  • LOVE the sword cane. The perfect accessory. Need a 1.1 version
  • Great back story to get you excited about the product
  • Love the print on canvas

CONS:

  • No real paint detail leaves much of the cooler elements looking pretty flat
  • Articulation is very limited due to fitted clothing
  • Magnets on head are not only visible but are not very strong; helmet feels loose.

NEXT REVIEW: 3A’s METAL GEAR SOLID REX

.

.

.

.

.

.

.

.

.

.

.

.

.