WWWetworks is back with another great tutorial for The Workshop. Carlo breaks down the step by step process on getting your own pimp decals laid down on some tiny cotton T’s (or undies, jorts, tube tops, etc..)
Enjoy!
– Knives
PART 1: PREPARATION
Ok first you have to choose the image that you would like to put as a decal, in my case I found an image of lasstranaut and make sure that it’s above 500px so your image will be crisp and detailed.
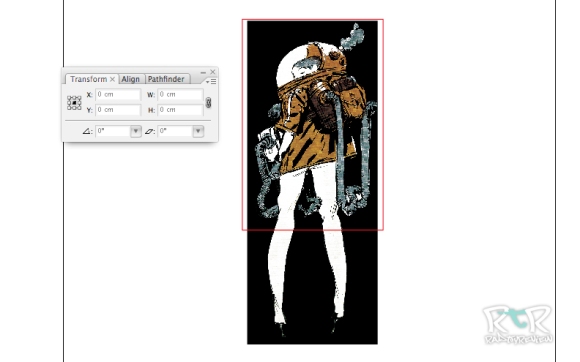
Once you have an image ready, you will have to edit it in Photoshop by cropping the picture. In this example, I managed to separate the image and added a black background, so why black? because the shirt that I will be using is black, you should always remember to use the color of the shirt, etc. red shirt = red background. This is crucial especially if you have a very complex and small image with a lot of details. In this case I didn’t have to cut away all the inner parts of the picture because it already had a black background. Convenient and makes the process much easier. Once you’re done adjusting, just save it out as a jpeg or tiff.
Ok, in the next step you will need to measure the area on the shirt on which you will lay down the image, in my case its 6cm x 9cm.
Now open Illustrator and draw a box with a 6cm x 9cm measurement and place/import the image into the workspace.
Scale down your image and place it inside the square, the square is your guide so make sure your image does not exceed the given area.
Now you’r ready to print. There are two types of iron-on papers, light for light colored fabric and dark for dark colored fabric. In this case, I printed the image using transfer paper for “DARK” fabrics. Make sure you set the paper quality to “BEST” to get a high grade print.
Now you’re decal is ready to be applied.
PART 2: APPLYING THE DECAL
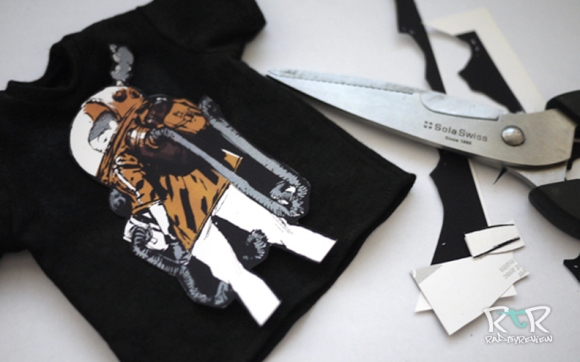
Now that you have your decal printed out, cut the black background leaving at least a 1mm margin.
This is another critical part because most folks don’t know that you have to peel the back of the paper before ironing it into the shirt
Position your decal carefully and grab a piece of onion skin paper (most iron-on papers come with this inside their pack).
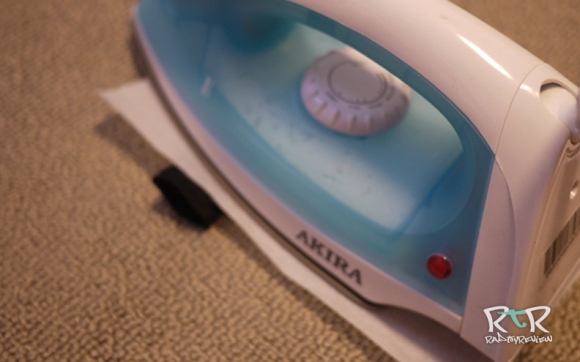
Put the onion skin paper above the decal and set the dial of your iron to “cotton”.
Once the iron is ready, press it against the onion skin paper for a maximum of 10 seconds. Make quick presses to the sides and be careful not to burn your decal.
This is what it looks like with the onion skin paper after ironing. CAUTION! VERY IMPORTANT! DO NOT TAKE THE ONION SKIN PAPER OFF THE SHIRT WHILE IT’S HOT!!
Allow it cool down for a few minutes and you will see that the paper will actually start to detach from decal pretty easily.
Now you’re done! Here is the final piece, I added an acrylic wash to the decal and some weathering to help blend it in with the rest of the figure. I hope you enjoyed this tutorial, cheers!
Thank you Carlo! New Workshop tutorials soon! Follow us on Twitter and like us on Facebook to stay updated!


awesome!
i hate you
LikeLike
sweet tute!!
LikeLike
Nice! haha next your gonna need to tell us how to ‘blend’ 😀
LikeLike
very NICE.
LikeLike
this is extremely helpfull, all i need now is time to do it !!, LOL..
thanks Carlo you are the custom MASTER !!!!
LikeLike
Excellent Carlo, thanks for the tips.Now I’m looking forward to my next TK project.
Great work
LikeLike